# Handling Browser Events
# Learning Objectives
After completing this lesson, you will be able to:
- Listen for clicks, keypresses, and other events.
- Run functions when an event occurs.
- Attach event listening functions to elements using HTML attributes, JS dot notation, and the DOM API
# Lesson
# What is an event?
An event is an action that happens in the browser. The browser produces a signal when an event occurs and provides a 'listener' to execute some code when the event occurs. This usually takes place when a user is interacting with a webpage in some way. For example, when a user clicks a button an click event occurs, a click event occurs.
# What is an event handler?
Events allow users to interact with the webpage. To react to these different events we can assign an event handler. These are functions that are executed with the event that is specified ojects are engaged. In the example below the alert() function is the event handler.
Let's quickly take a look at an example of a click event and see what they do in action. In this example we will use an HTML attribute.
Here is some HTML with a button element.
  <div>
    <button>Click me!</button>
</div>2
Right now, nothing will happen if we click this button. Let's add an event handler to our button and tell it to call alert() when the button is pressed.
  <div>
    <button onclick="alert('clicked')" >Click me!</button>
  </div>
2
3
Now you should see a pop up alert stating that the button has been clicked.
# Commonly used events
There are alot of events that can happen on a webpage check out a full list visit MDN Event reference. Lets take a look at a few events that are commonly used and what triggers them.
| Event | Triggered when |
|---|---|
| 'click' | the pointing device is clicked |
| 'resize' | the size of the browser or window is changed |
| 'scroll' | the window has been scroll |
| 'keydown' | any key is pressed |
| 'keyup' | any key is released |
| 'keypress' | ANY key except Shift, Fn, CapsLock is in pressed position. (Fired continously.) |
| 'fullscreenchange' | when the window has entered or exited full screen mode |
| 'dblclick' | the pointing device is double clicked |
| 'play' | media starts playing |
| 'ended' | media has finished playing |
# How to use HTML attribute?
In our first example we used a HTML attribute called onclick so that when the button is clicked, our handler is then executed. Notice the prefix 'on' before the name of the event. This is the key to this attribute that lets the browser know that it needs to execute the handler in case of the stated event. Of course for practical purposes we want to keep our HTML as clean as possible. In that case we can use dot notation to access our HTML attribute inside of our javascript.
Either in a separate javascript file that has been linked or in a script tag, we can give the onclick attribute to our button and then we can execute the same function.
<button id="myButton">Click Me!</button>
<script>
  const button = document.querySelector('#myButton')

  button.onclick = function() {
    alert('clicked')
  }
</script>2
3
4
5
6
7
On line 1, our button element no longer has the onclick attribute and has been replaced with id='myButton'. Down in our script tag on line 3 we select the id of the button by using document.querySelector() and assigning it to a variable.
We can now use dot notation to assign the button's onclick property to call the alert() method. Notice that we have used an anonymous function that calls our alert() method. Without the anonymous function, the alert() would run as soon as the page loads.
onclick is essentially a property like any other available on the button node, just like button.textContent, or button.style, but it is a special type. When you set a handler to it will run that code.
You can even set it to be equal to a named function. For Example:
<script>
  const button = document.querySelector('#myButton')
  function beenClicked() {
      alert('clicked')
  }
    button.onclick = beenClicked
</script>2
3
4
5
6
WARNING
The function should be assigned as beenClicked, not beenClicked().
If we add parentheses, beenClicked() -- is a function call. So the assignment actually takes the result of the function execution, which would be undefined since the function returns nothing.
But a node can only have one onclick attribute, so you can only register one event handler this way. So, for example, if we were to do something like this:
button.onclick = beenClicked

button.onclick = beenClickedAgain2
Only the second would execute because the onclick property of button has been reassigned.
For this reason addEventListener() method has become the standard. You are able to call multiple handlers to the same node.
button.addEventListener('click', beenClicked)
button.addEventListener('click', beenClickedAgain)# Why use addEventListener()?
The addEventListener() method allows you to add any number of event handlers so that it is safe to add handlers even if there is already another handler on the element. Let's revisit our previous example of a button and refactor it to use the addEventListener() method.
<script>
  const button = document.querySelector('#myButton')
    button.addEventListener('click', function() {
      alert('click')
    })
</script>2
3
4
5
addEventListener() takes 2 required arguements, the first is a string specifying the type of event such as click, and the second argument is the handler function. one of the advantages of using this method is that there is another method we can use that will remove the event listener, properly named removeEventListener(). So let's make it to where we only get an alert the first time we click the button.
<script>
  const button = document.querySelector('#myButton')
  function clickOnce(){
    alert('click')
    button.removeEventListener('click', clickOnce)
  }
    button.addEventListener('click', clickOnce)
</script>2
3
4
5
6
7
Testing our new example, on the first click the button is pressed and you are given the alert. once you close the alert and click the button again, the button no longer works.
# Event Objects
When the event happens, the event object is created. It then travels with the event on its journey through the DOM. The event object is passed as an argument to our event handler function. We can use this object to access a wealth of information about the event that has occurred.
TIP
You can console.log(event) inside of the handler to dive in to all the information that is available to you about the event.
# The Window Object and Events
The window object has the majority of the properties like length, innerWidth, innerHeight, name, if it has been closed, its parents, and more. It is the first thing that is loaded into the browser. Some event types can be access through the window object such as resize. To quickly take a look at this action let's take a look at a quick example.
<script>
  window.addEventListener('resize', function(){
    console.log('window.innerWidth')
  })
</script>2
3
4
This handler is executed when there is a change in the window size. When this event happens it will console.log() the current the browser's width. There are many window specific that can be used such as orientationchange, devicemotion, and storage.
# What can I do with the event object??
There is one more key to events and event objects that we have yet to discuss in full. This is the parameter that is passed from DOM and window Objects into the event handlers. Let's take a close look at it through an example.
<style>
  .box{
    background: red;
    font-size: 24px;
    width: 100px;
    height: 100px;
    margin: 25px;
  }
</style>
  <p class="box"></p>
  <p class="box"></p>
  <p class="box"></p>
  <p class="box"></p>
<p class="box"></p>2
3
4
5
6
7
8
9
10
11
12
13
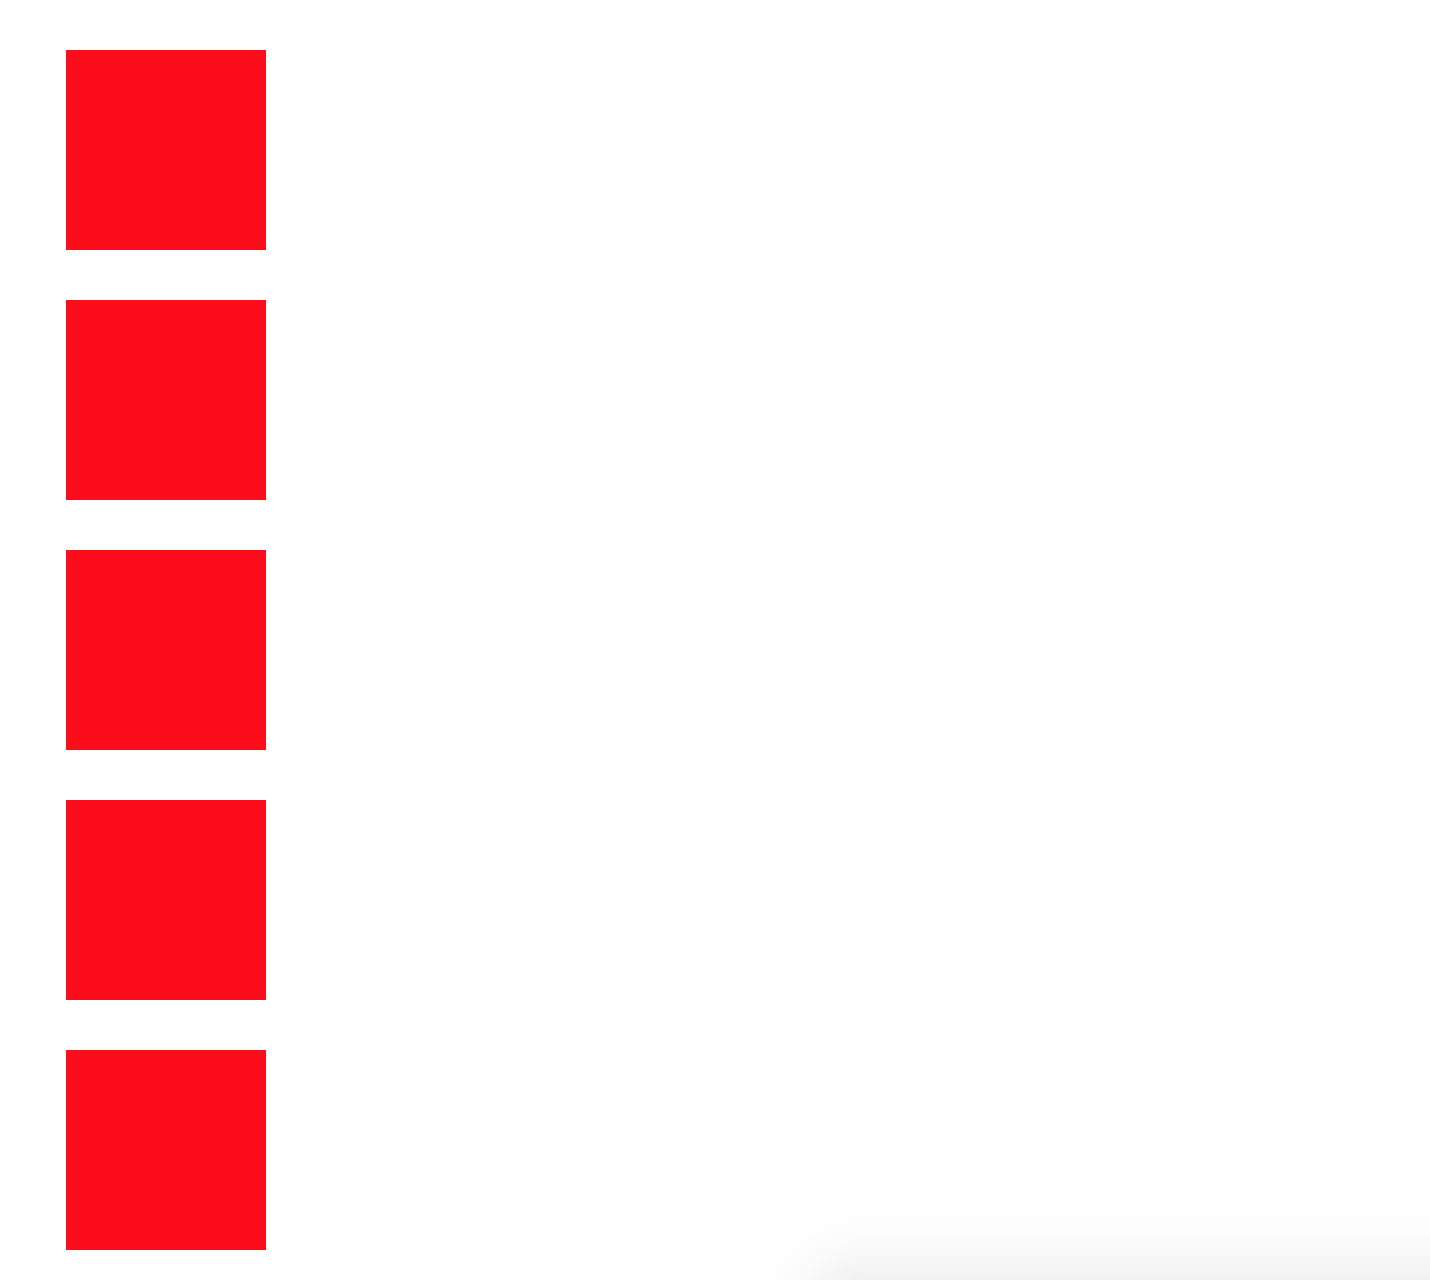
In this example we have 5 boxes colored red. We are going to add an addEventListener() to the script that will change the color of the box that is clicked using the event object. One of the property that we can access is the target property. It contains a reference to the element where the event took place. In this case it will be on our boxes.
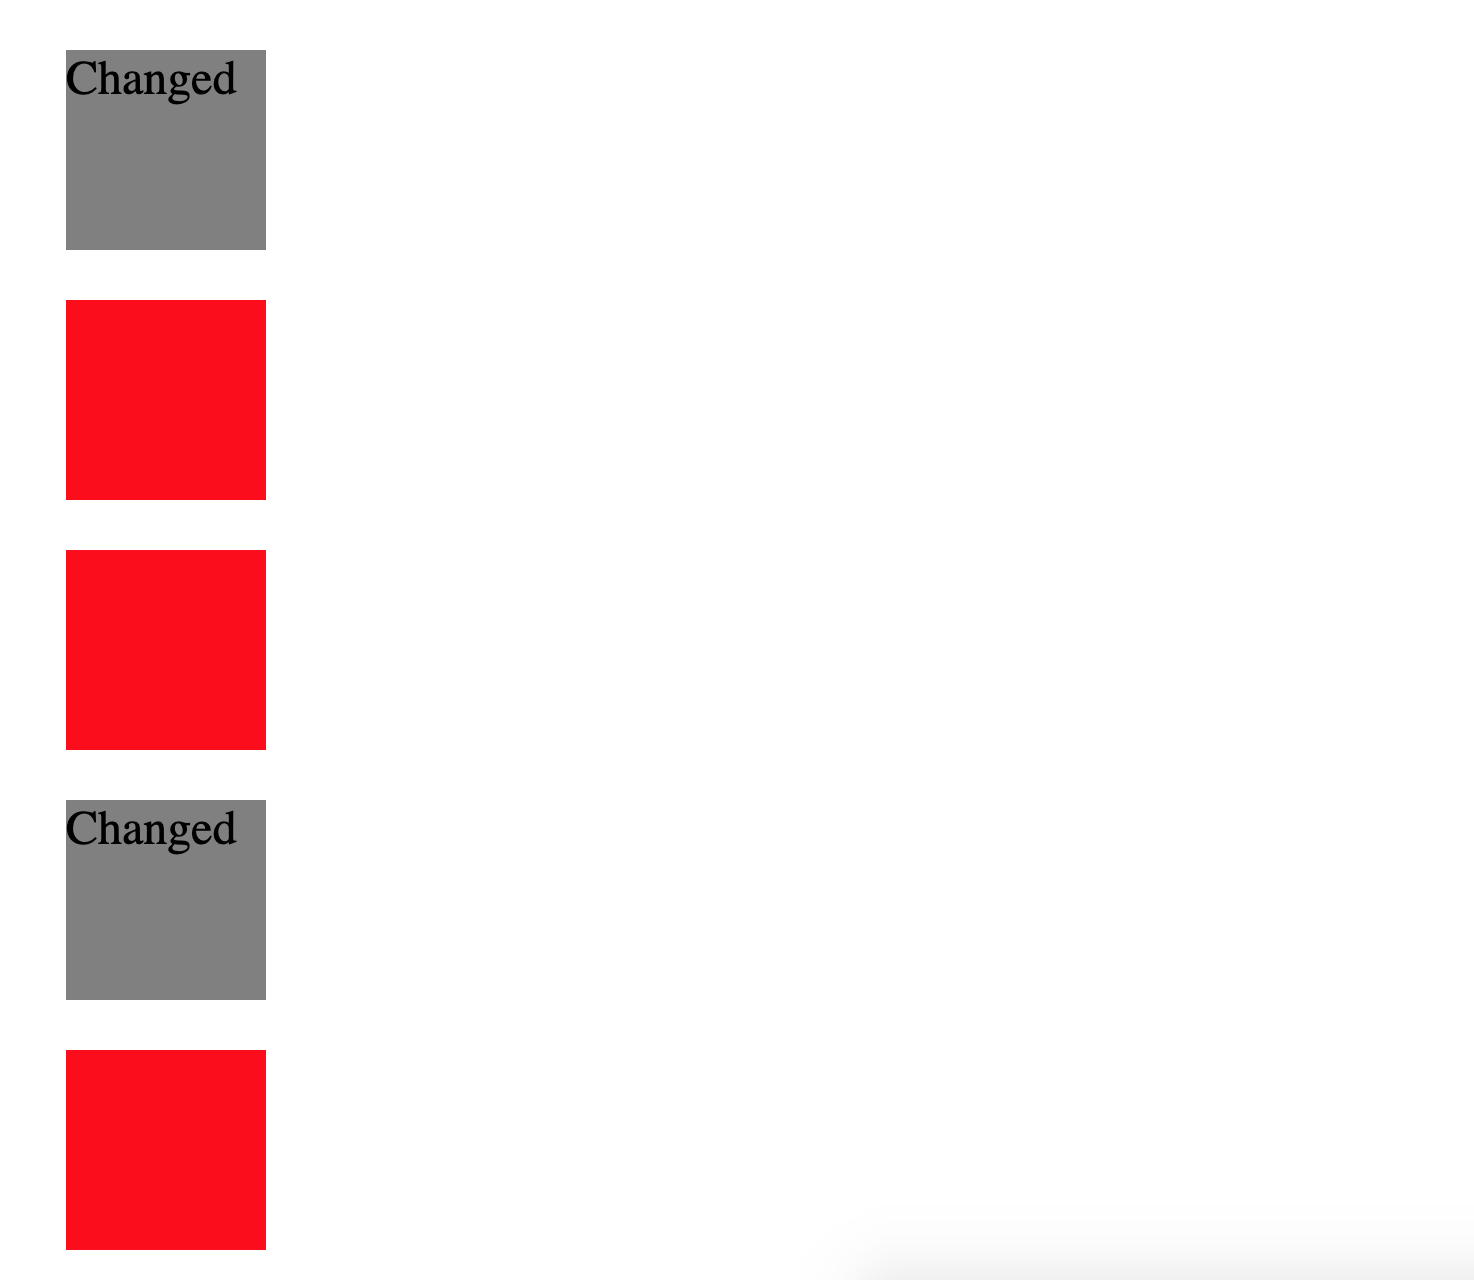
<script>
  document.addEventListener('click', event => {
    if(event.target.classList.contains('box')){
      event.target.style.backgroundColor = 'grey'
      event.target.innerText = 'Changed'
    }

  })
</script>2
3
4
5
6
7
8
We use the event.target property several ways in this instance. First we are checking the target of the click event and seeing it contains the class 'box'. If it does then we add a style property with background-color of grey. We can also change the DOM access the innerText property of the element and add text of our target.
# Summary
Event handlers make it possible to detect and react to events happening in our web page. The addEventListener() method is used to register such a handler. Each event has a type(click, focus, submit, etc) that identifies it.
Any Element or Node in the DOM can receive events. This includes the window object. Certain events can only happen on the window object, such as 'resize'.
It is best practice to use addEventListener() on the target node objects. While HTML attributes are useful if you only need to call a single event handler on a node object, they can clutter the HTML and are limited in their use.
# Training Exercises
To solidify your knowledge, here are a set of exercises that will require you to use the techniques you've just learned in the lesson above.
They are organized into small, medium, and large sized problems. The small exercises will be very similar to the examples in the lesson. If you get stuck, refer to the relevant section above. The medium exercises will require you to combine concepts. The lesson may not have a single, specific example for you to reference. The large exercises are more open-ended and may require you to search the web for additional material.
# Small
# Log Button Click
Create a button that logs "Button Pressed" to the console when clicked.
Solution
<!DOCTYPE html>
<html lang="en">
  <head>
    <meta charset="UTF-8" />
    <meta name="viewport" content="width=device-width, initial-scale=1.0" />
    <title>Log Button Click Solution</title>
  </head>
  <body>
    <button onclick="onButtonClick()">Click Me</button>
    <script>
      function onButtonClick() {
        console.log("Button Pressed");
      }
    </script>
  </body>
</html>
2
3
4
5
6
7
8
9
10
11
12
13
14
15
16
# Log Button Pressed
Create a button that logs "You Left Clicked" to the console when clicked.
- Hint: You will need to access the
eventobject.
Solution
<button id="myButton">Click Me!</button>
<script>
    const button = document.querySelector('#myButton')

    button.addEventListener('click', function(event){
        if(event.button === '0'){
            console.log('You Left Clicked')
        }
    })
</script>
2
3
4
5
6
7
8
9
10
# Add a scroll event
Add an event to log "You Change the size of the Window!" to the console when a user resizes the browser.
<script>
    window.addEventListener('resize', () => {
        console.log('You Change the size of the Window!')
    })
</script>
2
3
4
5
# Medium
# Madlibs
A Mad Libs is a word game where one player prompts others for a list of words to substitute for blanks in a story before reading the paragraph.
- Create a story in HTML with a missing noun, verb, adjective.
- The story should not be visible until the values are submmited.
- Create a input field for each missing word.
- Use an event listener to add the input values into the story.
# Shopping List
Create a Shopping List using Event Listeners and DOM elements
- Use input elements enter in new items for shopping list.
- Add a button to submit inputs and render the input values to the DOM.
- Add a button to the DOM for each new item in shopping list that can be used to remove the item.
# Large
# Calculator
Using the following parameters and starter code to create a calculator.
- Add click handlers to the number buttons
- Create an array of the numbers clicked, in order
- Add click handlers to the calculation buttons
- Create an array of the operators
- Don't let a user start with an operator
- Don't let a user type multiple operators (i.e. you can't type '--' or '++' or "*+")
- Add click handler to the 'equals' button
- The 'equals' button needs to trigger a few events (NOTE: These will be functions)
- Loop through the array of numbers (NOTE: These are currently strings)
- Convert the strings to integers
- Write a new array of integers
- Get an array of the operators
- Perform each math operation (NOTE: We'll use 4 while loops)
- Add click handler clearing the input on press of clear
HTML
<!doctype html>
<html class="no-js" lang="">
<head>
    <meta charset="utf-8">
    <meta http-equiv="x-ua-compatible" content="ie=edge">
    <title>Calculator</title>
    <meta name="description" content="">
    <meta name="viewport" content="width=device-width, initial-scale=1">

    <link rel="stylesheet" href="css/style.css">
</head>
<body>
<div class="wrapper">
    <div class="calculator">
        <div class="input" id="input"></div>
        <div class="buttons">
            <div class="operators">
                <div>+</div>
                <div>-</div>
                <div>*</div>
                <div>/</div>
            </div>
            <div class="leftPanel">
                <div class="numbers">
                    <div>7</div>
                    <div>8</div>
                    <div>9</div>
                </div>
                <div class="numbers">
                    <div>4</div>
                    <div>5</div>
                    <div>6</div>
                </div>
                <div class="numbers">
                    <div>1</div>
                    <div>2</div>
                    <div>3</div>
                </div>
                <div class="numbers">
                    <div>0</div>
                    <div>.</div>
                    <div id="clear">C</div>
                </div>
            </div>
            <div class="equal" id="result">=</div>
        </div>
    </div>
    <p class="u-center">
        Originally forked from: <a href="https://codepen.io/lalwanivikas/pen/eZxjqo">https://codepen.io/lalwanivikas/pen/eZxjqo</a>
    </p>
</div>
<script src="js/script.js"></script>
</body>
</html>
2
3
4
5
6
7
8
9
10
11
12
13
14
15
16
17
18
19
20
21
22
23
24
25
26
27
28
29
30
31
32
33
34
35
36
37
38
39
40
41
42
43
44
45
46
47
48
49
50
51
52
53
54
CSS
body {
    font-size: 16px;
    font-family: -apple-system, BlinkMacSystemFont, "Segoe UI", Roboto, Helvetica, Arial, sans-serif, "Apple Color Emoji", "Segoe UI Emoji", "Segoe UI Symbol";
}

p {
    display: block;
    margin: 2em auto;
}

.u-center {
    text-align: center;
}

.wrapper {
    max-width: 960px;
    margin: 4% auto;
    width: 100%;
}

.calculator {
    border-radius: 1px;
    box-shadow: 0 1px 4px 0 rgba(0, 0, 0, 0.2);
    font-size: 1.8rem;
    letter-spacing: 5px;
    margin: 0 auto;
    padding: 20px;
    -webkit-box-shadow: 0 1px 4px 0 rgba(0, 0, 0, 0.2);
    width: 29rem;
}

.input {
    border: 1px solid #ddd;
    border-radius: 1px;
    font-size: 2.5rem;
    height: 60px;
    margin-right: 6px;
    overflow-x: auto;
    padding-right: 1rem;
    padding-top: 10px;
    text-align: right;
    transition: all .2s ease-in-out;
}

.input:hover {
    border: 1px solid #bbb;
    -webkit-box-shadow: inset 0px 1px 4px 0px rgba(0, 0, 0, 0.2);
    box-shadow: inset 0px 1px 4px 0px rgba(0, 0, 0, 0.2);
}

.operators div {
    display: inline-block;
    border: 1px solid #bbb;
    border-radius: 1px;
    width: 80px;
    text-align: center;
    padding: 10px;
    margin: 20px 4px 10px 0;
    cursor: pointer;
    background-color: #ddd;
    transition: border-color .2s ease-in-out, background-color .2s, box-shadow .2s;
}

.operators div:hover {
    background-color: #ddd;
    -webkit-box-shadow: 0px 1px 4px 0px rgba(0, 0, 0, 0.2);
    box-shadow: 0px 1px 4px 0px rgba(0, 0, 0, 0.2);
    border-color: #aaa;
}

.operators div:active {
    font-weight: bold;
}

.leftPanel {
    display: inline-block;
}

.numbers div {
    display: inline-block;
    border: 1px solid #ddd;
    border-radius: 1px;
    width: 80px;
    text-align: center;
    padding: 10px;
    margin: 10px 4px 10px 0;
    cursor: pointer;
    background-color: #f9f9f9;
    transition: border-color .2s ease-in-out, background-color .2s, box-shadow .2s;
}

.numbers div:hover {
    background-color: #f1f1f1;
    -webkit-box-shadow: 0px 1px 4px 0px rgba(0, 0, 0, 0.2);
    box-shadow: 0px 1px 4px 0px rgba(0, 0, 0, 0.2);
    border-color: #bbb;
}

.numbers div:active {
    font-weight: bold;
}

.equal {
    display: inline-block;
    border: 1px solid #3079ED;
    border-radius: 1px;
    width: 17%;
    text-align: center;
    padding: 127px 10px;
    margin: 10px 6px 10px 0;
    vertical-align: top;
    cursor: pointer;
    color: #FFF;
    background-color: #4d90fe;
    transition: all .2s ease-in-out;
}

.equal:hover {
    background-color: #307CF9;
    -webkit-box-shadow: 0px 1px 4px 0px rgba(0, 0, 0, 0.2);
    box-shadow: 0px 1px 4px 0px rgba(0, 0, 0, 0.2);
    border-color: #1857BB;
}

.equal:active {
    font-weight: bold;
}
2
3
4
5
6
7
8
9
10
11
12
13
14
15
16
17
18
19
20
21
22
23
24
25
26
27
28
29
30
31
32
33
34
35
36
37
38
39
40
41
42
43
44
45
46
47
48
49
50
51
52
53
54
55
56
57
58
59
60
61
62
63
64
65
66
67
68
69
70
71
72
73
74
75
76
77
78
79
80
81
82
83
84
85
86
87
88
89
90
91
92
93
94
95
96
97
98
99
100
101
102
103
104
105
106
107
108
109
110
111
112
113
114
115
116
117
118
119
120
121
122
123
124
125
126
127
JS
'use strict';

const input = document.querySelector('#input'), // input/output button
  numbers = document.querySelectorAll('.numbers div'), // number buttons
  operators = document.querySelectorAll('.operators div'), // operator buttons
  result = document.querySelector('#result'), // equal button
  clear = document.querySelector('#clear'); // clear button

let resultDisplayed = false; // flag to keep an eye on what output is displayed
2
3
4
5
6
7
8
9
# Interview Questions
# Fundamentals
- What is Asynchronous programming and how do you deal with asynchronous browser events?
# Bugfix
Take a look at the following code and rewrite to make this code run properly.
<button id="myButton">Click Me!</button>
<script>
    const button = document.querySelector('button')
    button.onclick = alert('clicked')
    button.addEventListener('click', (e) => {
        console.log('clicked')
    })
</script>2
3
4
5
6
7
Solution
Solution 1
So If we try to run the problem our alert() function will run as soon as the page loads as we are assigning a function call to our on onclick property which is returning undefined and running the function right away.
We can fix this by assigning an anonymous function to our onclick assignment. This way the anonymous function will be executed when the button is clicked and call the alert() function.
<button id="myButton">Change Color</button>
    <script>
    const button = document.querySelector('button')
    button.onclick = () => alert('clicked')
    button.addEventListener('click', (e) => {
        console.log('clicked')
    })
</script>2
3
4
5
6
7
# Conceptual
- What is the difference in using a HTML attribute and
addEventListener()? - What is a Event Handler?
- What is an Event Object and what information is stored and accessible through it?
# Architect
- How would you use events to build a form that would open a sidebar menu when a button is pressed?
- How would you use events to change a form's submit action?