# Git 101
# Learning Objectives
After completing this lesson, you will be able to:
- Manage revisions of your code using git
- Synchronize your local code repository with GitHub
# Lesson
# Overview
When working on your code, you save regularly. But there will be times you wish you could go back to a previous change beyond what a simple "undo" can give you. Or you may find that you want to work on a copy of your code, while leaving its current state safely preserved.
Version Control Systems (VCS) were created to handle these very situations.
In this lesson, we'll introduce two different ways of using version control:
- Commit source code
- Revert and reset previous commits
- Create separate branches of your code
- Merge changes from two branches
- Resolve conflicting changes when merging
We'll use a program called git as our VCS - it's extremely powerful and the most widely used in the industry. Though we'll only be managing code written by a single developer, its real strength lies in its collaboration tools. We'll learn about these in a future lesson.
# Configuring git
Since git is made for tracking changes made by multiple collaborators, each change will be attributed to a particular developer.
Let's make sure git can do that by letting git know who you are. Run the following commands, but with your name and your email address:
git config --global user.name "Firstname Lastname"
git config --global user.email myaddress@example.com
2
# Using git
Even if you're not working with other developers, git can help you manage versions of your code in two ways:
- Restore old versions of your code
- Create alternate versions of your code and switch between them
# The git workflow, visually
When working with git, you'll make changes to your files as normal. Then you'll add some or all of these changes into git's staging area. Finally, you'll commit, or save, a snapshot of the staging area in the repository.
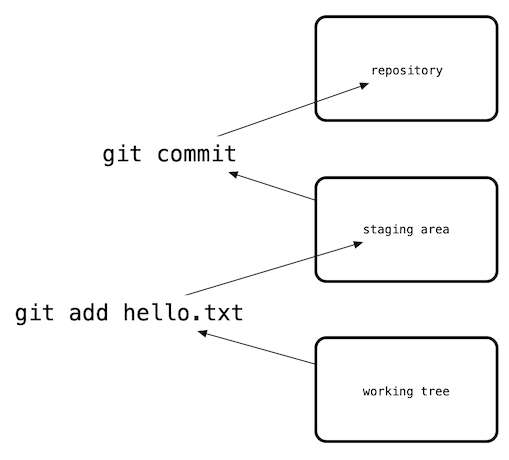
Even though the bulk of your development work will be editing files on your hard drive (or in git's terminology, in the working tree), it is important to regularly commit snapshots as your code changes.
# Creating a repository
The first step is to create a repository, which is a directory that git will watch for changes. You can turn any directory into a git repository by running git init. For this lesson, we'll create a new directory from scratch:
mkdir git101
cd git101
git init
2
3
This creates a "local" repository (or simply "repo"), meaning that it only exists on your computer. (Later in this lesson, we will walk through the steps to make this repo public.)

After running git init, git reports that it has initialized a new repository in the current directory.
A repo is a directory with a `.git`
When you ran git init, the message shows that it created a new directory named .git. This is the directory that git uses to manage the different versions of your code.
Other than the exisence of this directory, there's nothing special about a repo.
Run the following command to ask git about the current state of the repository.
git status
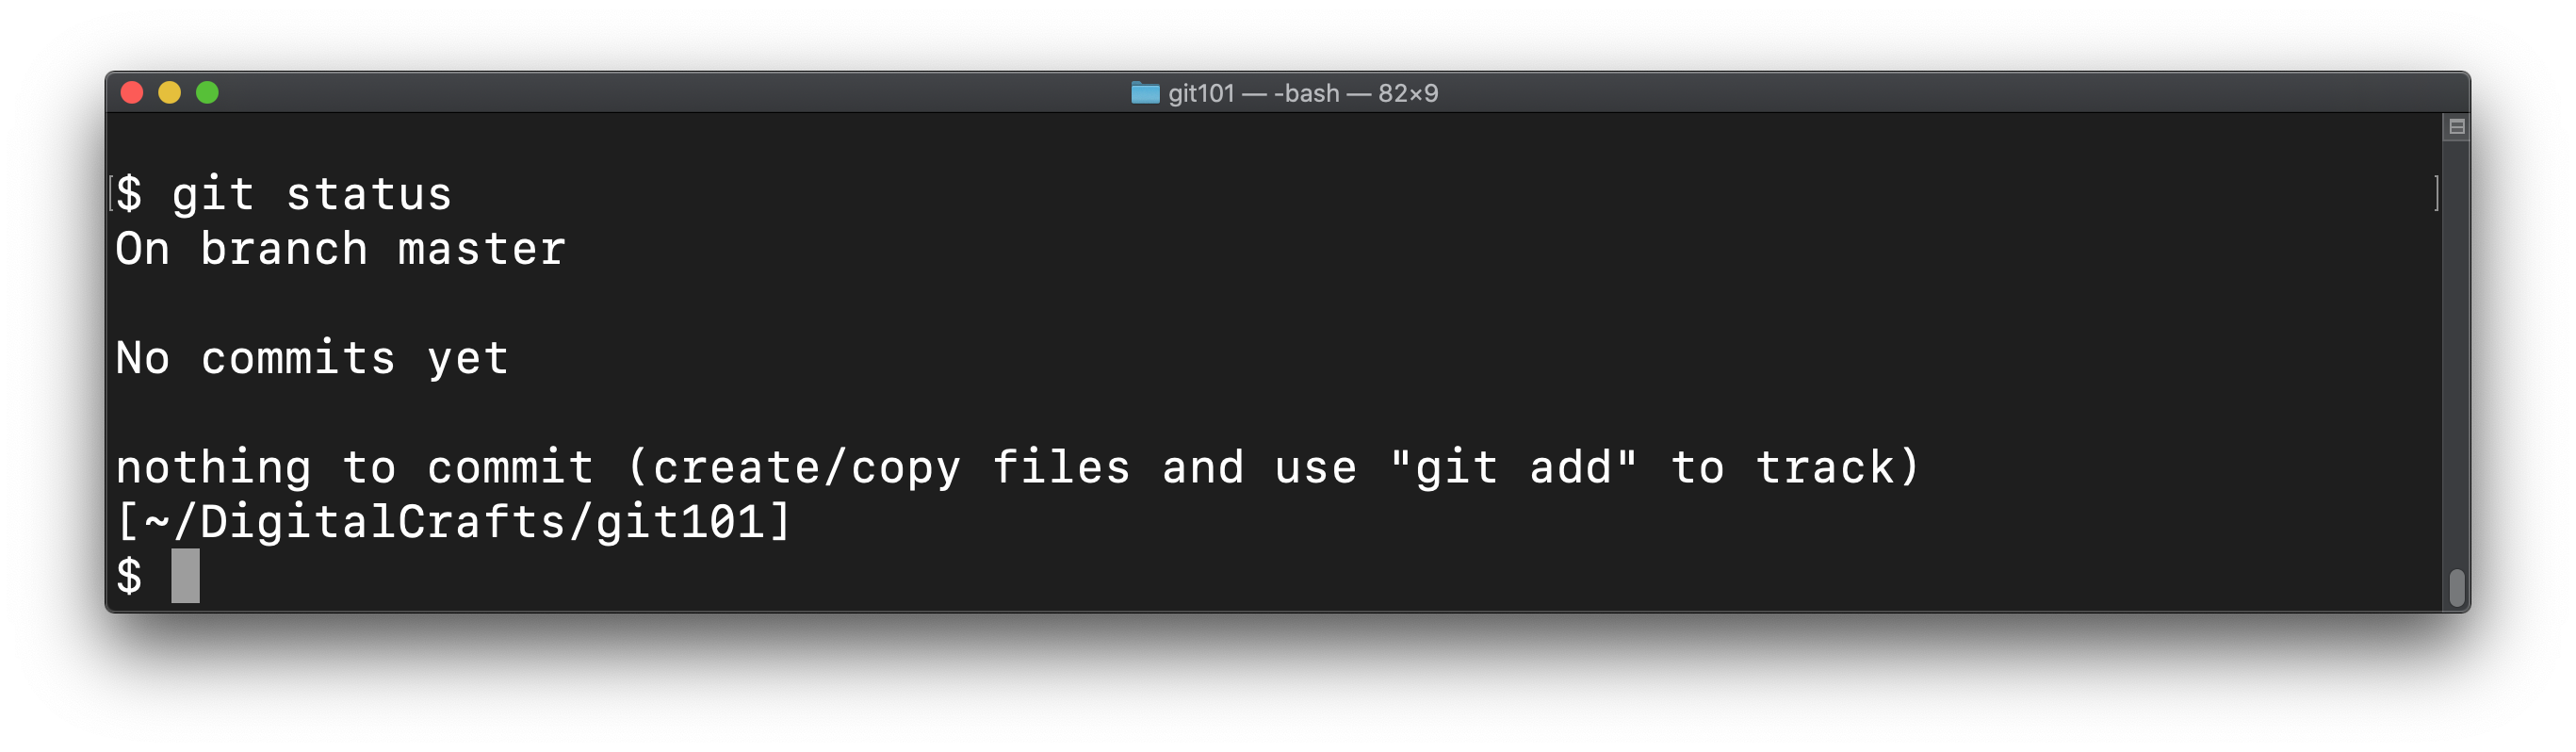
Congratulations! You've successfully created a git repo and are ready to start tracking changes to files.
# Adding and committing changes
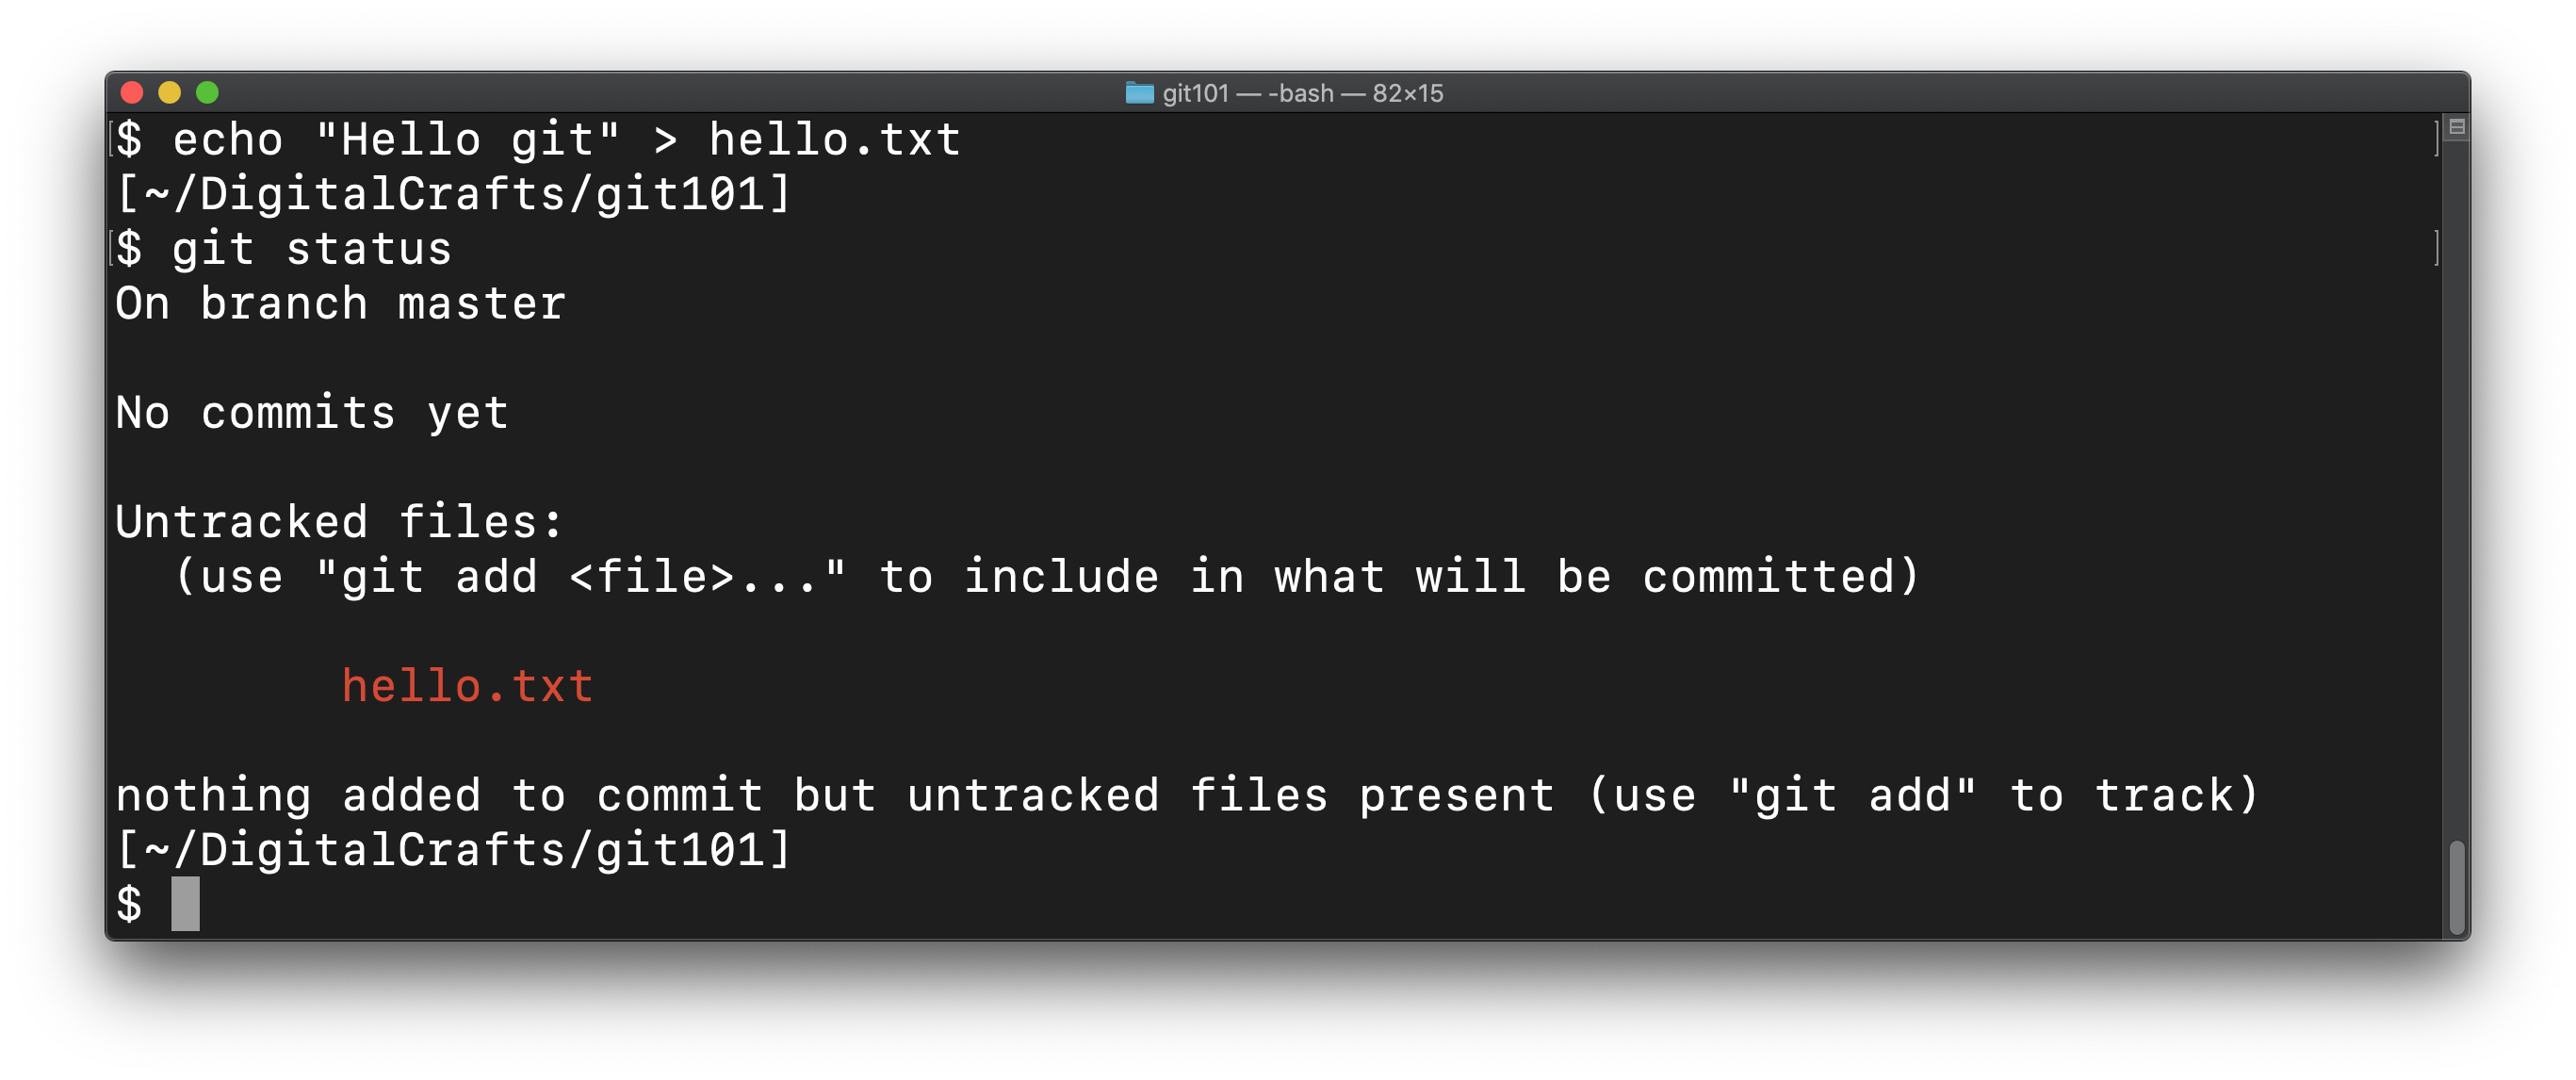
Let's create a file in our repo:
echo "Hello git" > hello.txt
This command puts the text "Hello git" into our new hello.txt file. Run git status again. git informs you that it is aware of the file, but that it currenlty isn't tracking it:
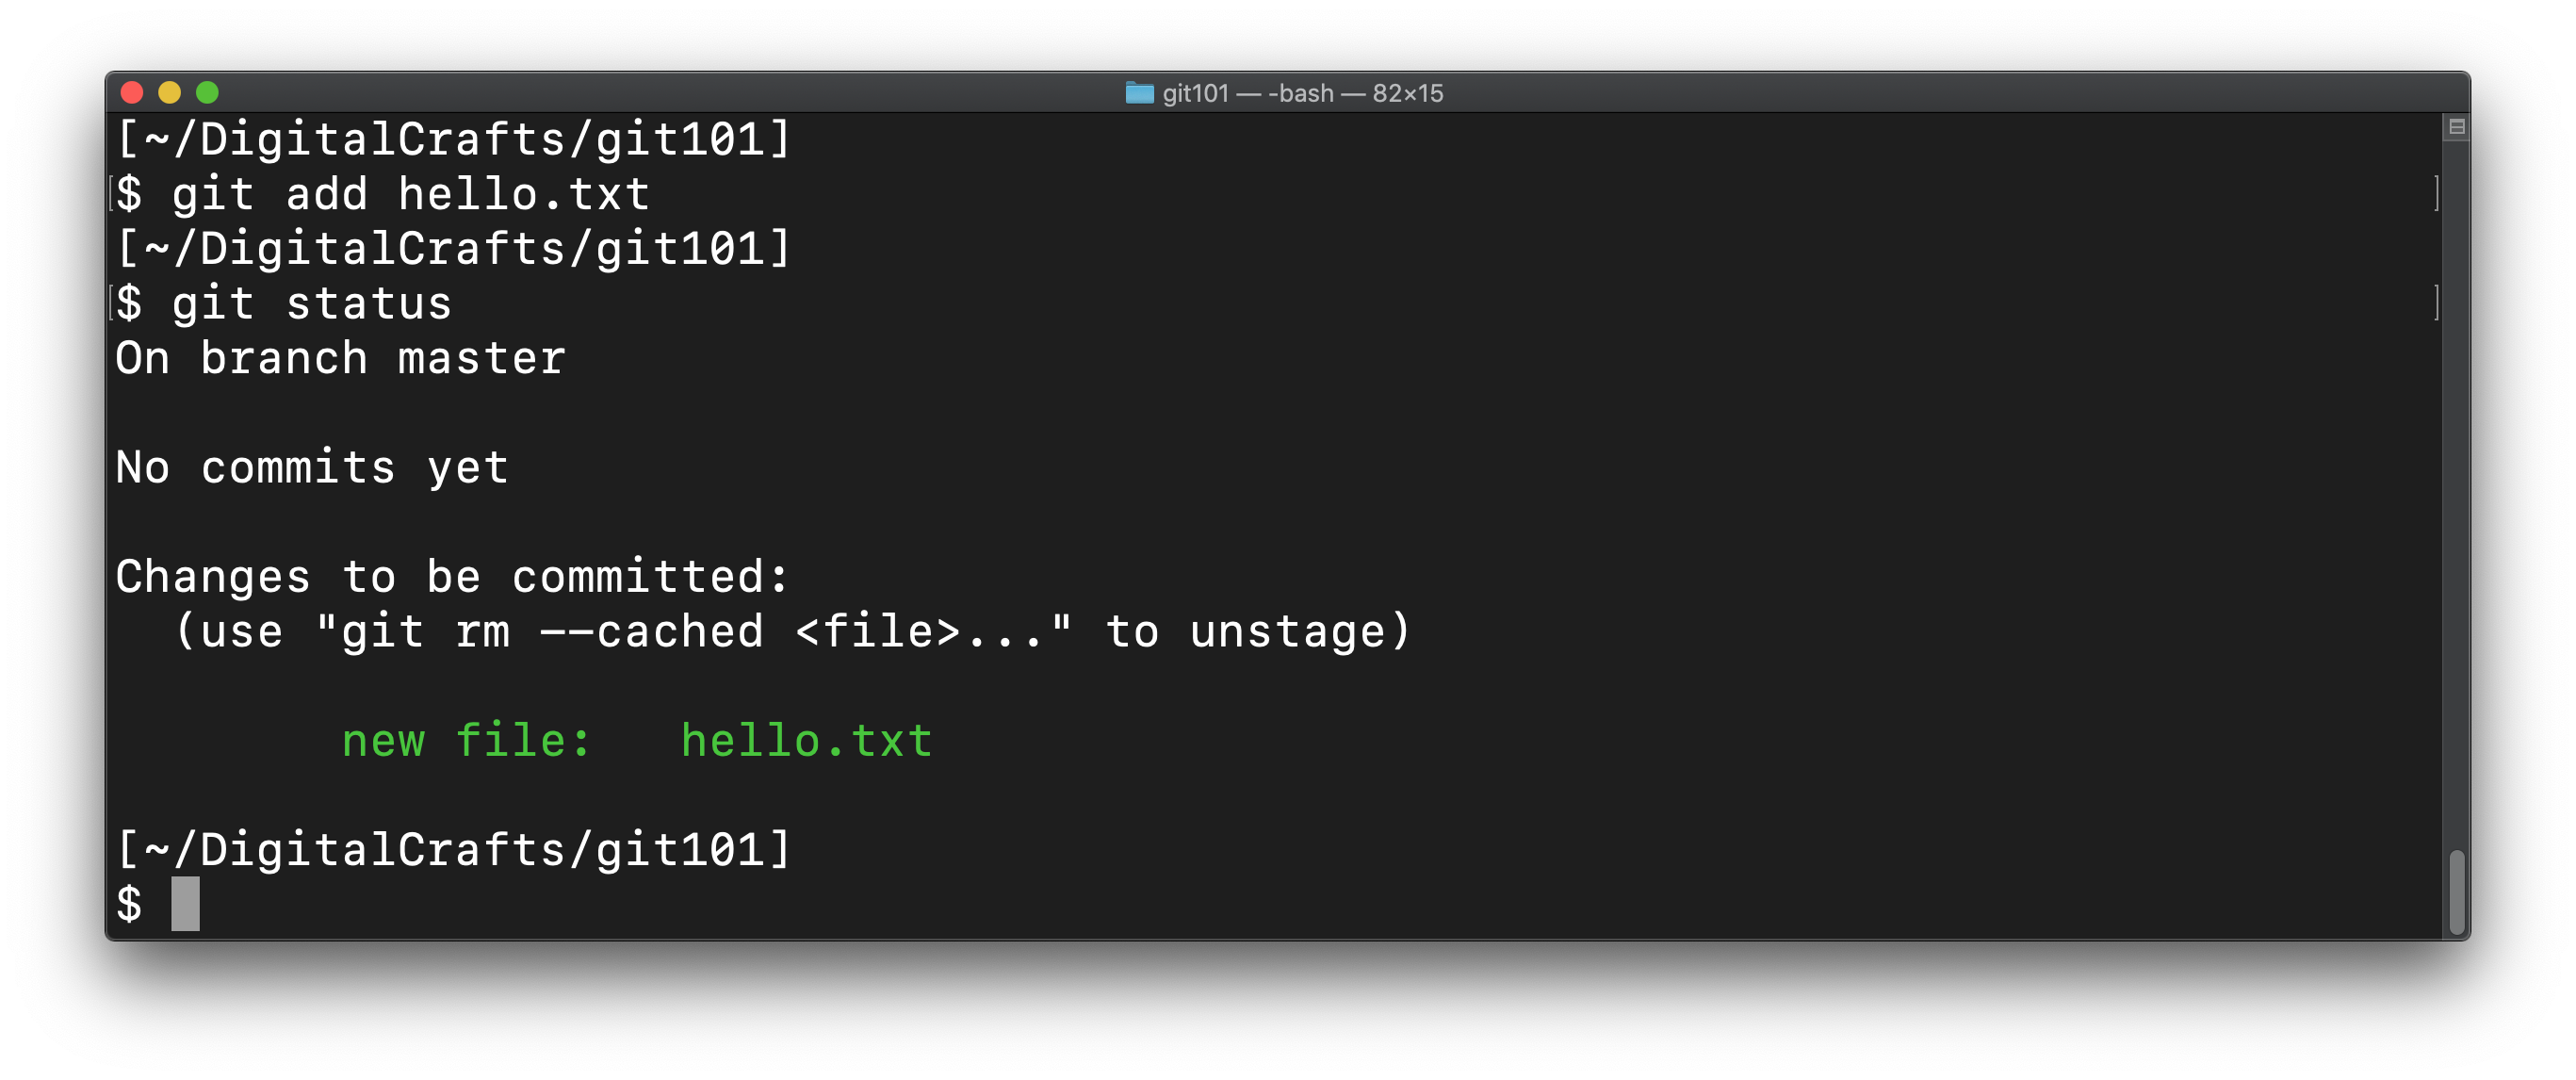
Tell git to start tracking changes to hello.txt using the git add command:
git add hello.txt
Run git status again. git shows that this change will be committed, which is similar to taking a snapshot of the files.
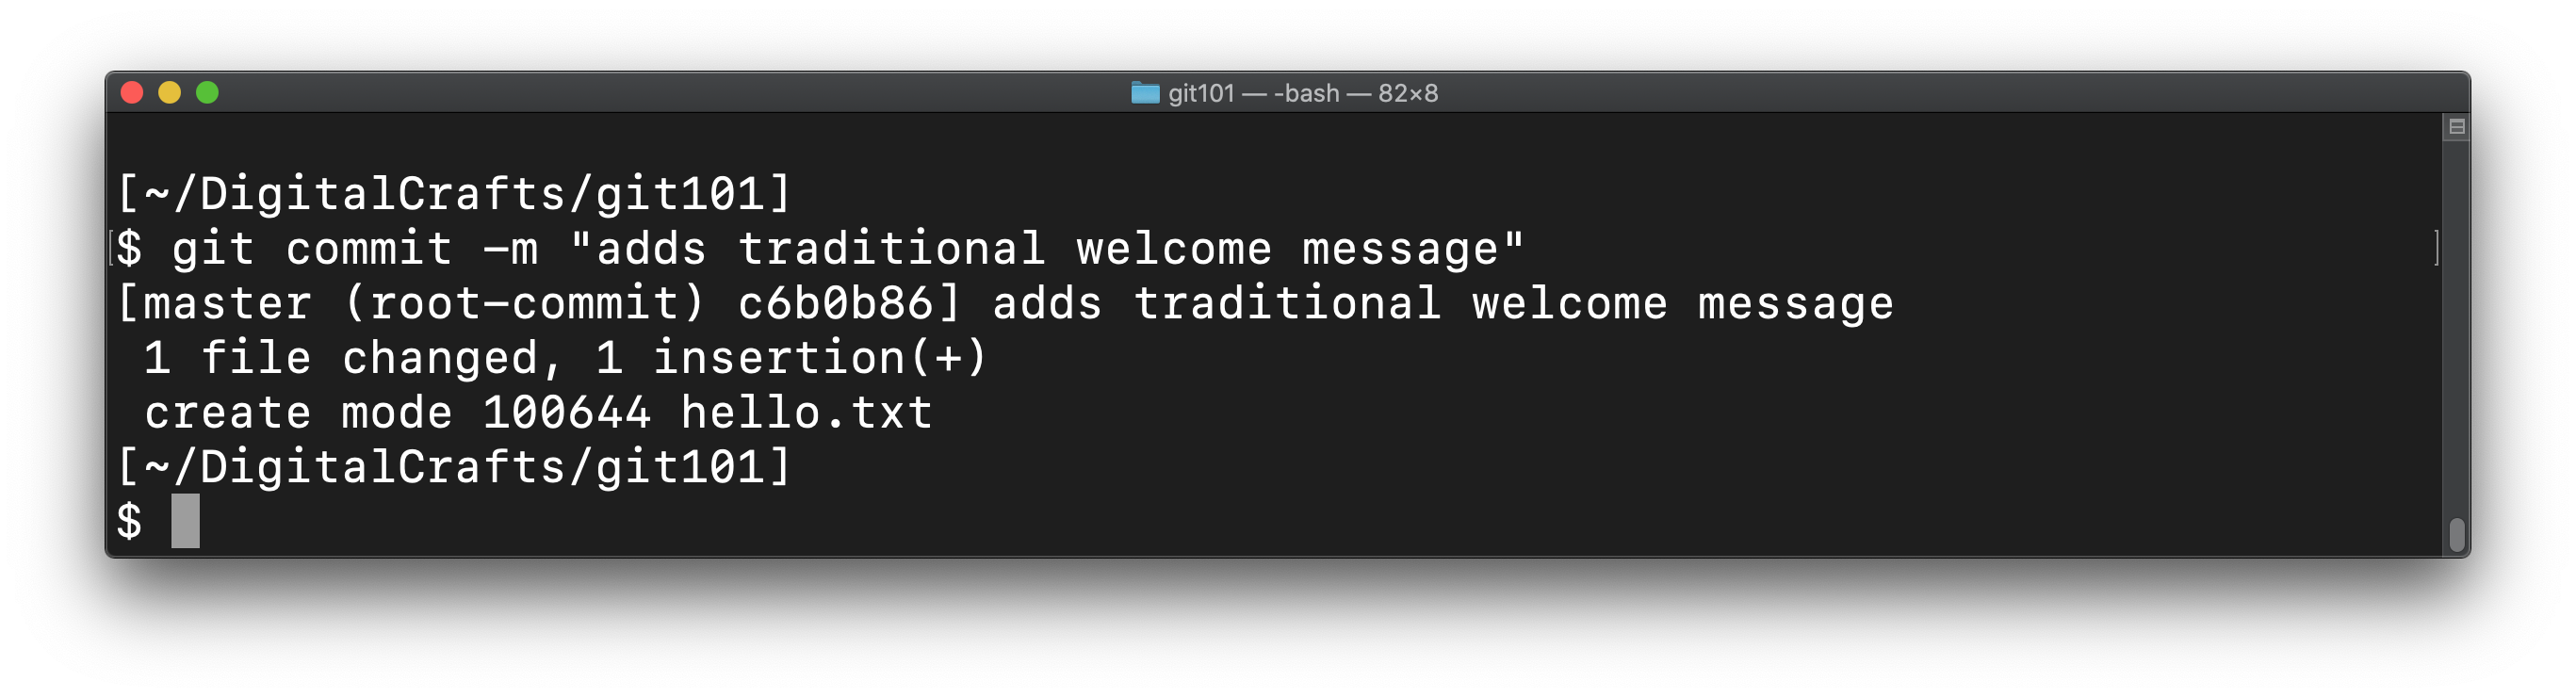
Make the commit using git commit and provide a description of the contents of the commit:
git commit -m "adds traditional welcome message"
Writing a good commit message
It is best to keep commit messages short and to start them with a present-tense verb.
When viewing a list of commits during code review, the reviewer knows precisely what changes were made by each individual commit.
For example:
- adds automated end-to-end tests for authorization
- uses stronger encryption for password field
- adds username and password fields to database
- displays login form instead of protected content
- creates login form in HTML
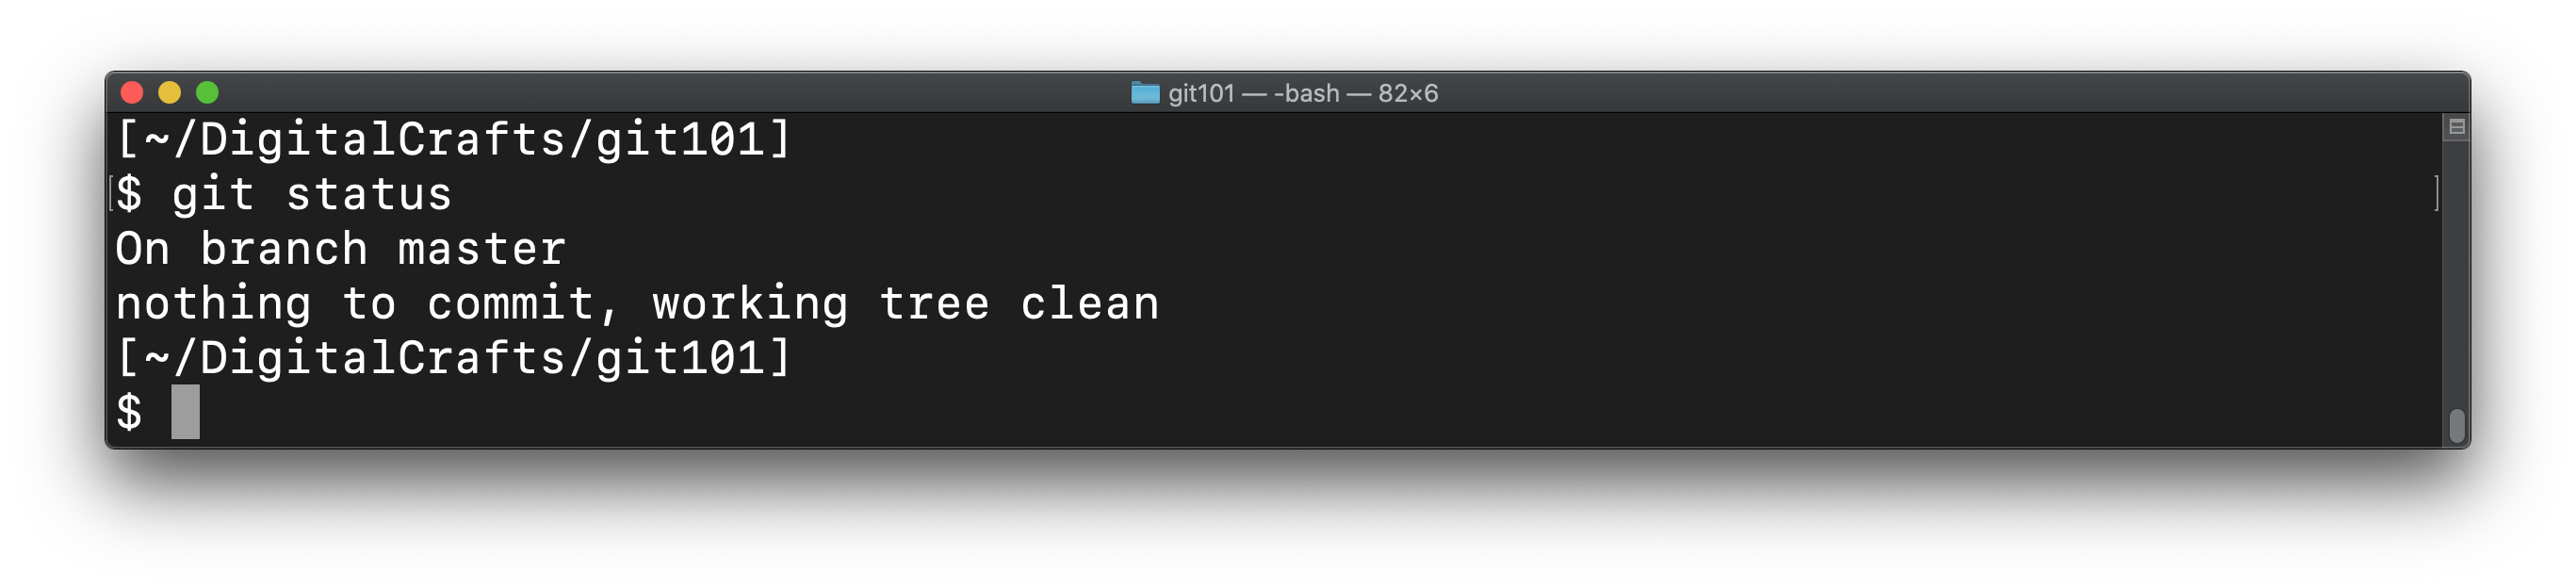
Now that you've committed those changes, check the status of your git repo:
git status
You should see that there are no changes to commit:
# Committing subsequent changes
So far, you have created a single commit to your repository. Let's add more changes to your repo. Create a new file with the following command:
echo "Goodbye" > bye.txt
And make an additional change to our hello.txt file:
echo "Pleased to meet you" >> hello.txt
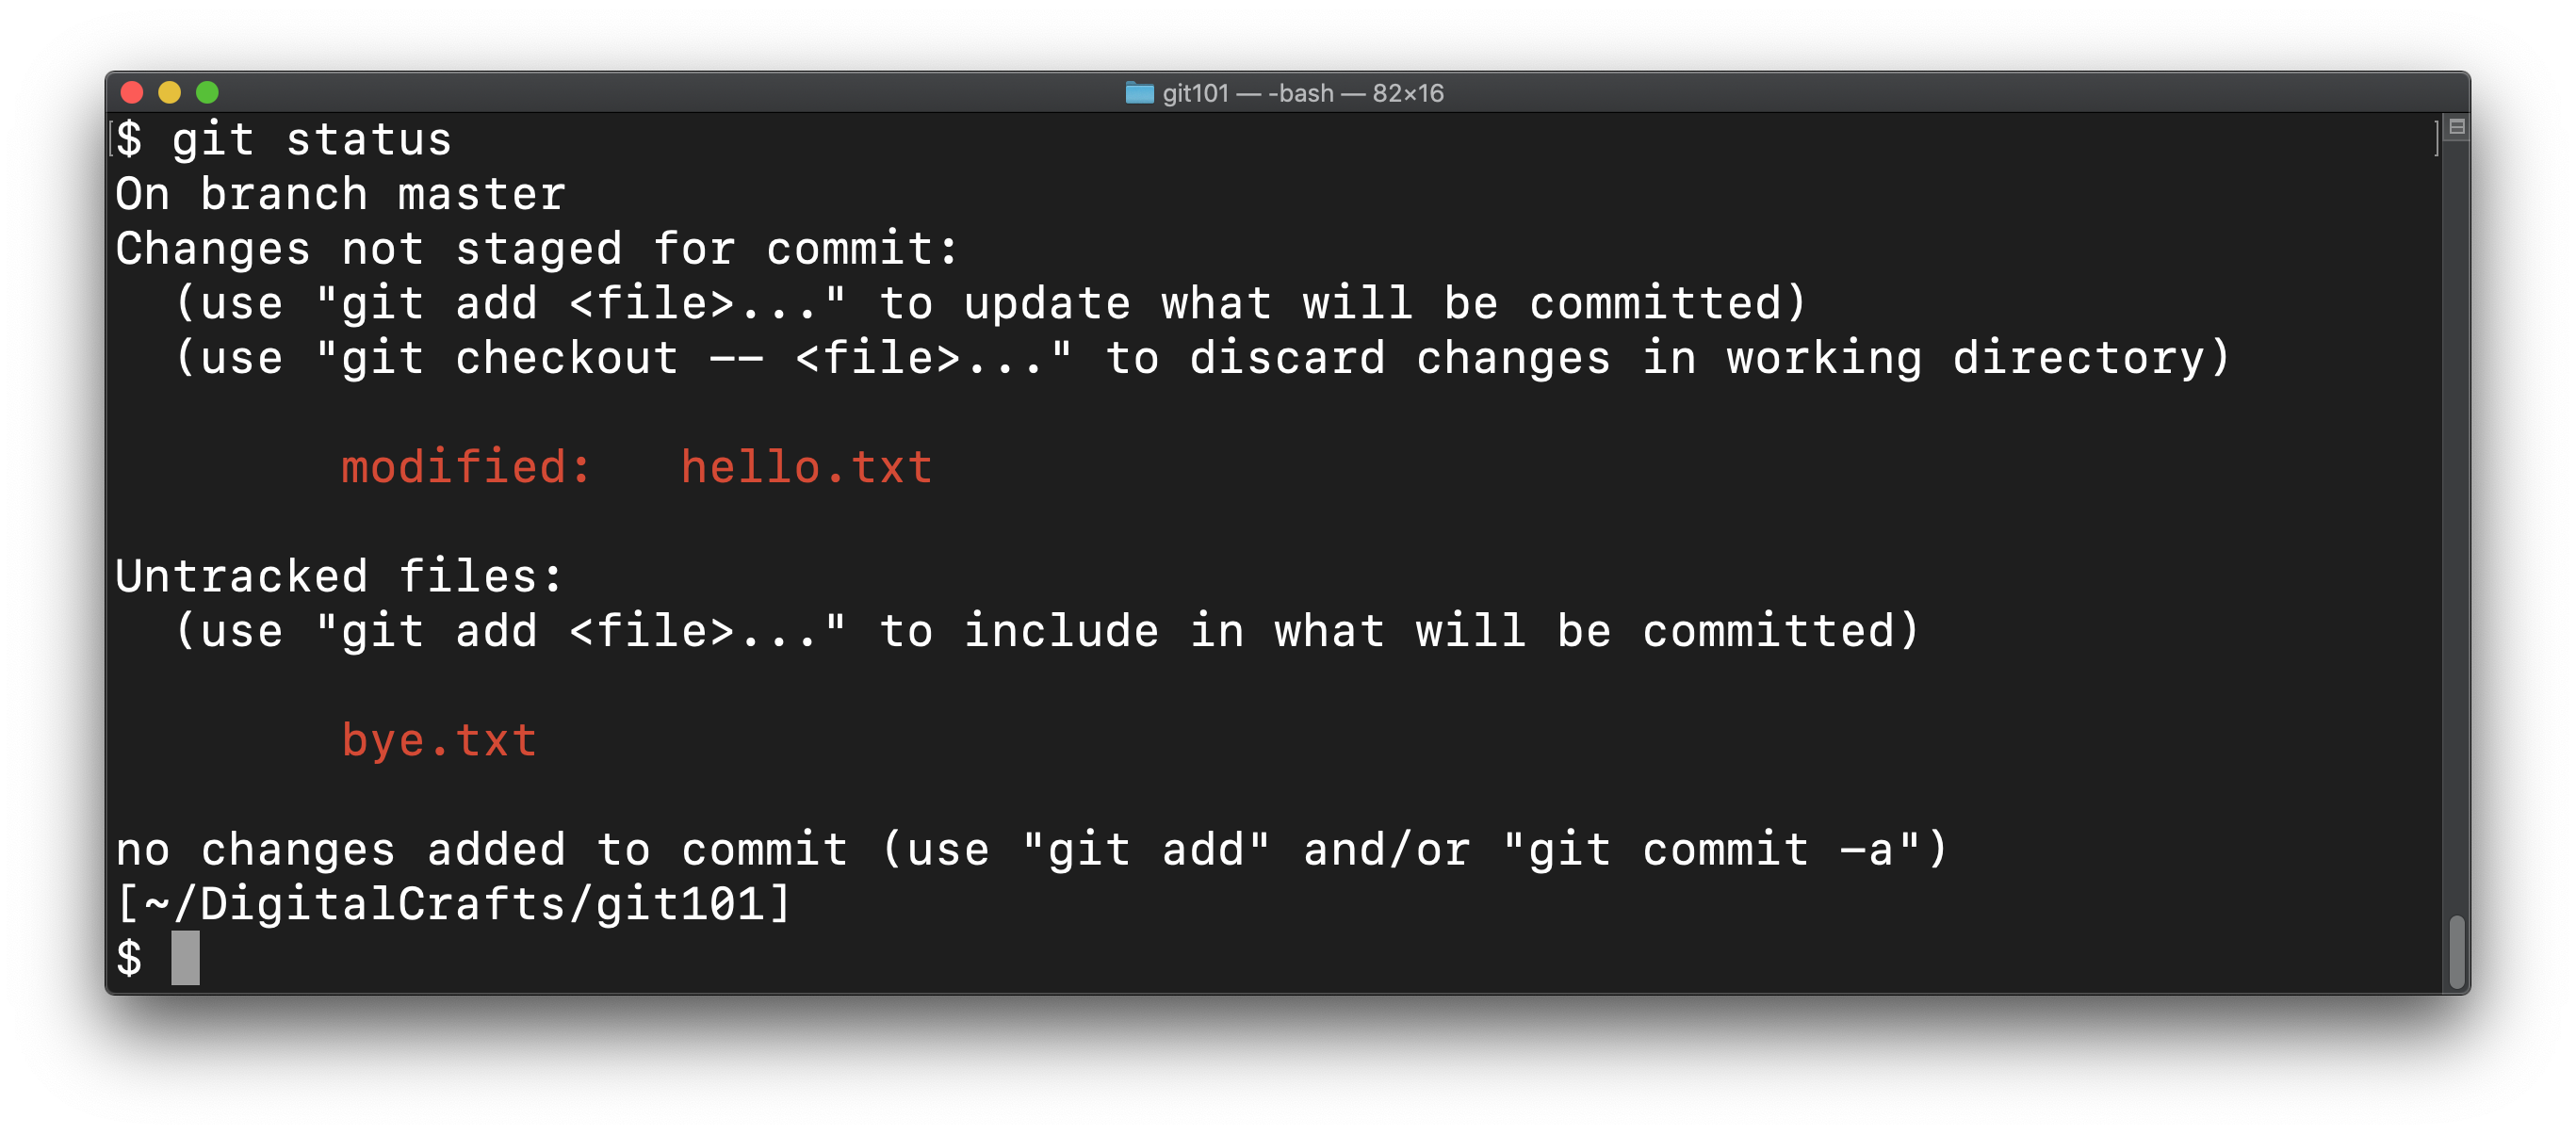
git status should reflect those changes:
Add bye.txt and hello.txt to the staging area, and then commit using git commit -m:
git add bye.txt
git add hello.txt
git commit -m "adds changes to hello.txt and bye.txt"
2
3
git tracks changes, not files
One thing that confuses new users of git is that they need to continue to git add for the same file paths. This is because git knows that the file has changed, but it will not automatically include the file path in the next commit.
As you get more used to git, you pick and choose the changes that go into an individual commit.
For example, you might make unrelated changes before making a commit, perhaps one is a bug fix, and another is a documentation change. You might choose to split these into two separate commits.
Add and commit in single command
The previous code example could have been written like so:
git add bye.txt
git commit -am "adds changes to hello.txt and bye.txt"
2
The -a flag tells git to automatically add changes to any files it is already tracking. We did not have to git add hello.txt to include it in the commit.
The -a flag is the short version of --all.
# Viewing a log of commits
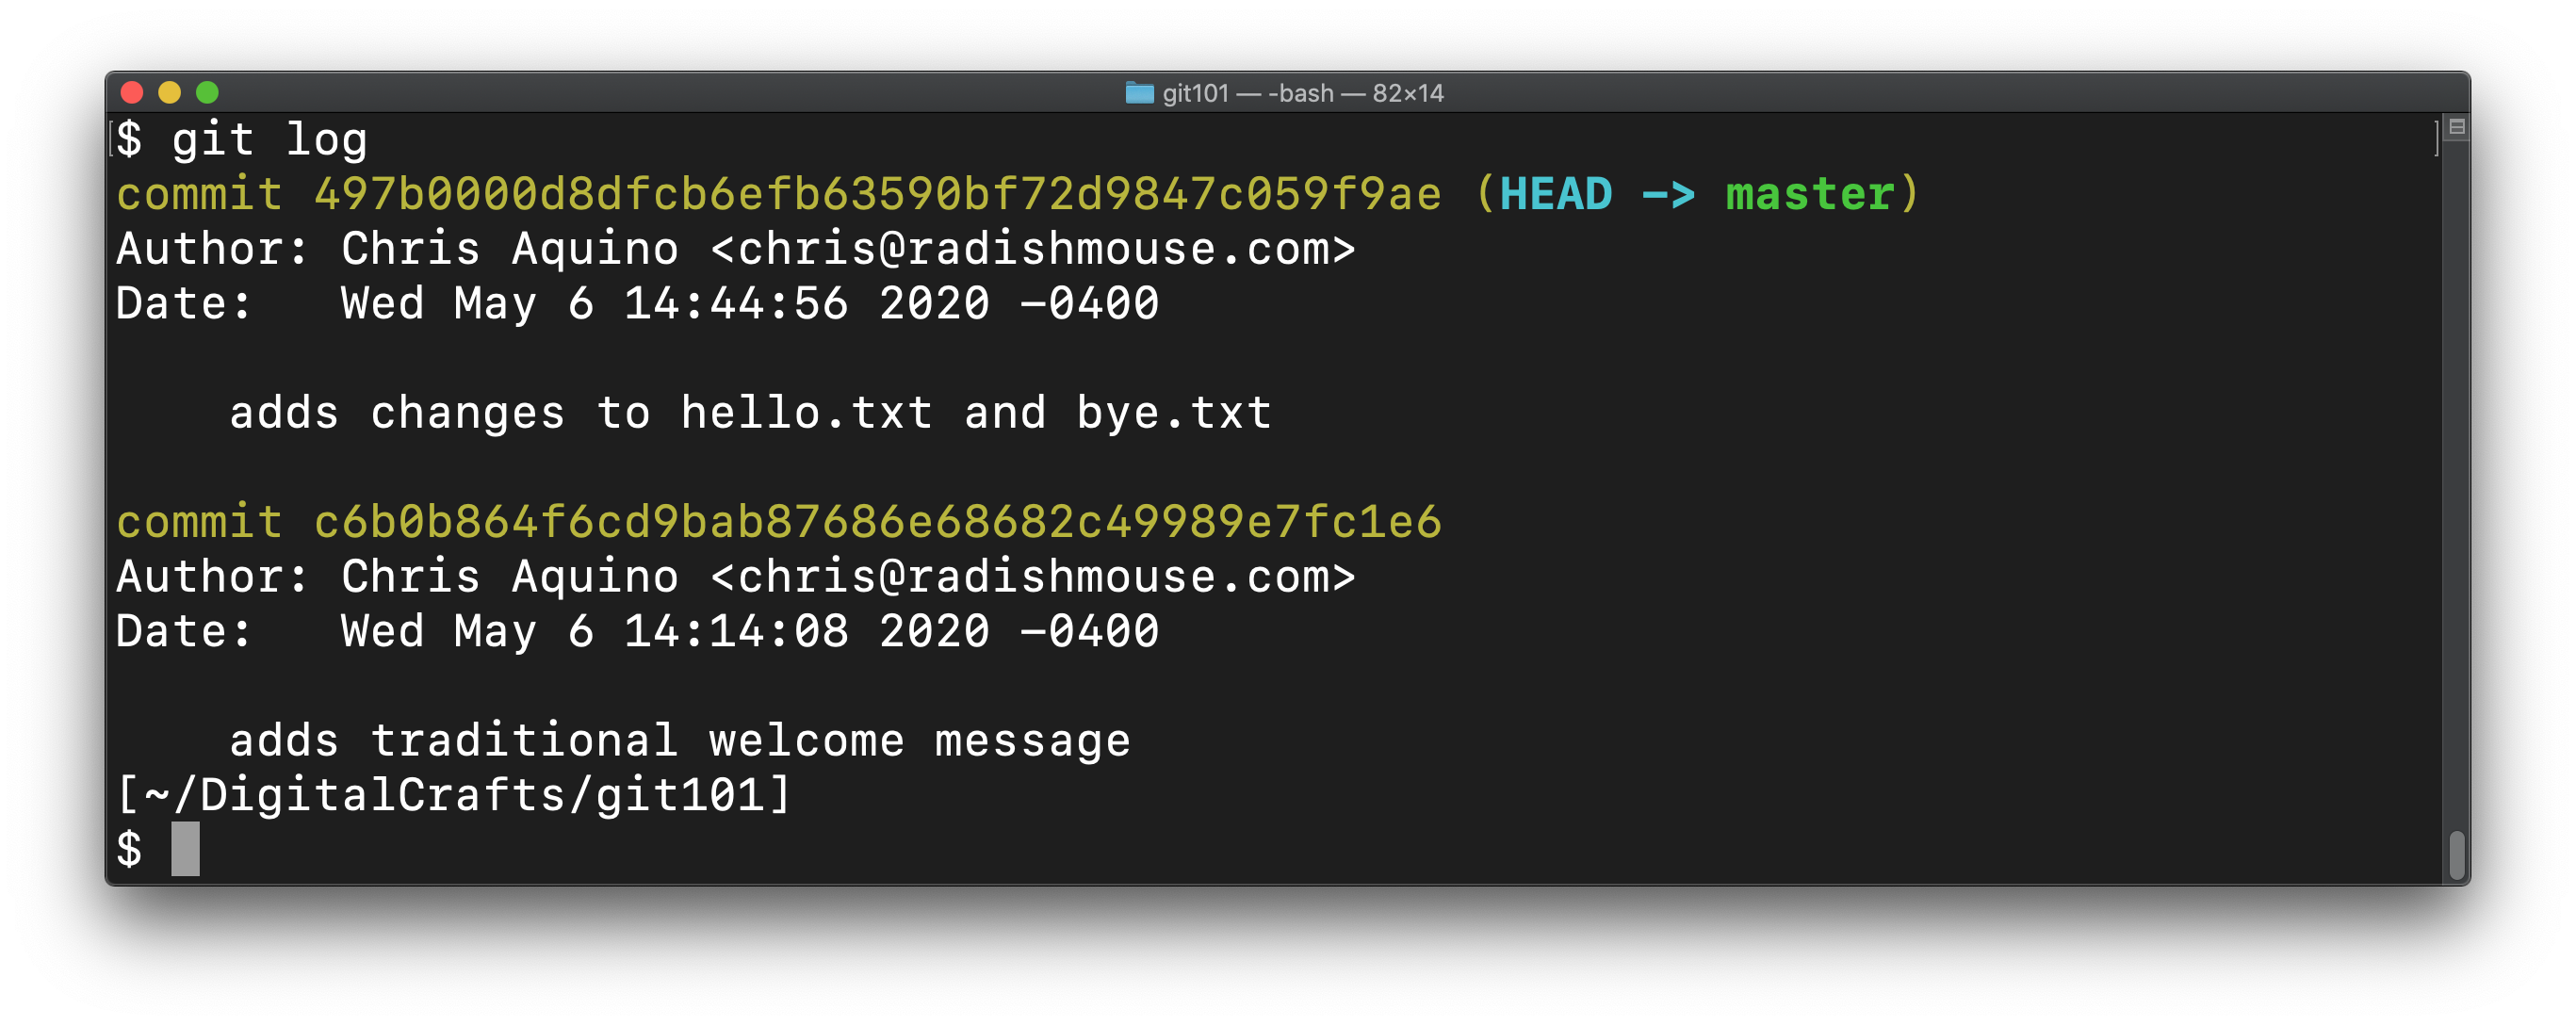
You can view record of your commits using the following command:
git log
You should see two entries in the log:
Press `q` to quit the log
If your terminal window is small, git may only be able to show you a few lines of the log at a time.
You can use the PageUp and PageDown keys to move up and down when viewing a longer git log.
When you are finished viewing the log and want to return to the bash prompt, press q on your keyboard.
In addition to the author, the date, and the commit message, you should see a commit ID, also referred to as the hash A hash is a unique identifier generated using a mathematical function. The commit ID is sometimes called the "SHA" (which is the name of the algorithm used to generate the hash).
When there are many commits, it can be useful to view a condensed version of the log:
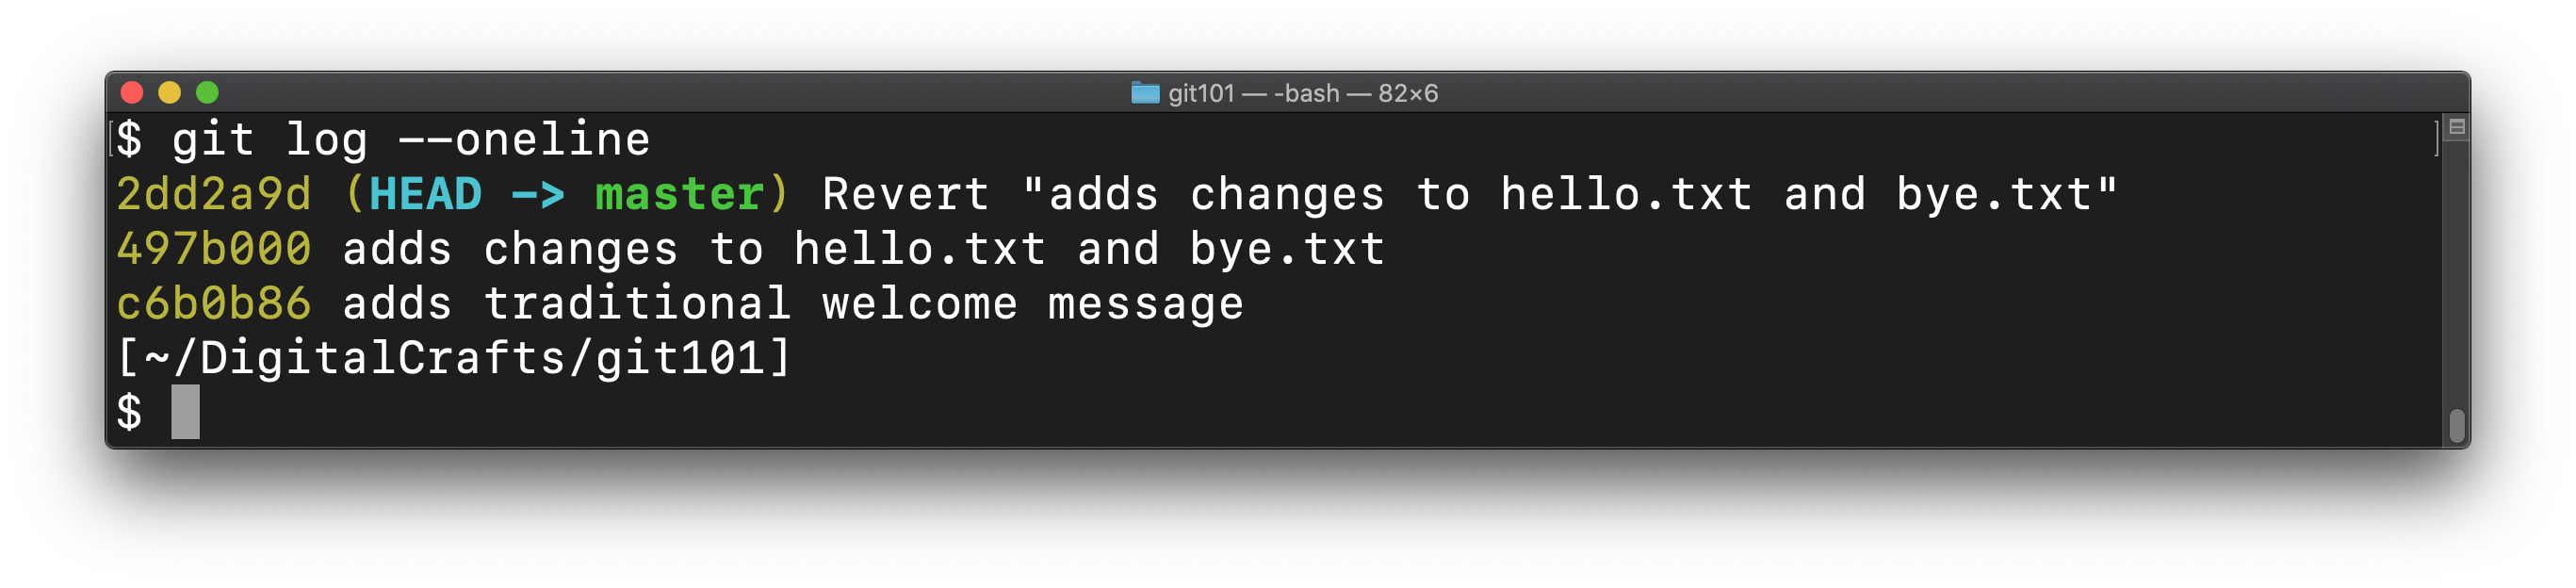
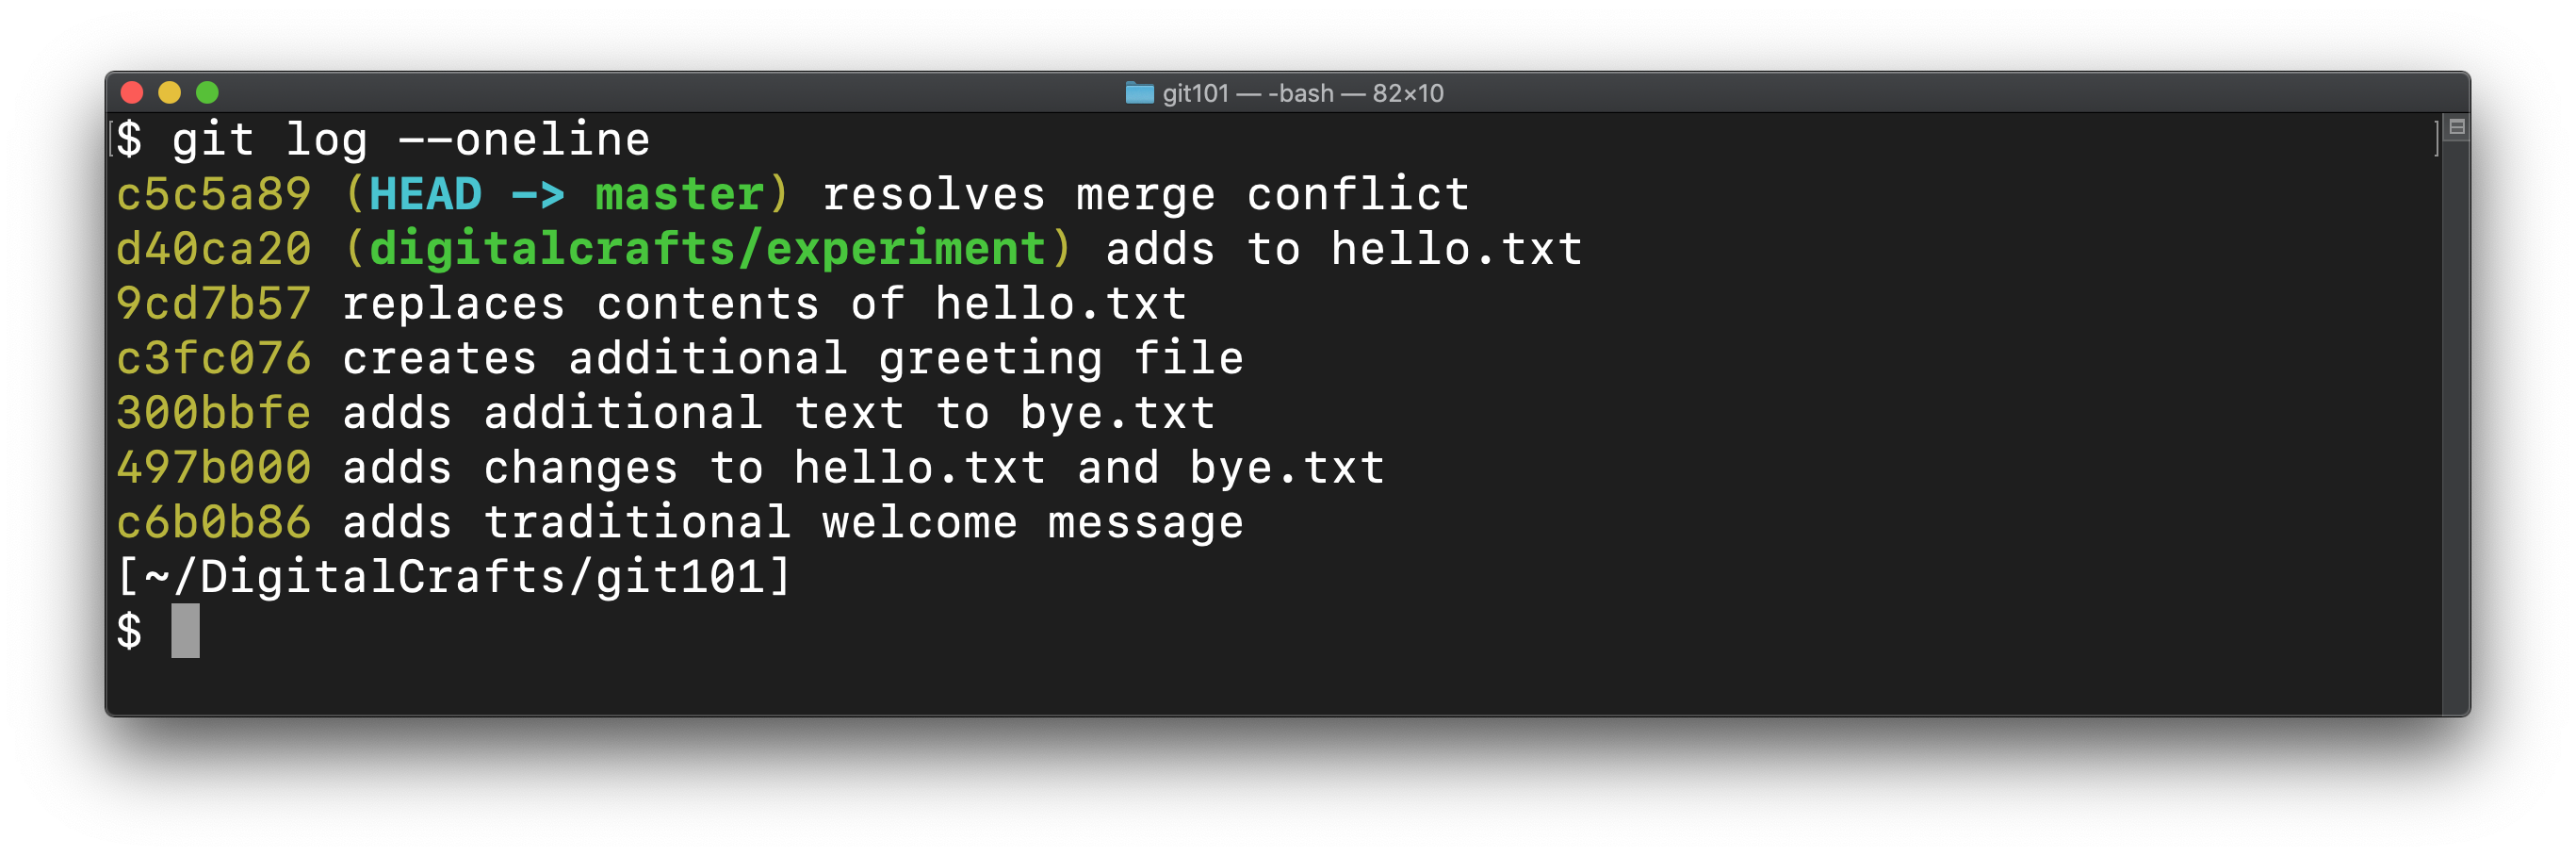
git log --oneline
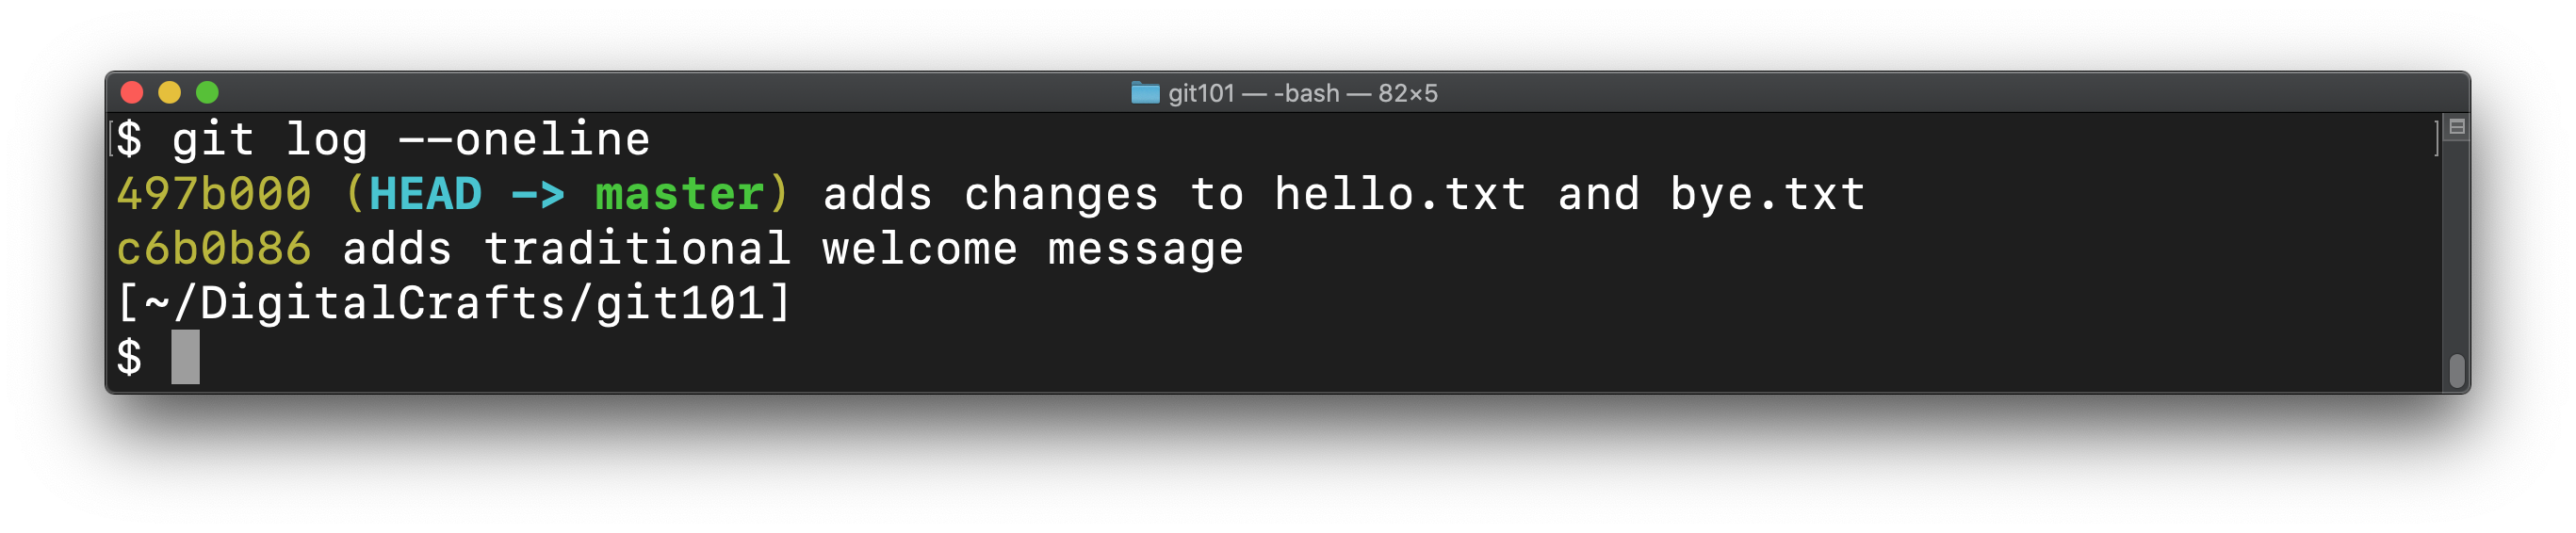
Each line shows the first 7 characters of the hash and the commit message. We'll use the hash in the next section. The important thing to understand is that a hash is universally unique. The first 7 characters are enough to distinguish one commit from another, even for commits that contain the exact same changes.
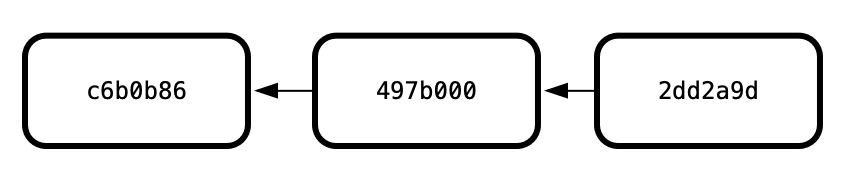
It can be useful to visualize a sequence of commits like this:
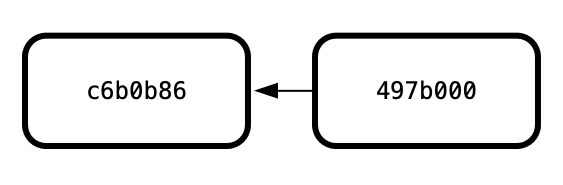
Each commit is a snapshot of changes since the previous commit. The previous commit is referred to as the parent commit. In our example repository, commit c6b0b86 is the parent of commit 497b000.
# Undoing changes
Using git, there are two ways to undo changes you make to your files:
- revert - add a new commit that change your files back to a previous state
- reset - remove commits and erase the changes that they made
In either case, you must tell git which commits you want to undo. Again you have two options:
- use the hash to identify a specific commit you want to go back to
- or tell git how many commits you want to go back.
Let's look at these techniques now.
# git revert
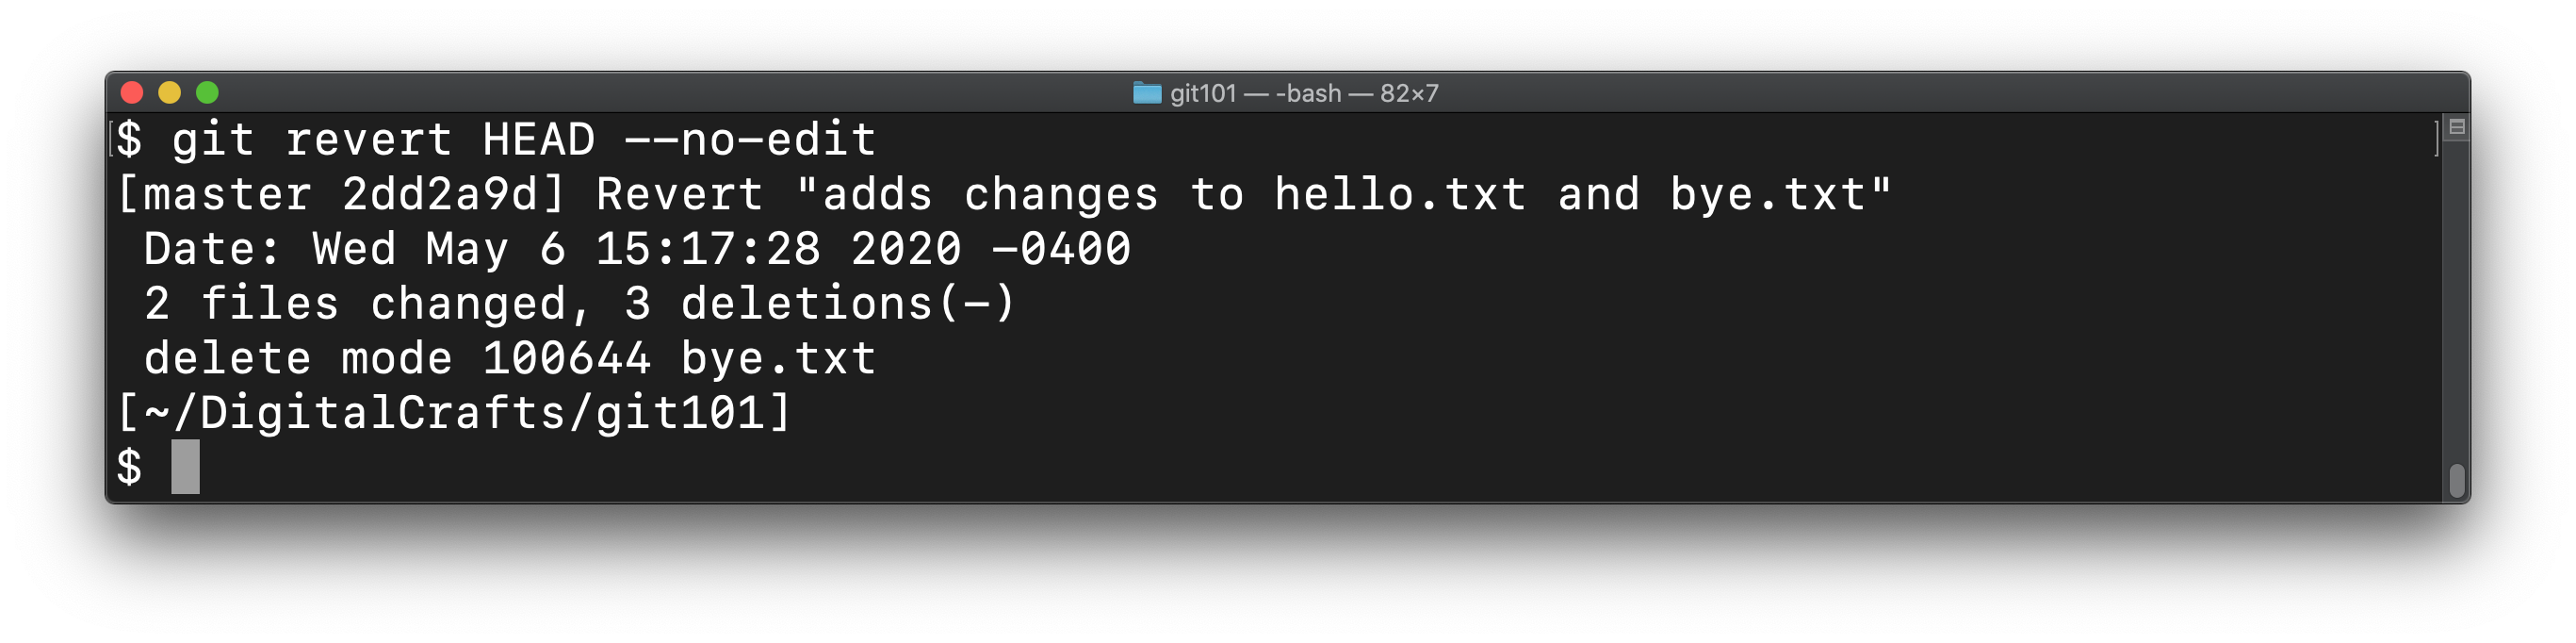
In the output from git log --oneline, you may have noticed that the most recent commit also carries the designation HEAD. To "undo" this most recent commit, run the following:
git revert HEAD --no-edit
The --no-edit command line option means that you want to accept the default message for the commit.
Run this command on your repo.
Check the status of the repo and list the files in your directory.
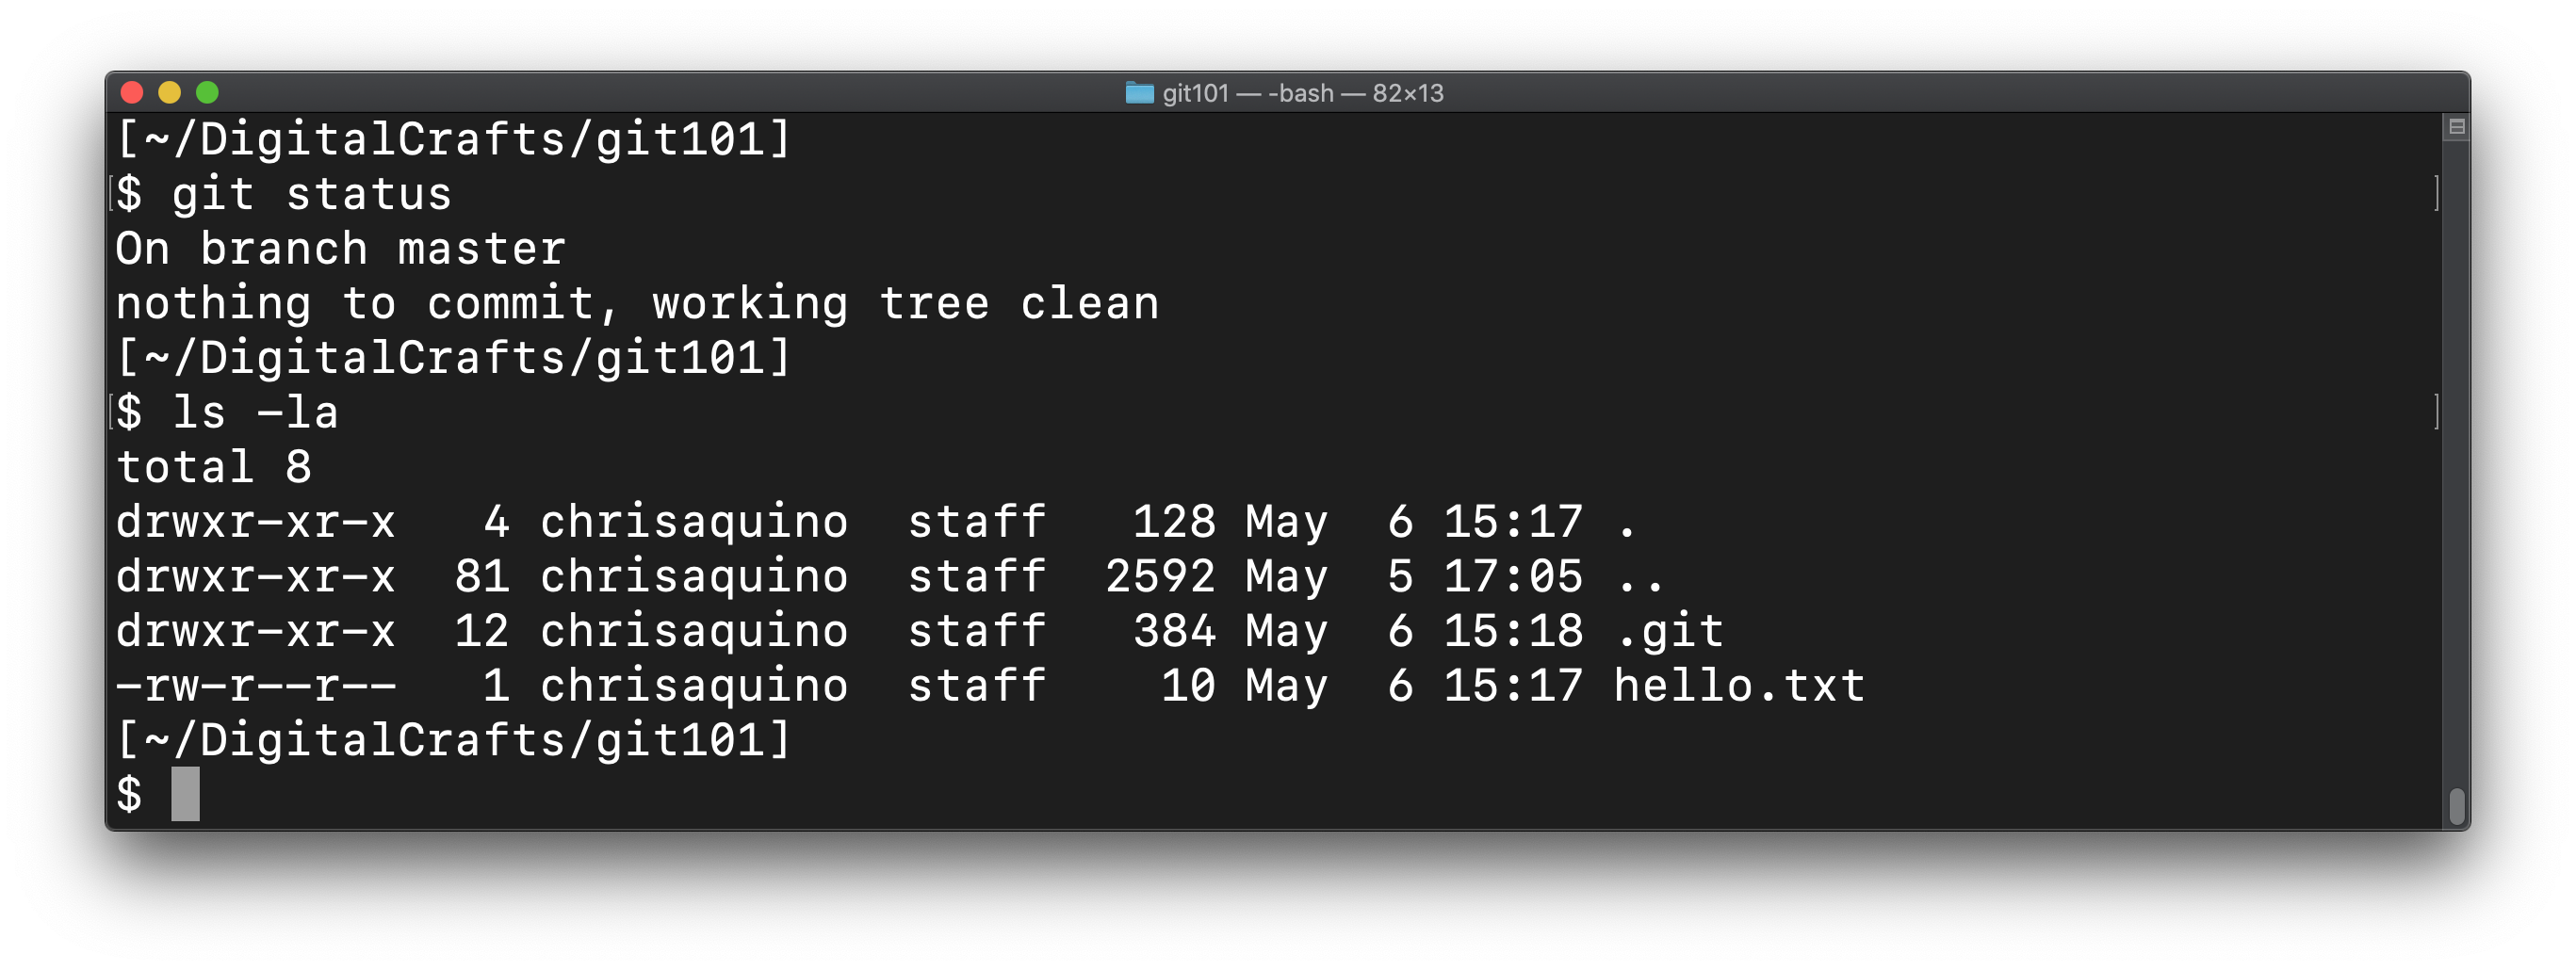
If you view the contents of hello.txt, you'll see that it only contains the text "Hello git"; the text "Pleased to meet you" was removed from the file when you executed the git revert:

To find out exactly what happend, run git log --oneline:
You can see that git adds a new commit that makes the opposite changes of the last commit.
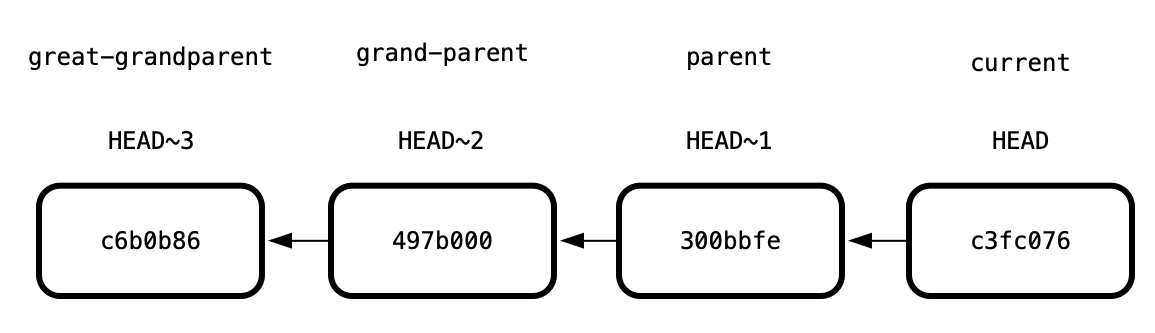
HEAD~n
HEAD always refers to the current commit and you can use it as a reference point.
The commit prior the current one is HEAD~1. The commit before that one is HEAD~2.
The syntax is similar to calculating an array index: HEAD~4 is current index minus 4.
You can read more about Relative references on the Atlassian.com site.
# git reset
git revert is convenient when you want a record of all of the changes in a repo. On the other hand, if you want to delete commits without preserving them, use git reset to go back to a particular commit. Let's delete the most recent commit.
We currently have 3 commits. Two of them came from creating and modifying the files hello.txt and bye.txt. The third one was added when we ran git revert. Let's go back to the second commit, which will delete the third one.
(Your hashes will be different than the ones shown, so make sure to substitute the values accordingly.)
git reset 497b000
git tells us that there are changes that need to be committed:
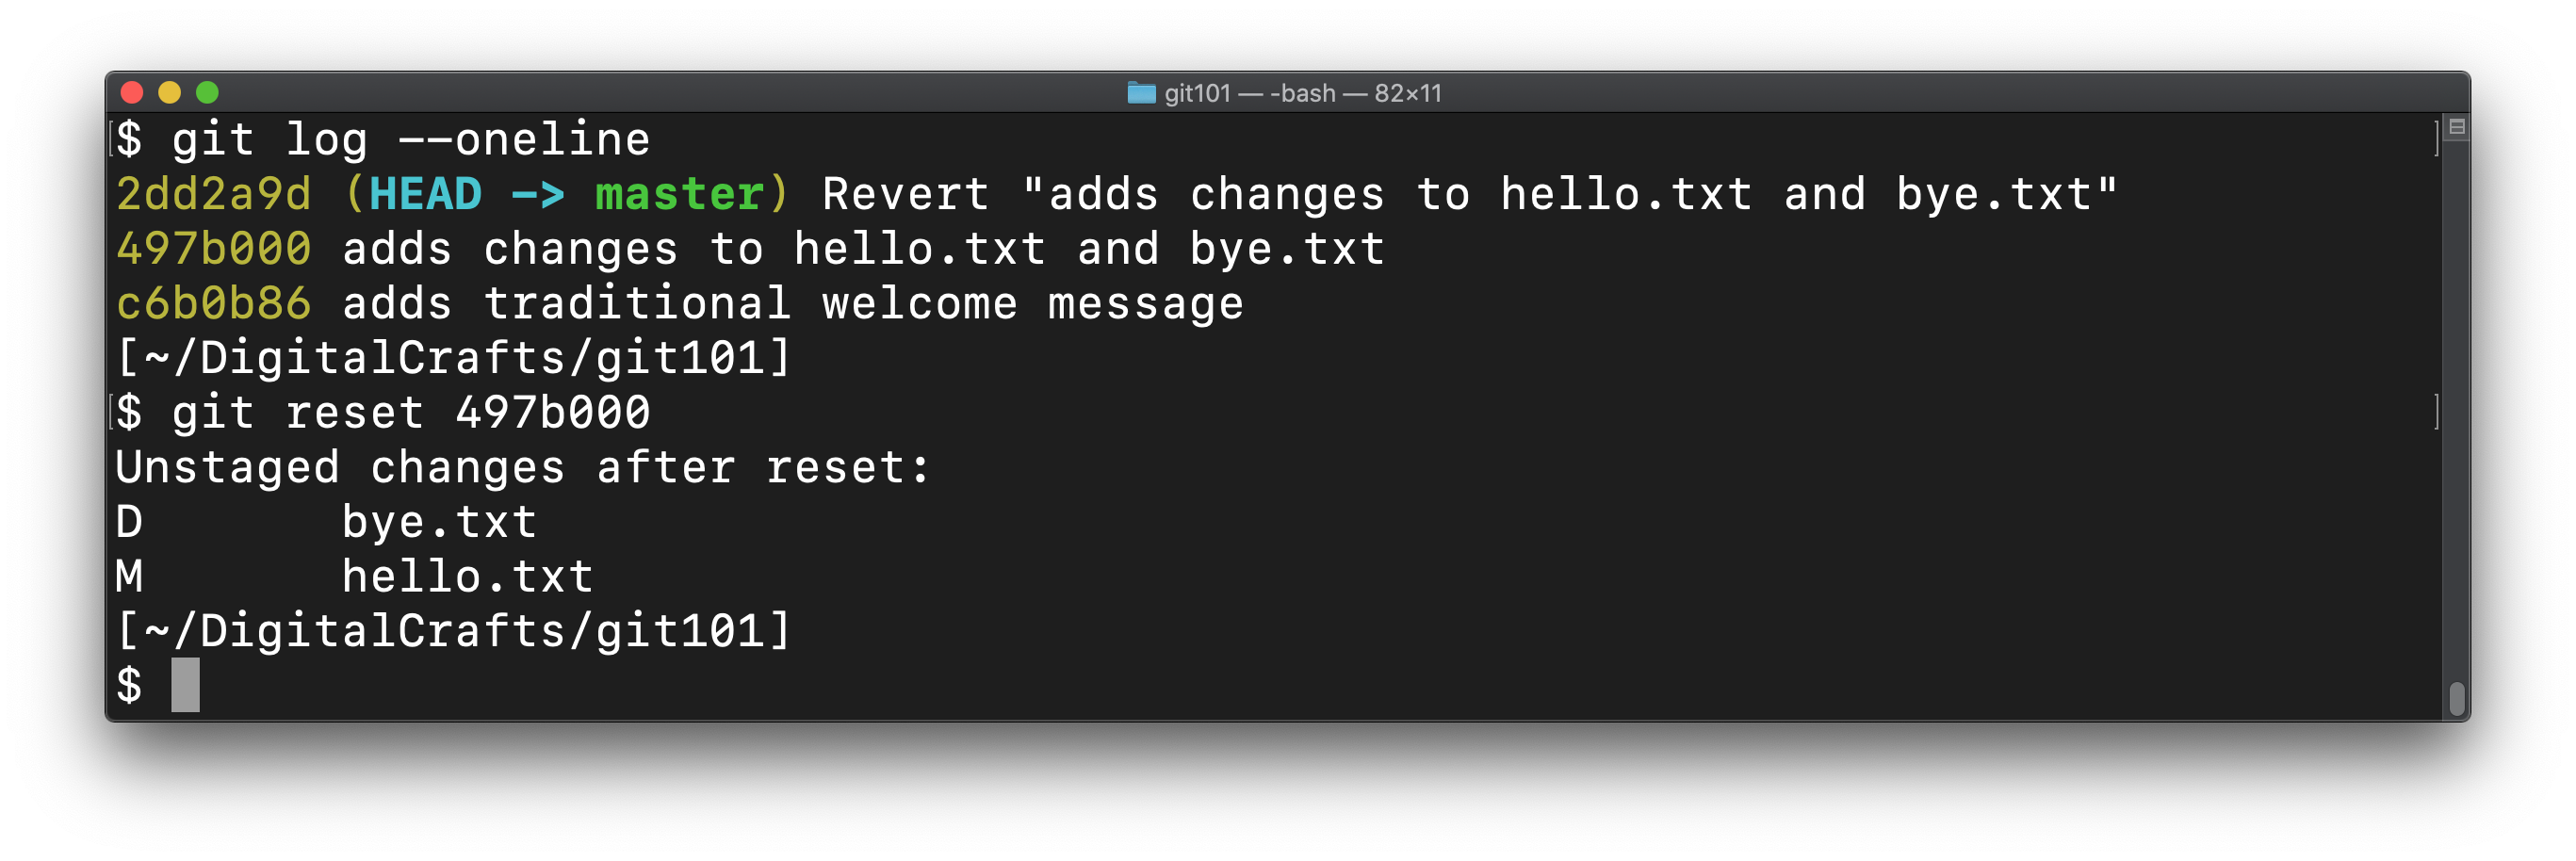
What this means is that git left the files on the hard drive alone - bye.txt is still deleted and hello.txt still only has the text "Hello git". We can either commit those changes (canceling the git reset) or we can throw the changes away (finalizing the git reset).
To throw the changes away, run git stash:
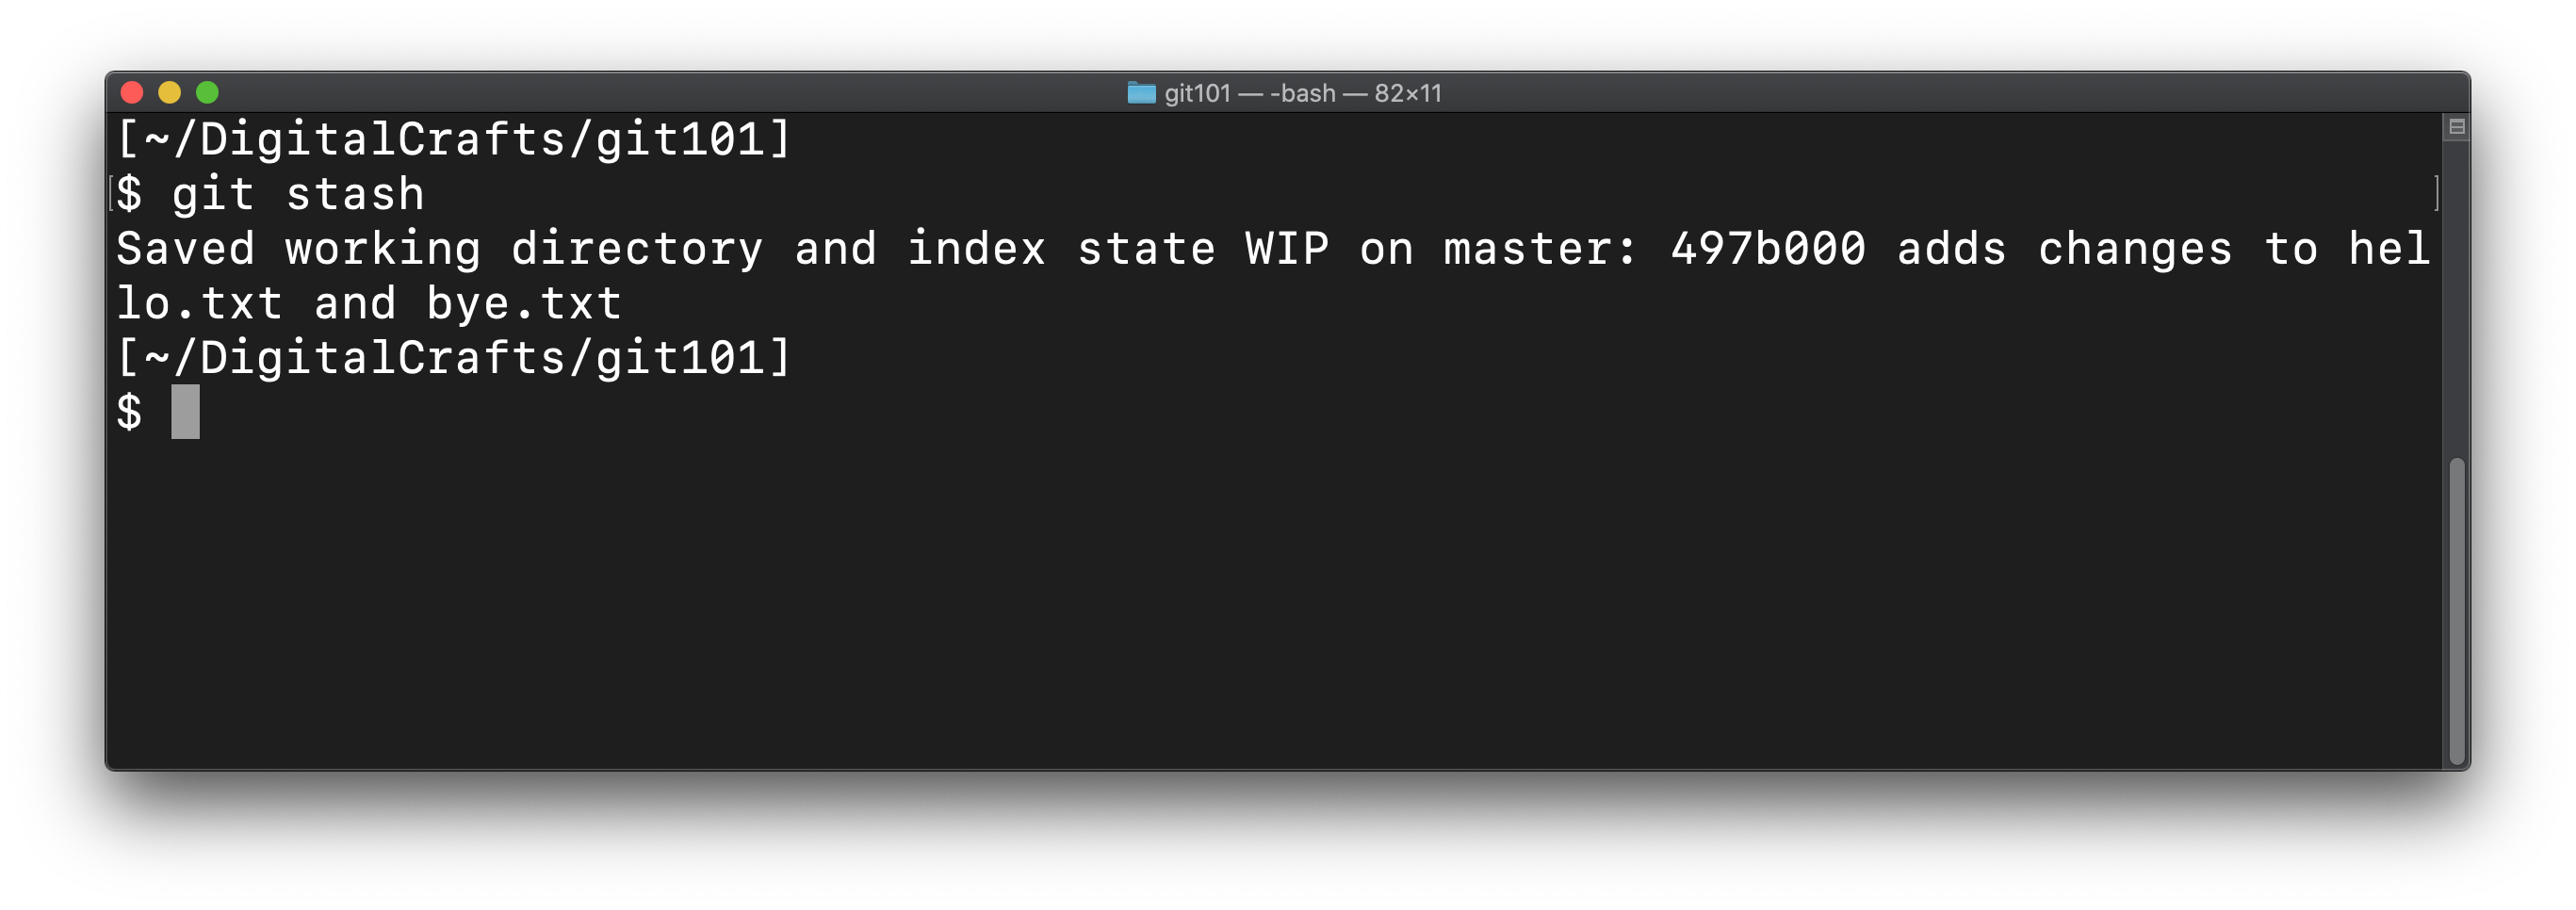
After running that command, our repo only contains 2 commits:
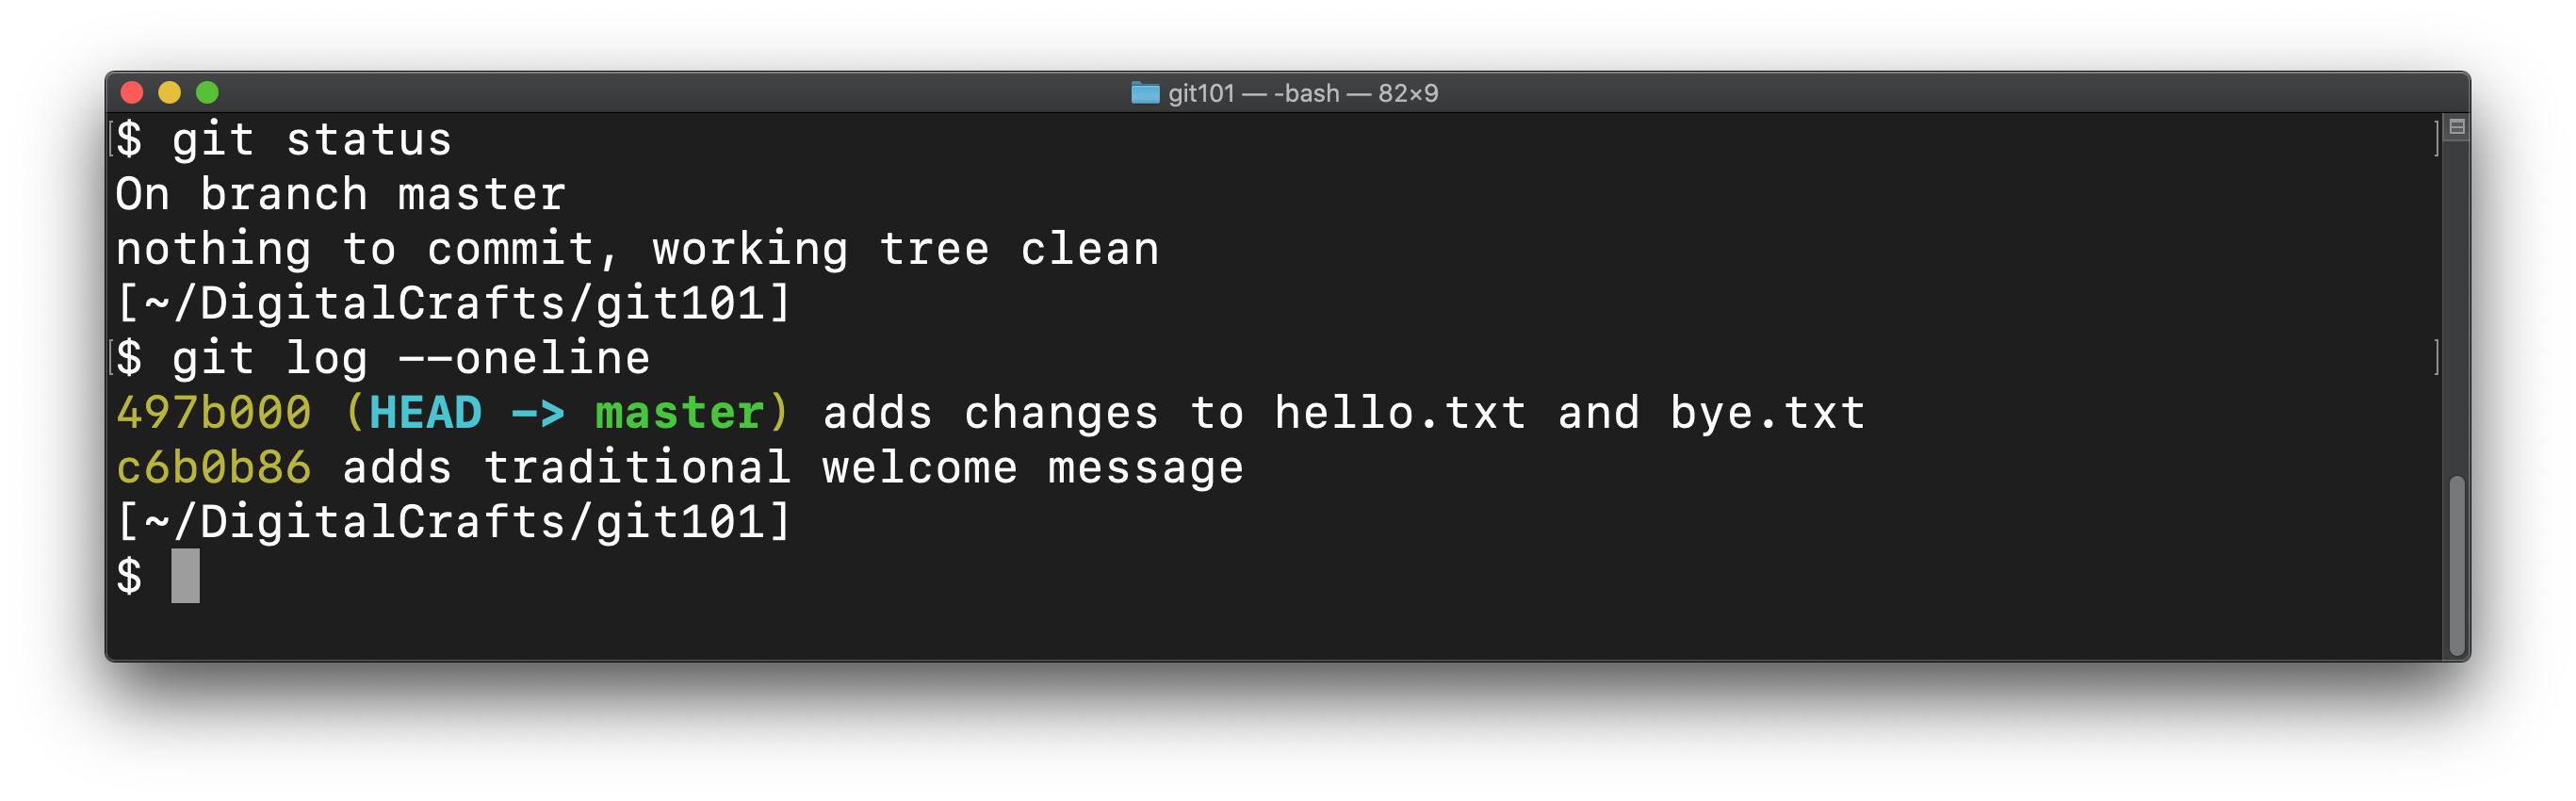
Our commits, visually:
The stash keeps changes for later
By using git stash we aren't really throwing away our changes.
Instead, git records the current state of the working tree and changes your files back to their previous state.
If we want to re-apply those changes to our files at a later time, we can run git stash apply.
Destructively resetting
We've shown you a safer (though more complicated) way of using git reset. It gives you a chance to retrieve your changes from the stash in case you've made a mistake.
The destructive version of our reset is the command git reset --hard 497b000
This immediately applies the changes to our files without giving us the opportunity to review or stash them. Use with caution.
The staging area
When you git add a file path, git moves the file path to "the staging area" - that is, the list of file paths to be included in the next commit.
It is more formally known as the index, but it might be useful to think of it as a staging area or a waiting room.
If you accidentally add a path to the staging area, you can unstage it using git reset hello.txt.
# Using branches
The ability to go back to a different revision of your code is a huge win for a developer. But git also gives you the ability to switch between entirely different versions of our code.
These versions of your code are known as branches. You can view the available branches using the following command:
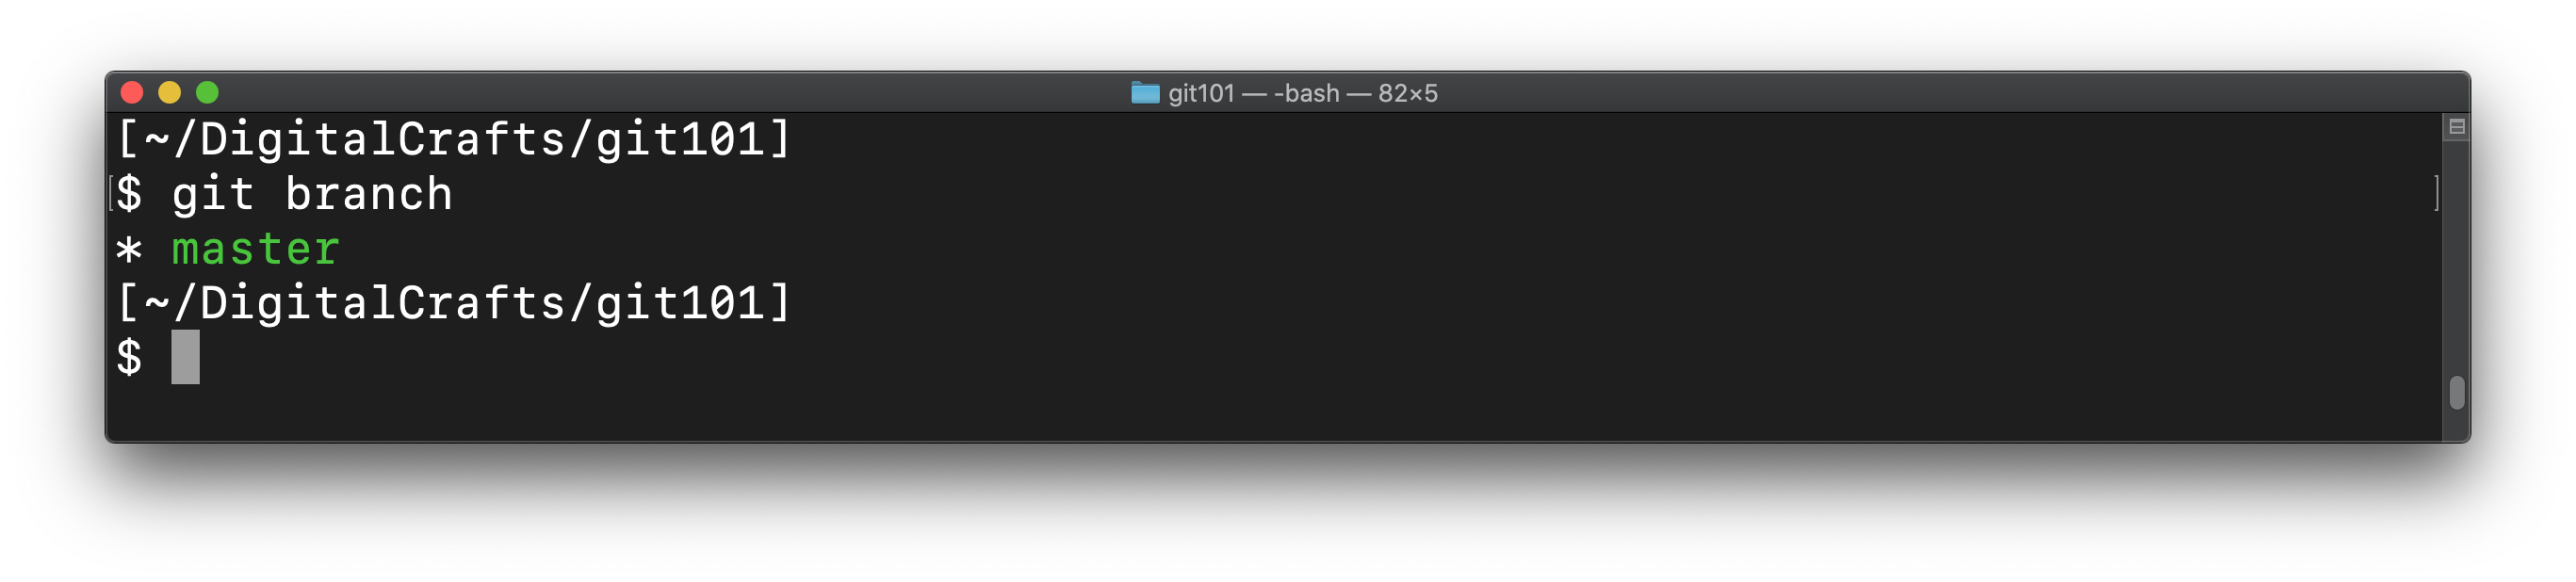
git branch
At the moment, our repo only has a single branch, whose default name is master:
To create a new branch, run git branch again, but provide it with the name of the branch you'd like to create:
git branch digitalcrafts/experiment
In this example, we create the new branch with the name digitalcrafts/experiment.
Branch naming
It is a common practice to prefix your branch name with your name. This help identify branches when you are working on a project with other developers.
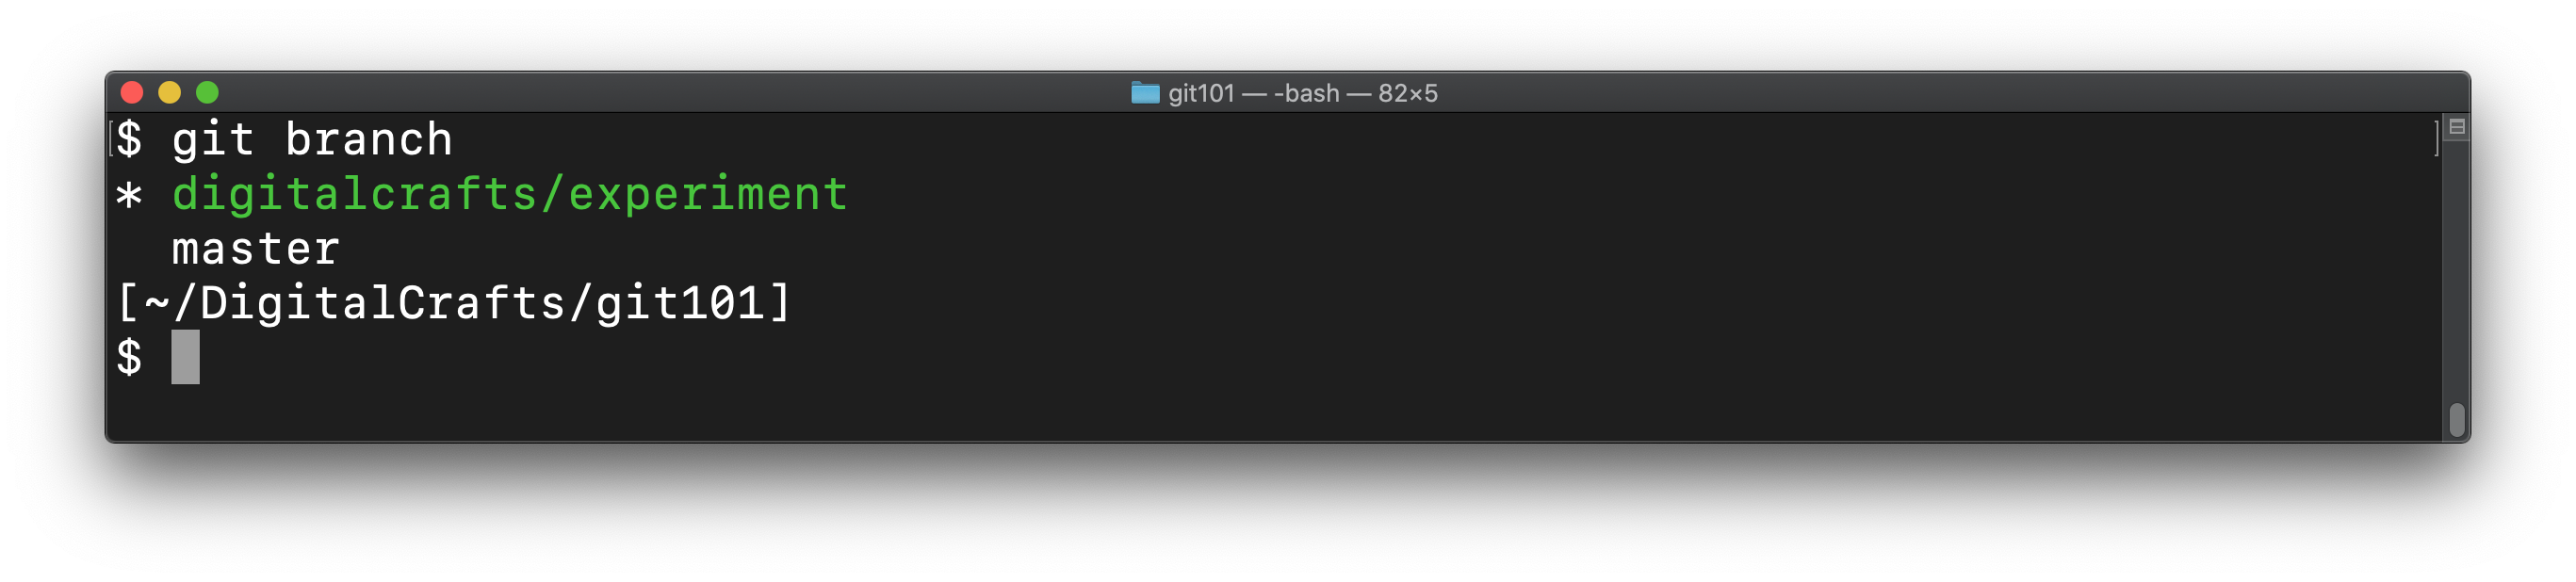
Running git branch again shows our new branch:
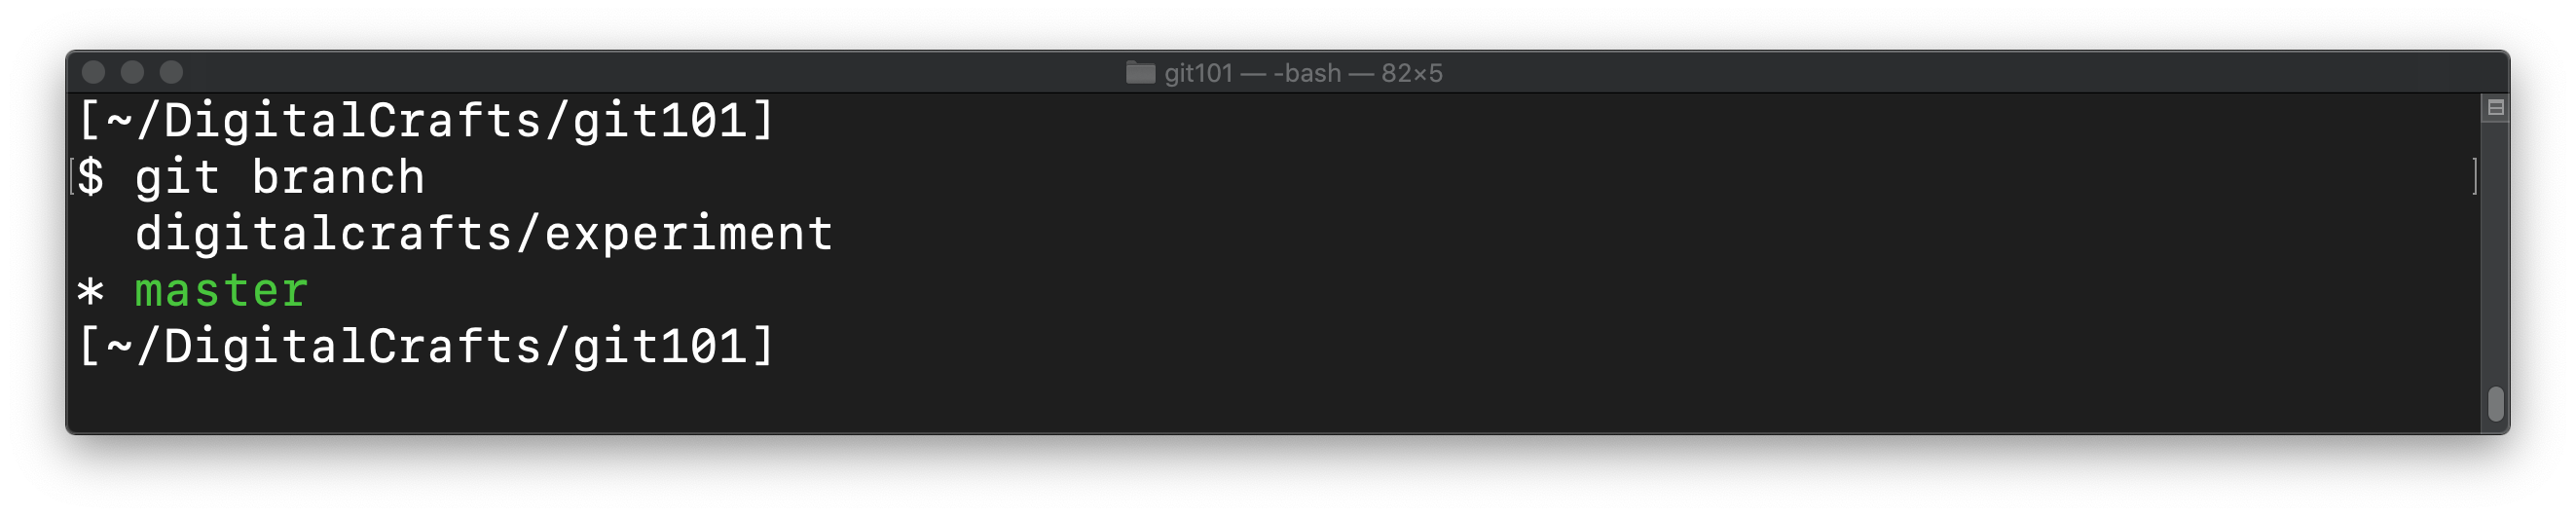
To use our new branch, run git checkout and provide the branch name:
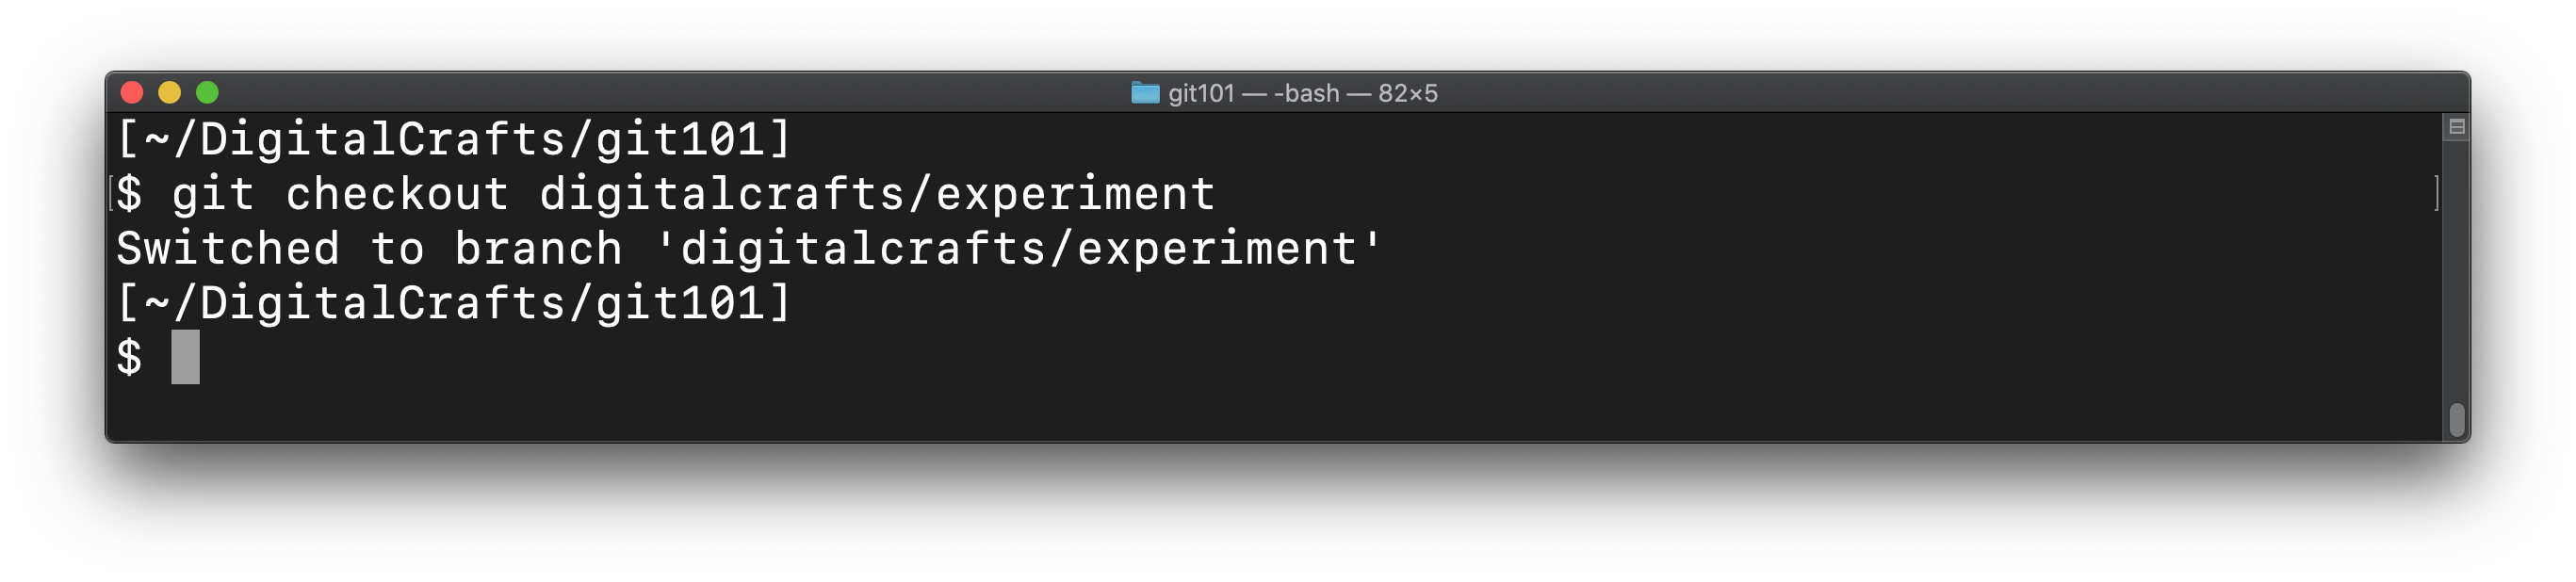
git branch now shows that we are "on" our new branch:
A diagram of our commits would show two branches, but they have the exact same commits:

# Committing changes to your branch
You can change your code and commit the changes, just as you did before. But the commits will only affect the current branch.
To demonstrate, we'll add two commits: one that changes bye.txt and one that creates a new file hello-again.txt.
echo "farewell" >> bye.txt
git commit -am "adds additional text to bye.txt"
echo "oh hey I didn't see you there" >> hello-again.txt
git add hello-again.txt
git commit -m "creates additional greeting file"
2
3
4
5
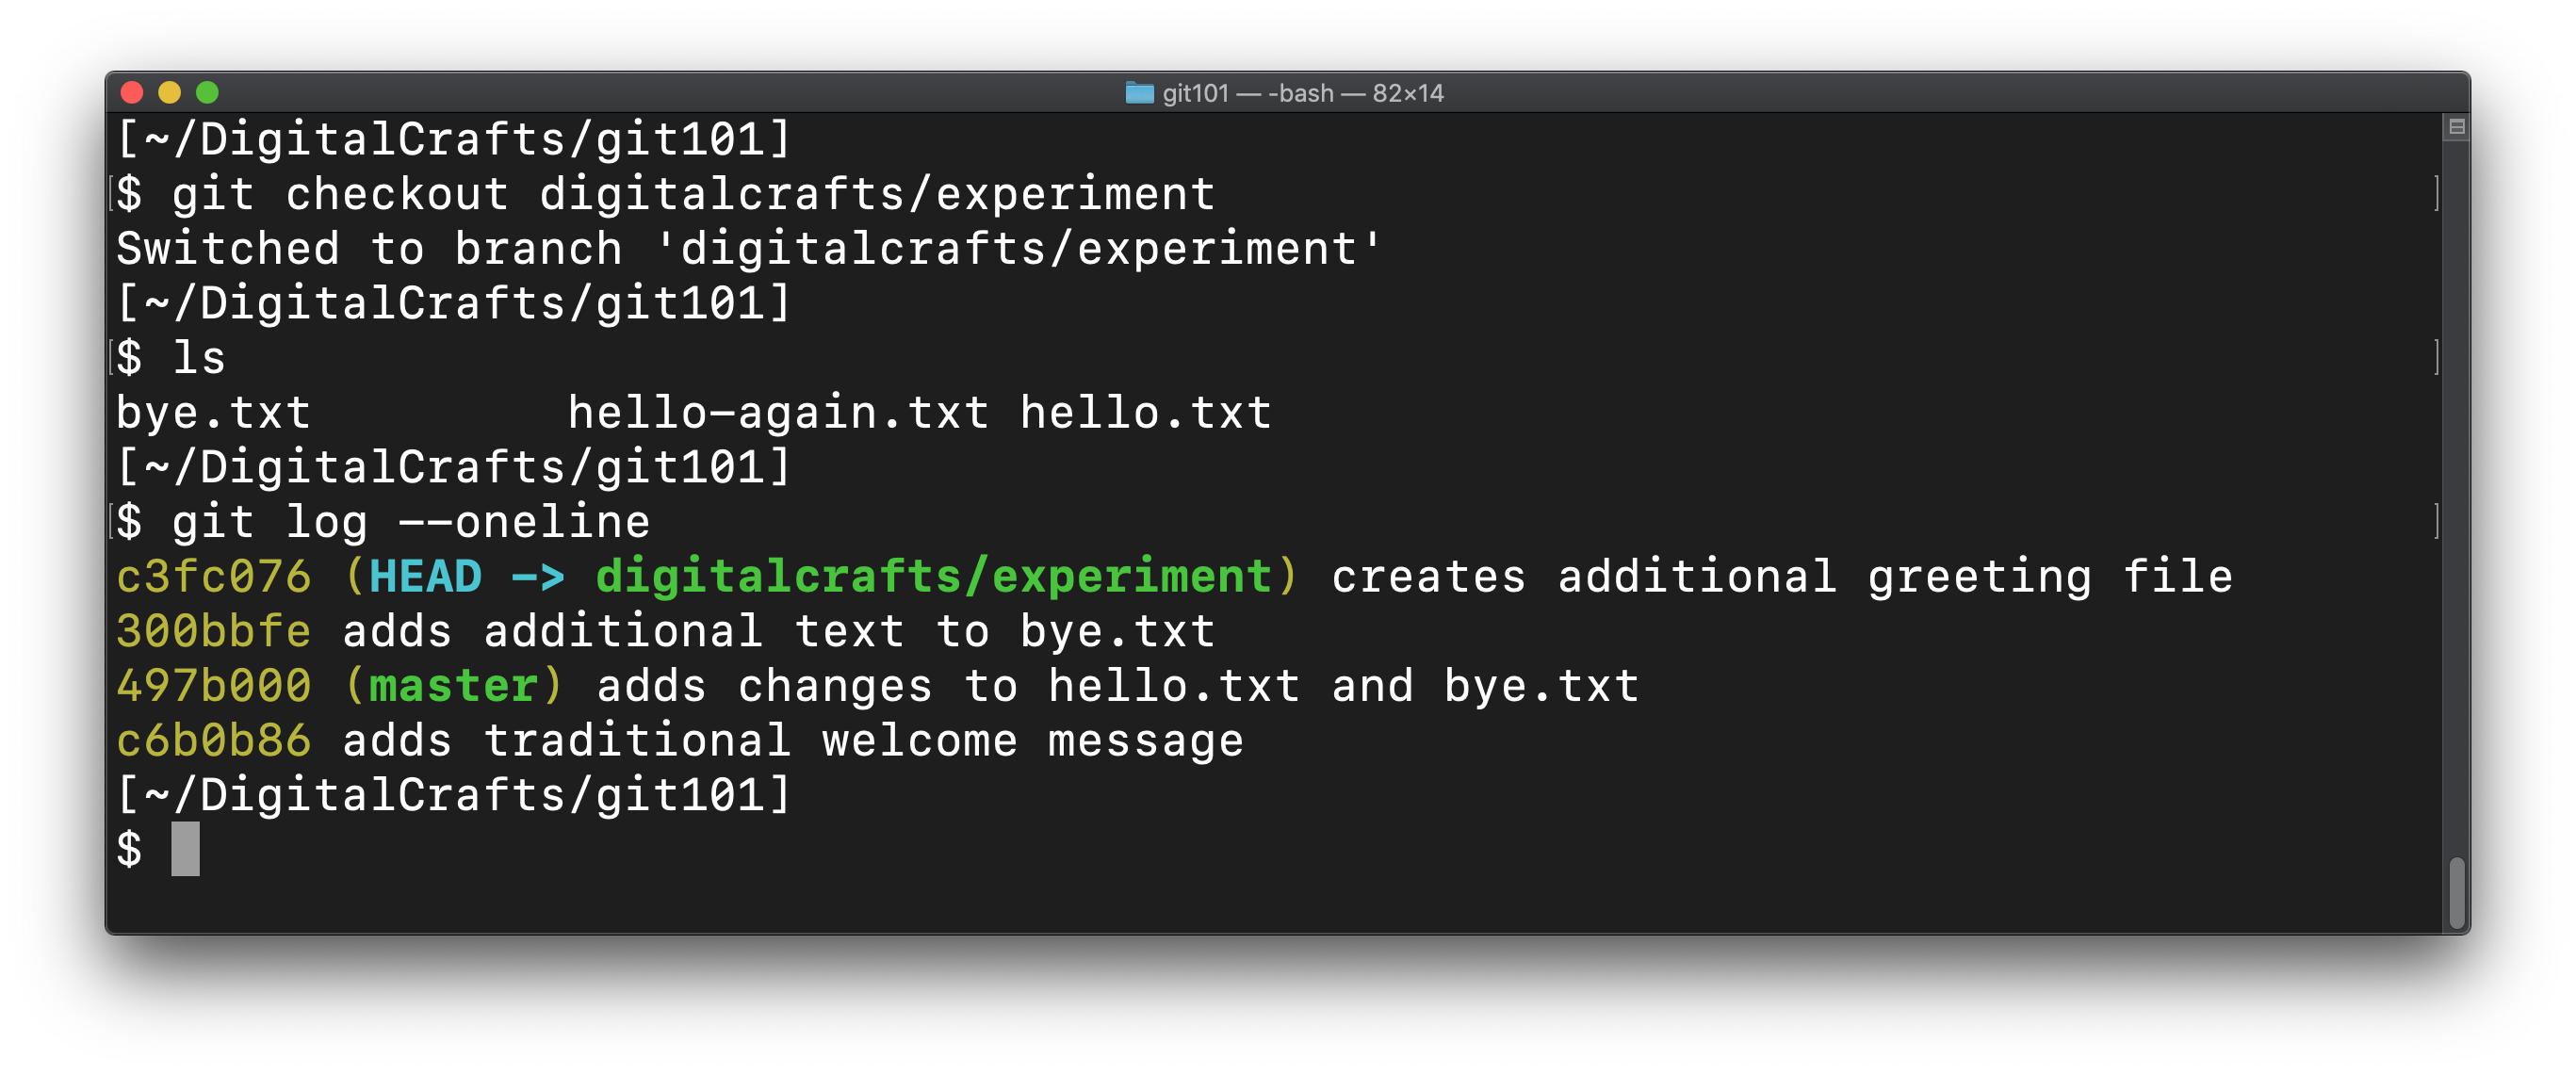
View the log and confirm that the two new commits exist:
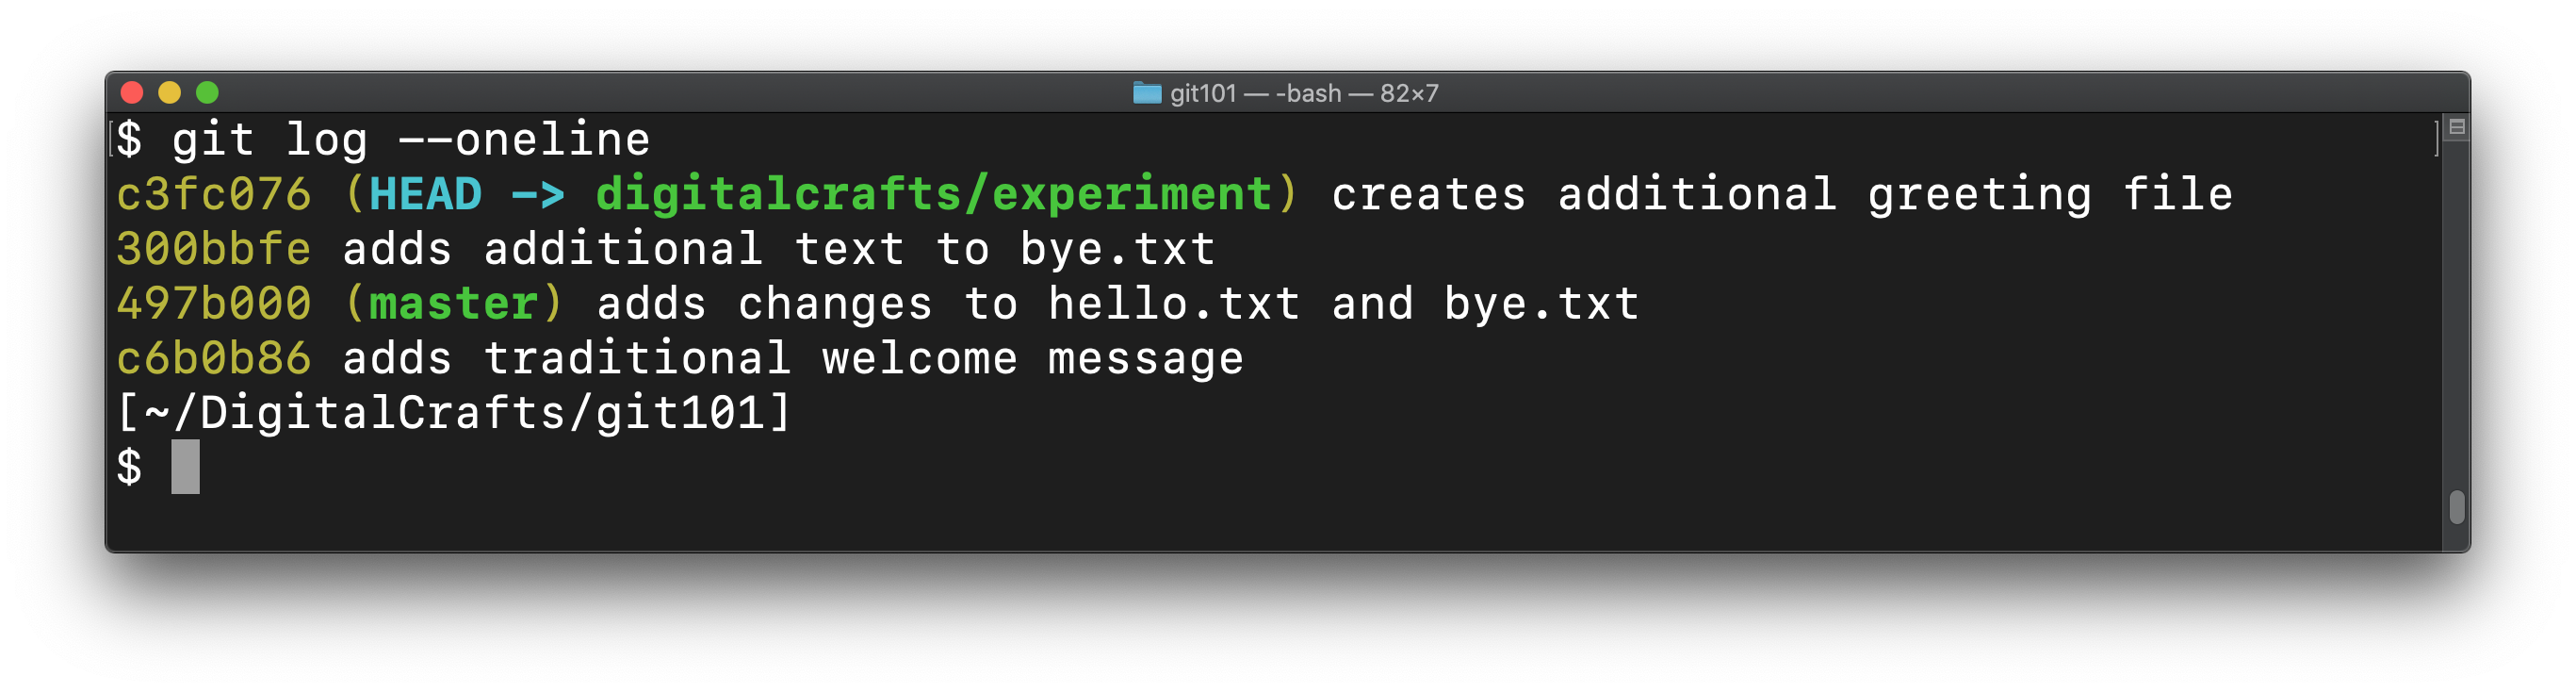
A visualization of the log shows that digitalcrafts/experiment has four commits in total. The first two commits are the same ones that live on the master branch:
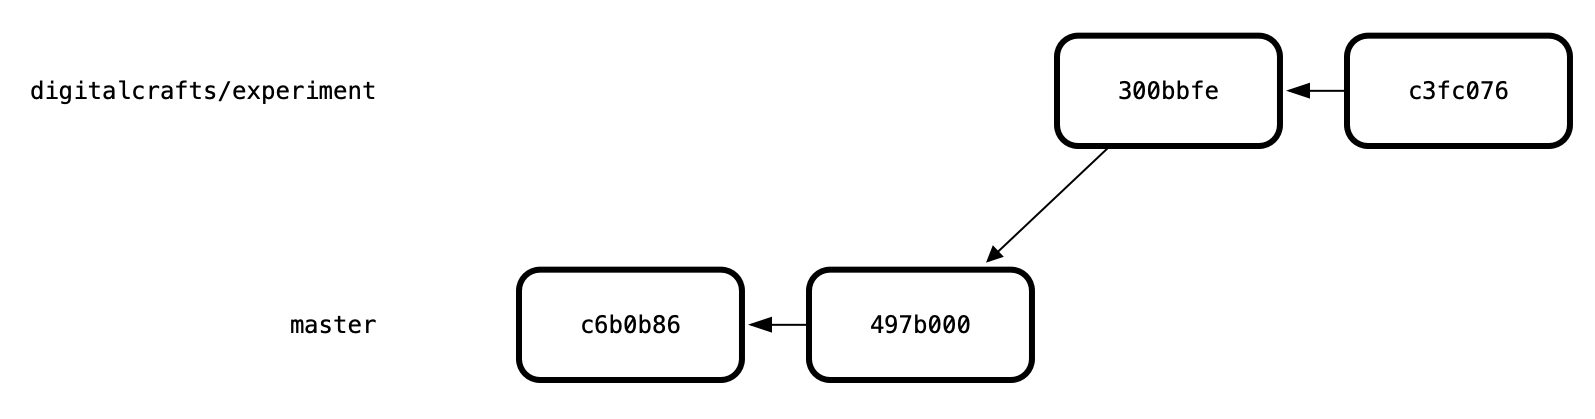
In theory, that makes sense, but how can you confirm that these changes are isolated to your experimental branch?
# Switching back to the master branch
Earlier, you changed from master to digitalcrafts/experiment using the git checkout command. You can use git checkout to return to the master branch:
git checkout master
You can use git branch confirm that you have successfully switched back to master:
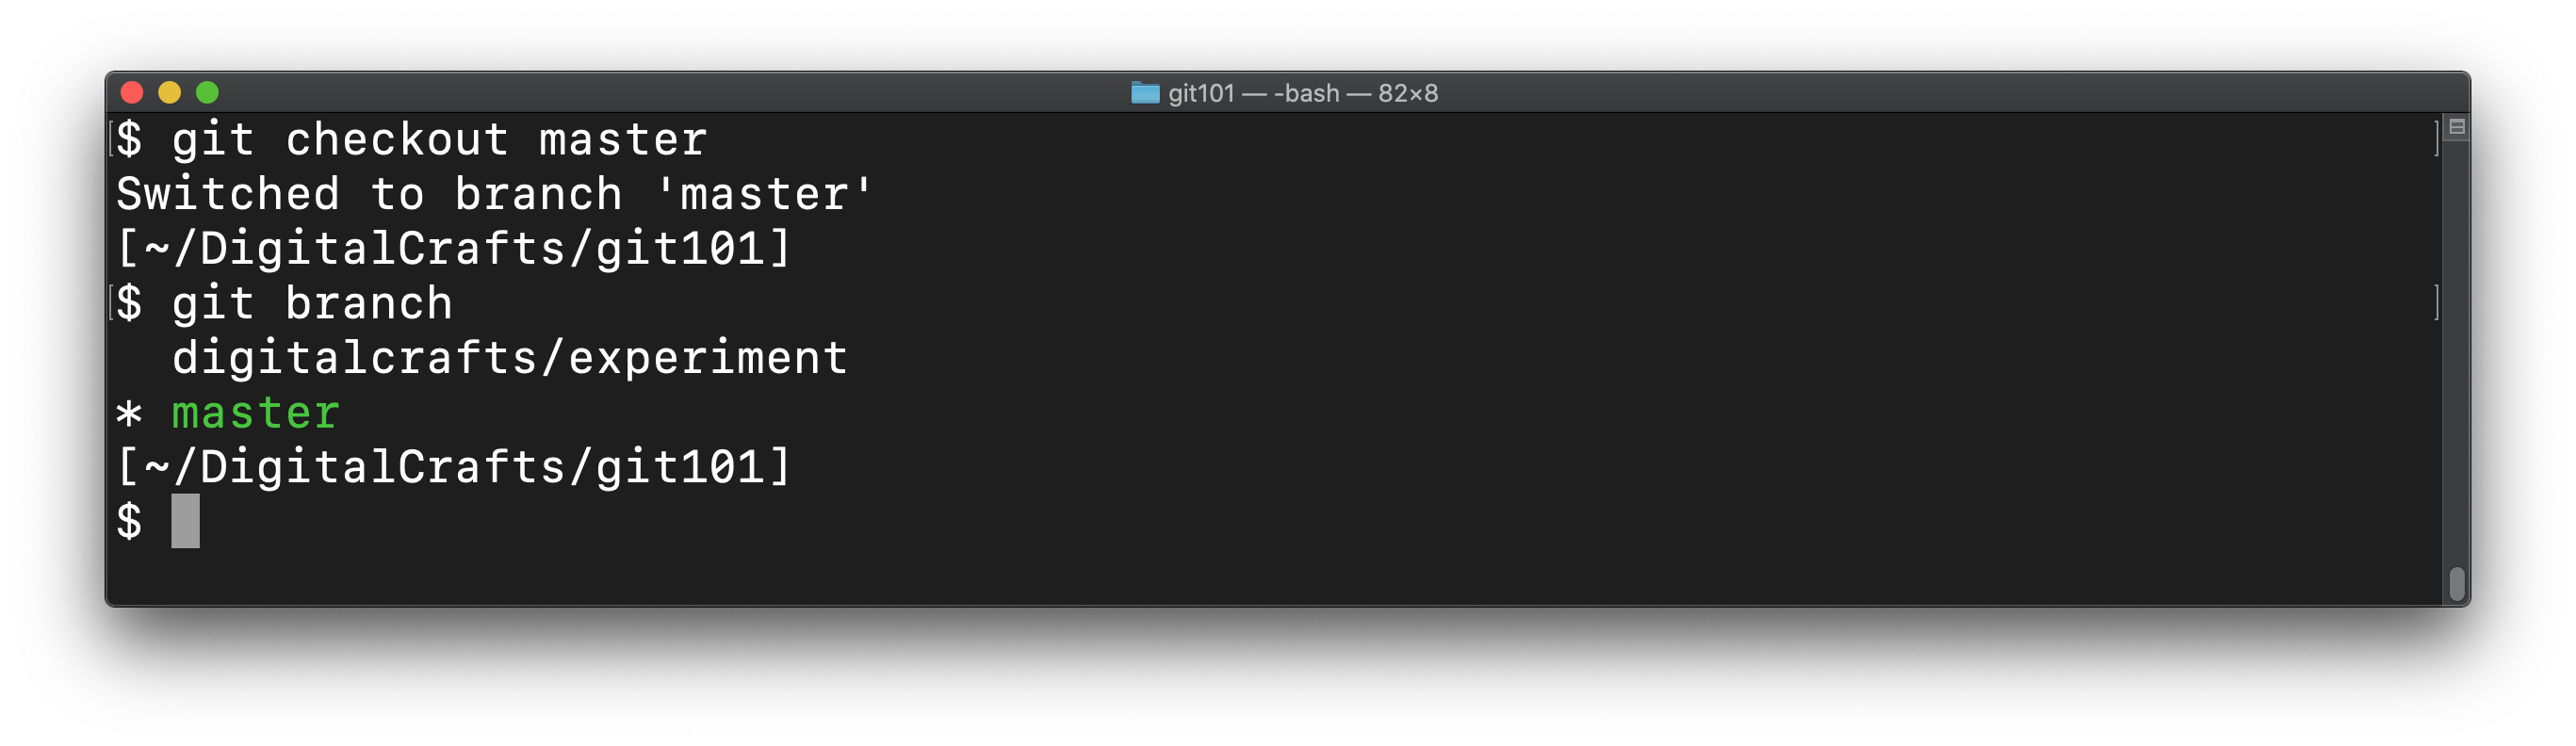
Run ls and cat to confirm that the files are in the same state as before:
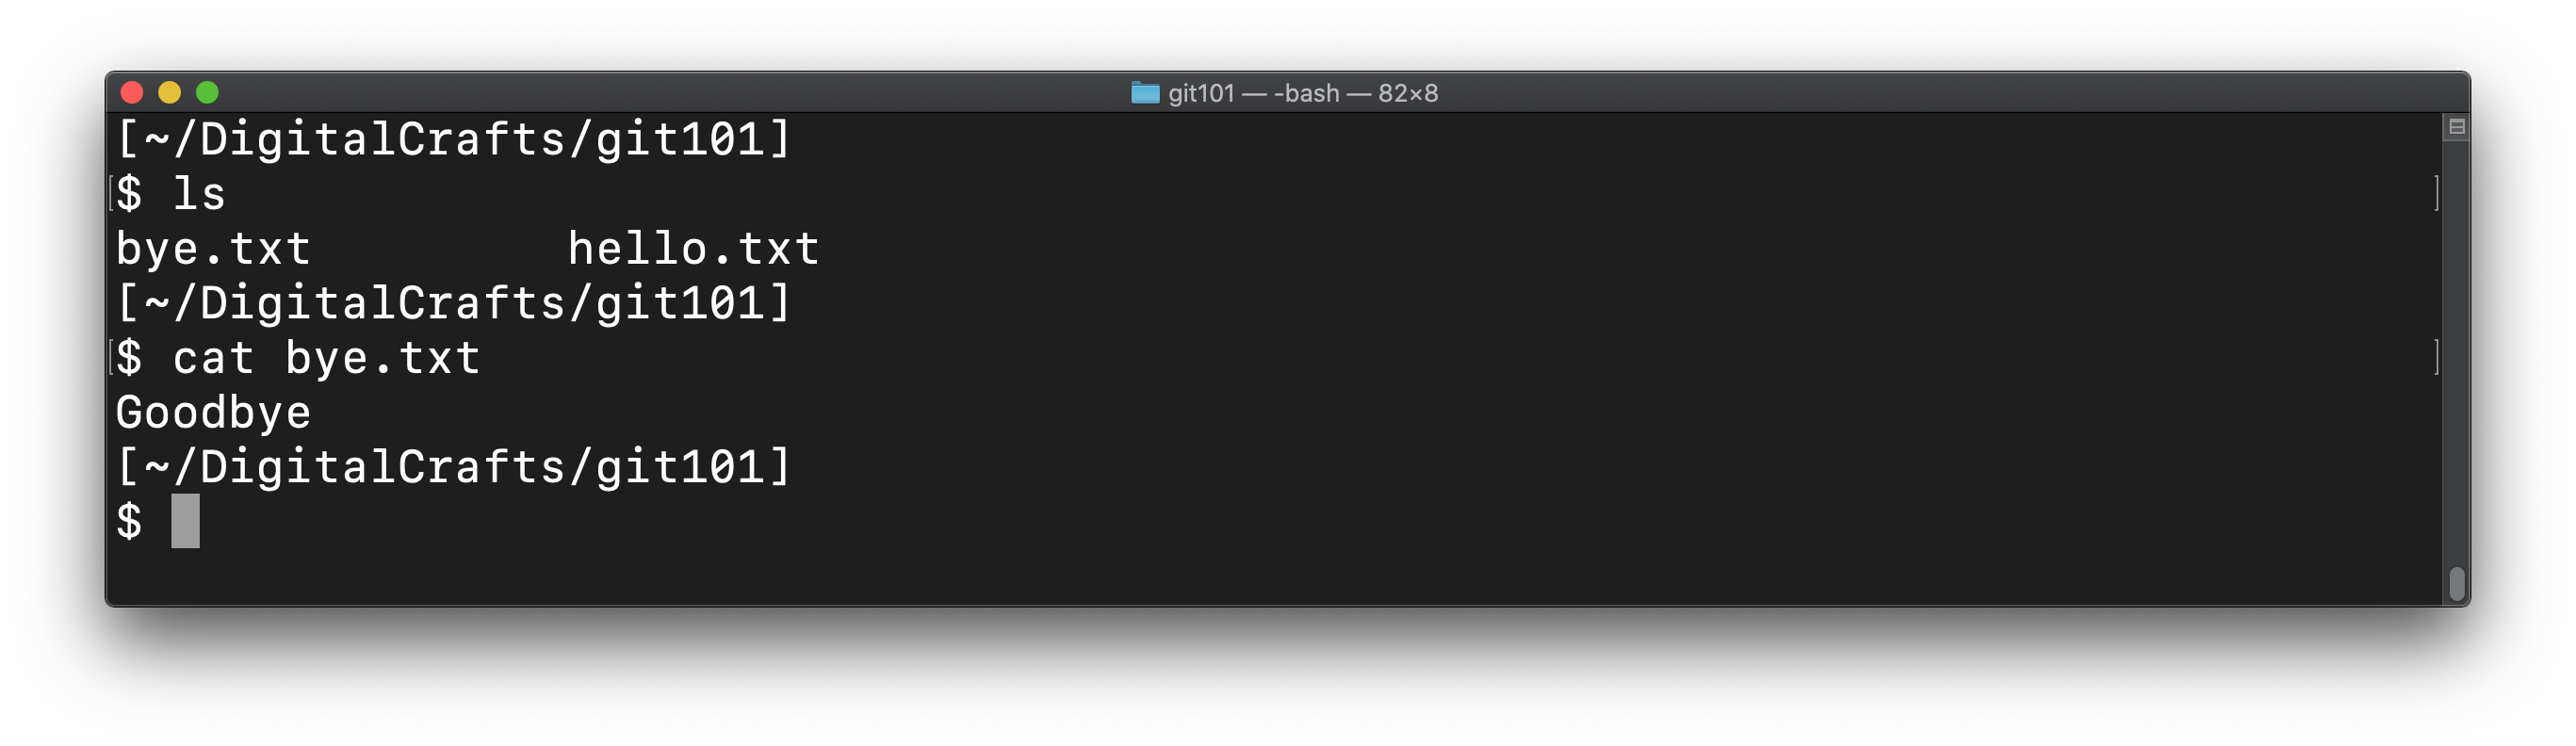
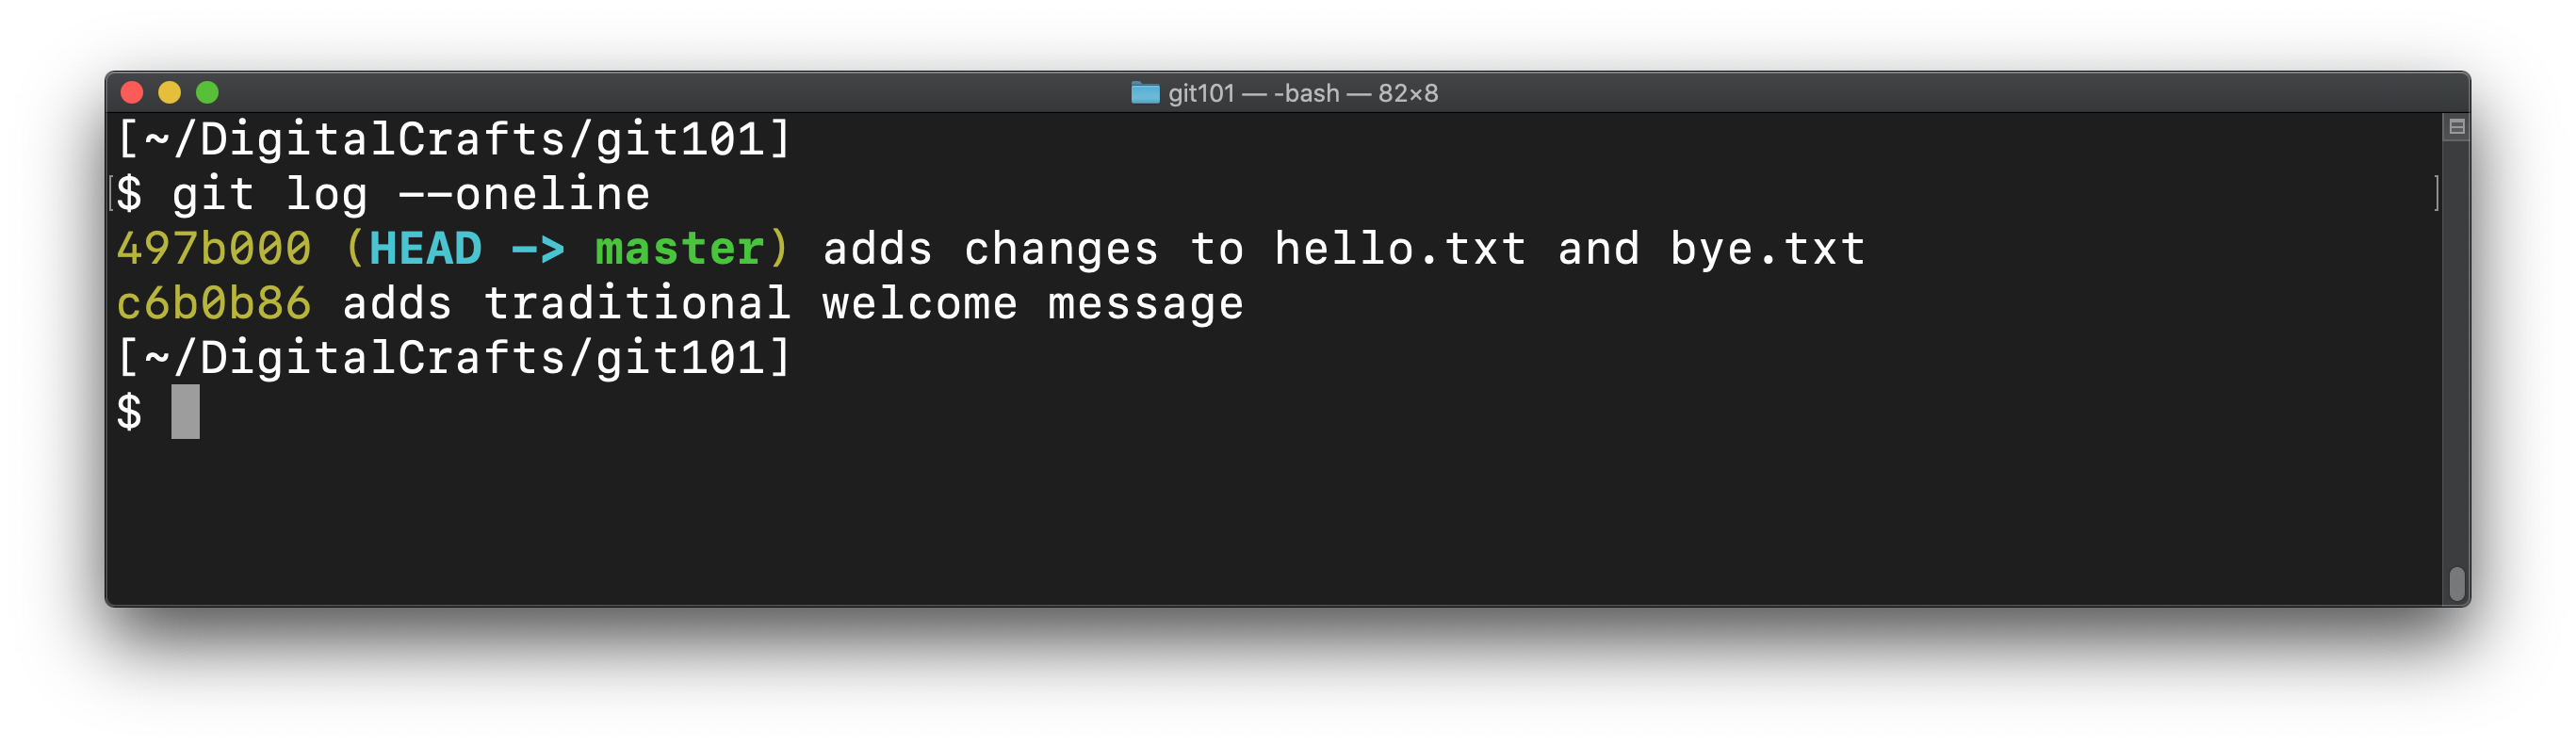
When you switch to the master branch, the files on the hard drive are changed to match the last commit on the master branch. Using git log --oneline shows that HEAD is pointing to the last commit before we created digitalcrafts/experiment:
When you switch back to your feature branch, git will change the files to match:
This is one way that git manages versions of your code. You can literally have different copies of the same code and switch between them.
The working tree
In git terminology, the files and directories in your repo are known collectively as the working tree
When you move the HEAD to a specific commit using git reset or you switch to a branch using git checkout, git will update the contents of the working tree to match.
Ideally, you will use branches to isolate changes to your code, whether you are implementing a new feature or fixing a bug. When you are ready to incorporate those changes into master by merging the commits.
# Merging
To copy the new commits from digitalcrafts/experiment to master, do the following:
git checkout master
git merge digitalcrafts/experimetn
2
Running these two commands should show the following:
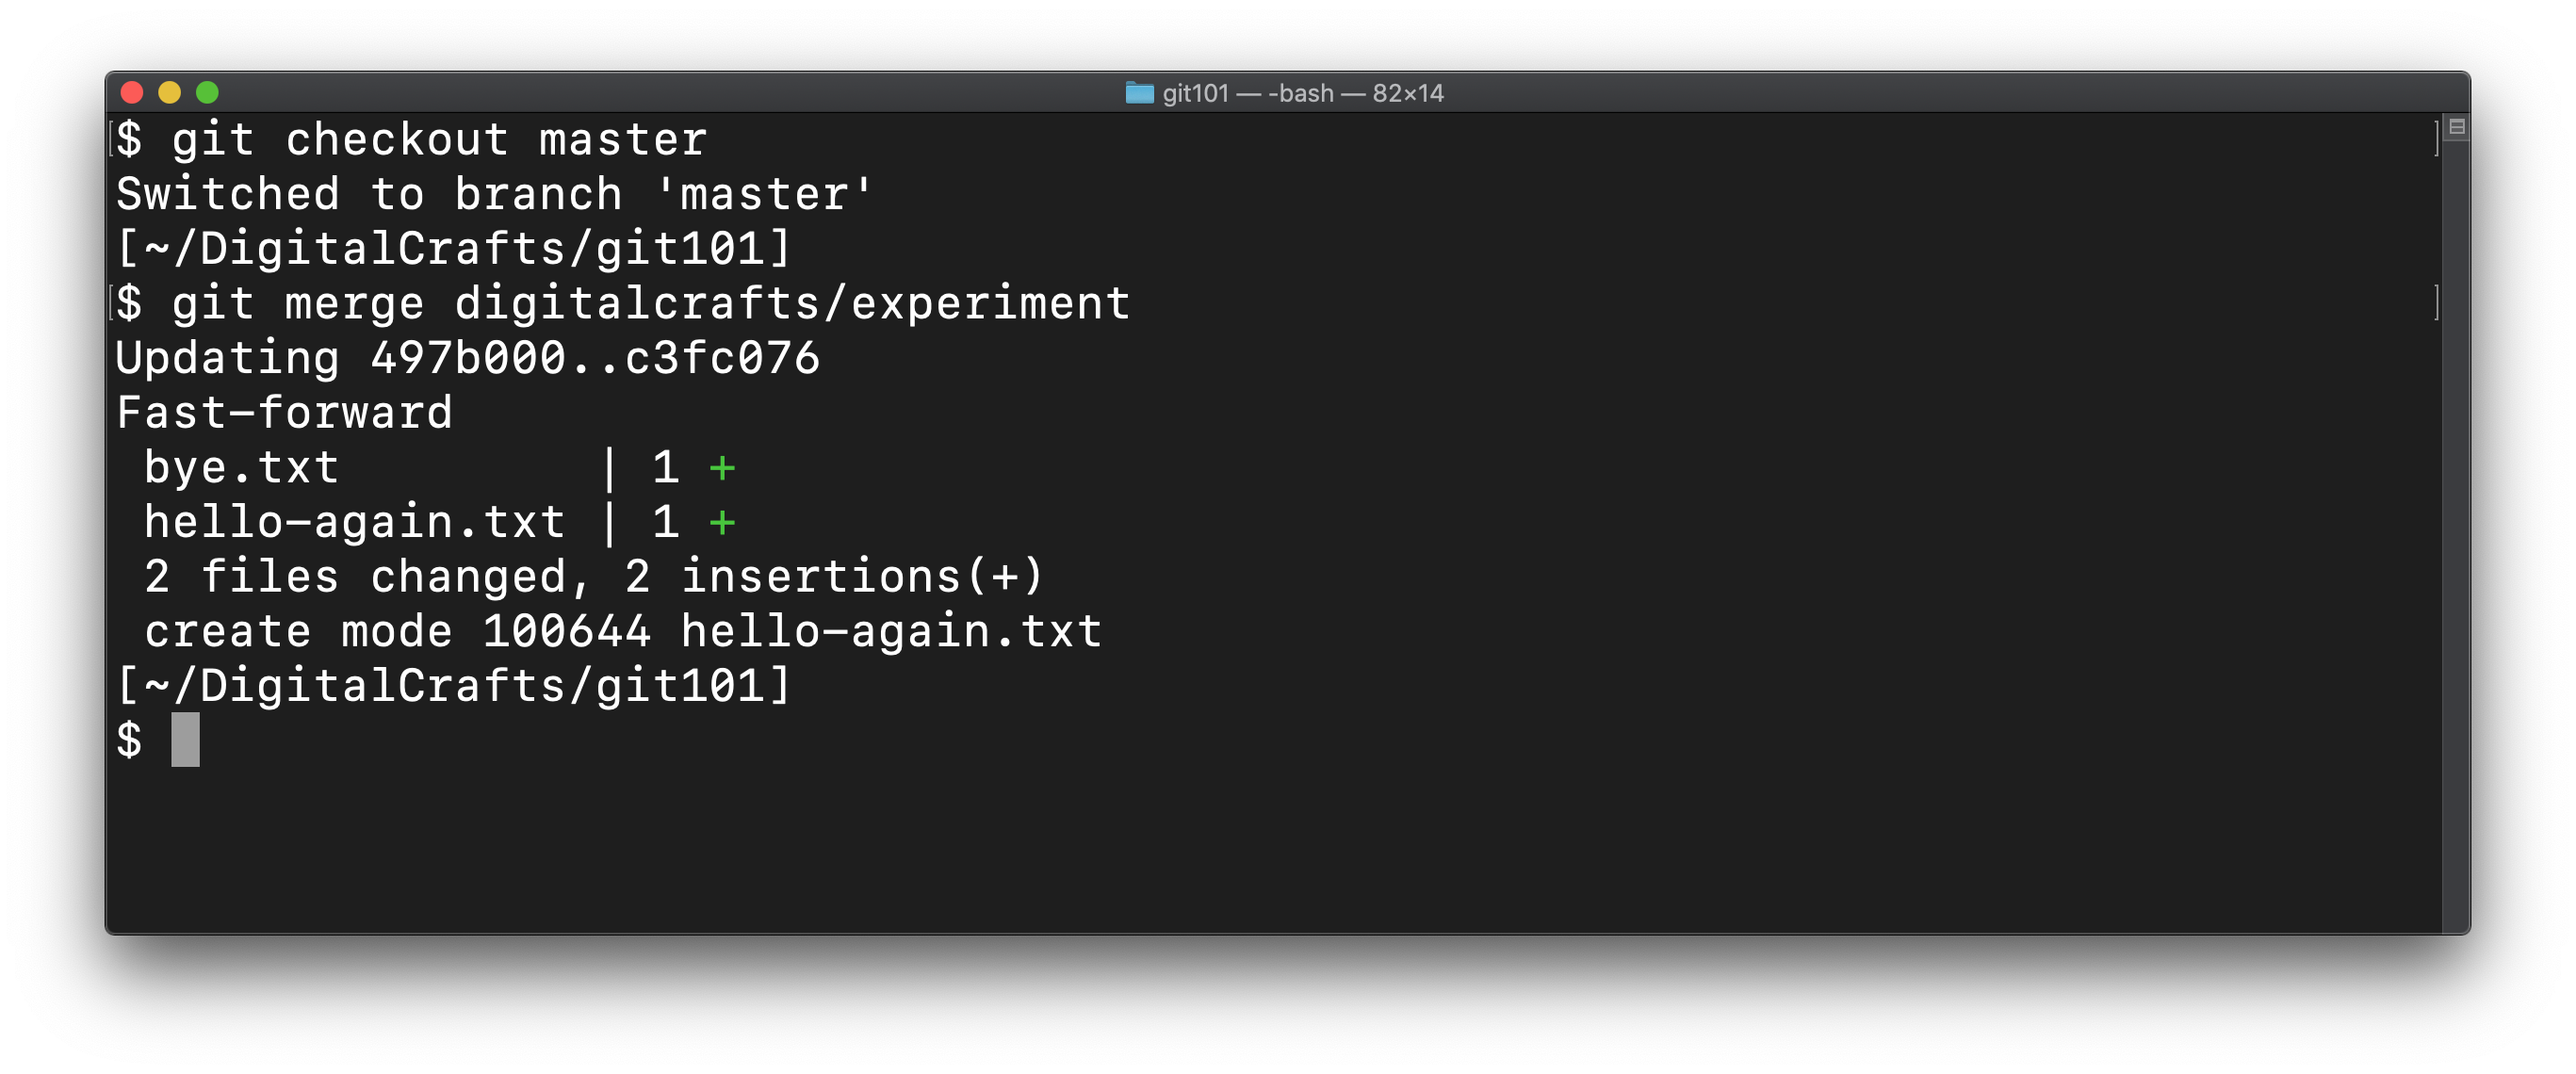
This kind of merge is known as a fast-foward. This is ideal, in that git only has to copy the commits and then apply the changes to the working tree.
Checking the directory with ls and viewing the git log shows that master has been updated:
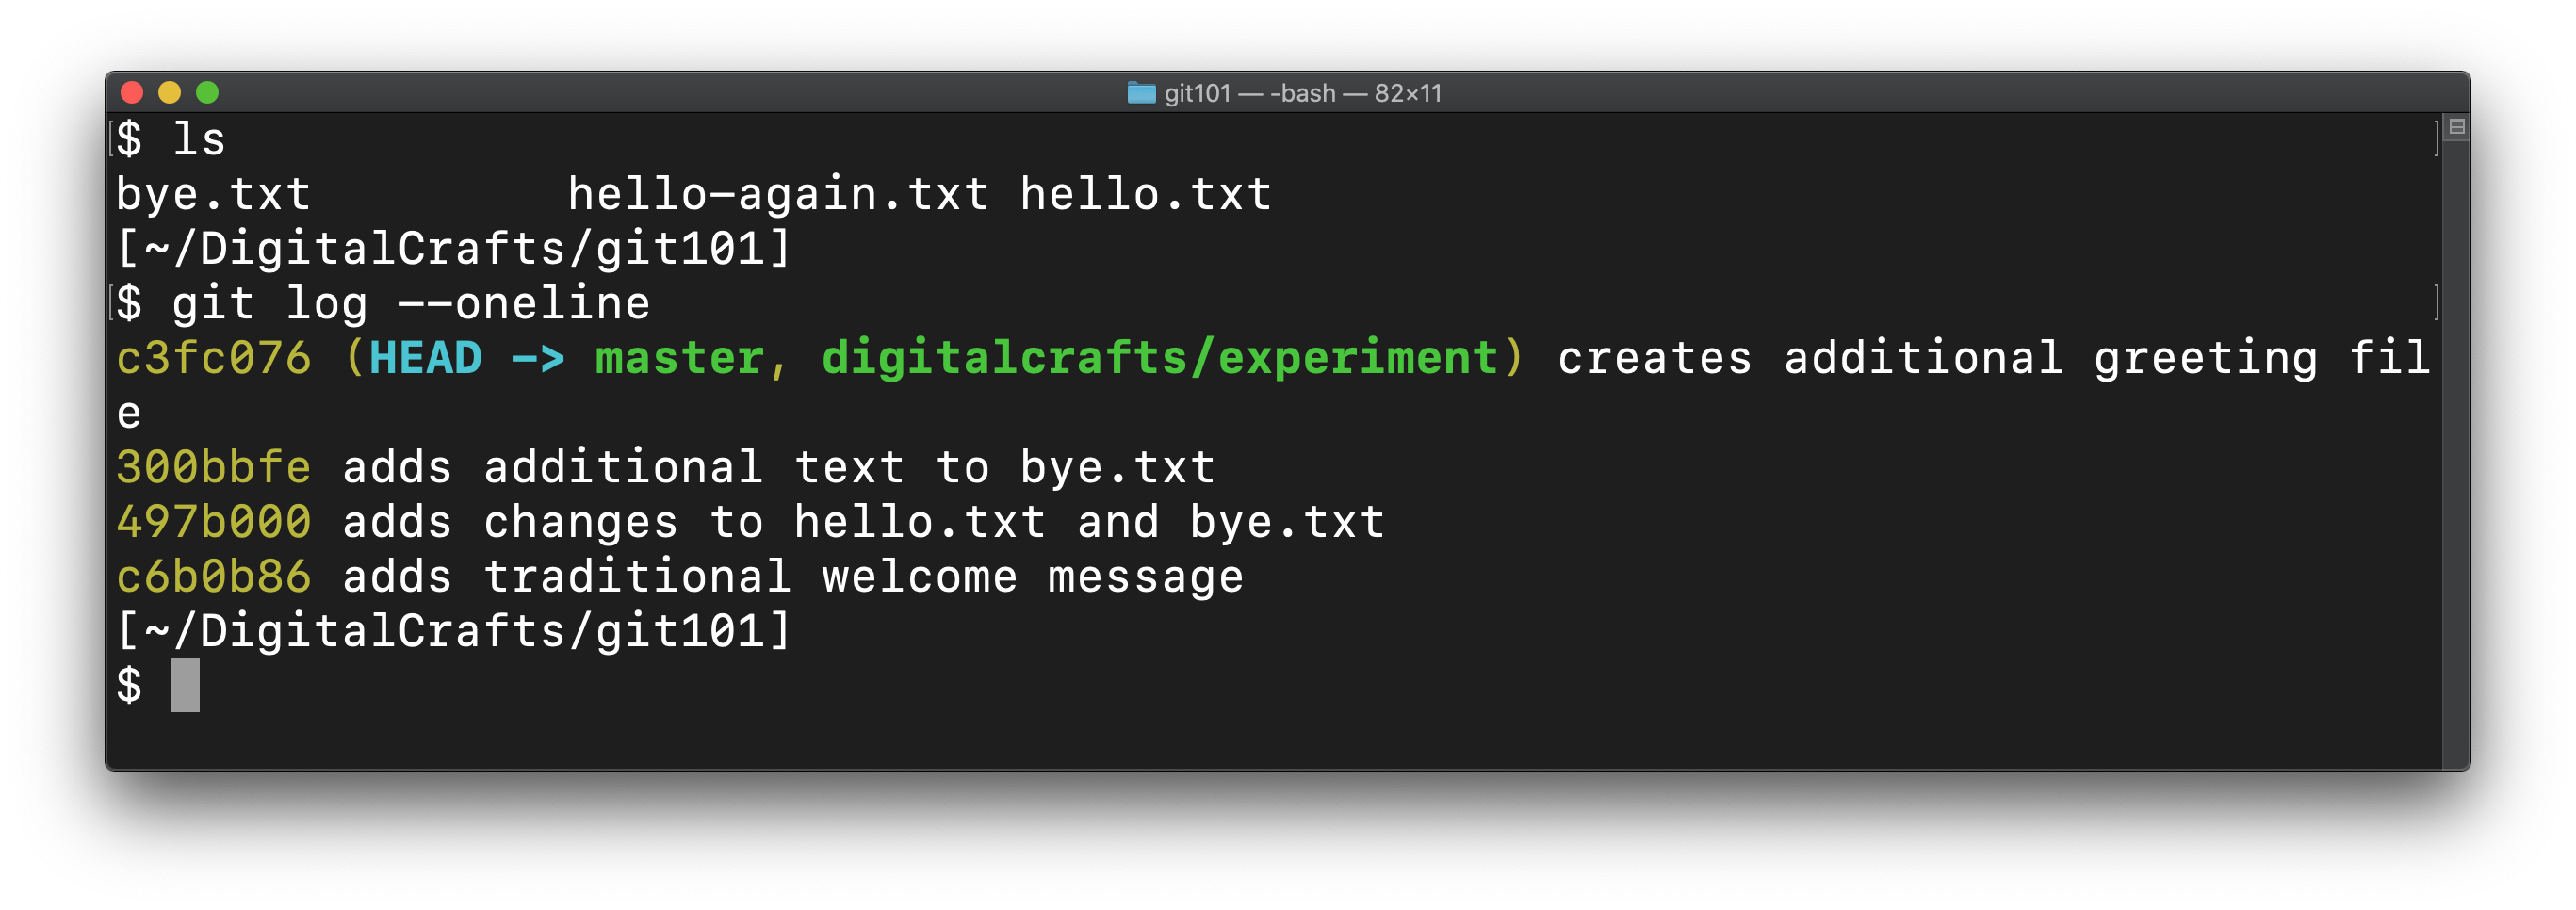
After merging, both branches contain the same commits:

Sometimes a fast-forward isn't possible. git will determine whether it can simply apply the new commits, or if there are conflicting changes.
# Resolving conflicts
As a demonstration, we'll make a new commit to master and a new commit to digitalcrafts/experiment. In each commit, we'll make different changes to hello.txt.
First, make the changes to master:
# Using a single ">" which completely overwrites hello.txt
echo "this is a change from master" > hello.txt
git commit -am "replaces contents of hello.txt"
2
3
Then, checkout the digitalcrafts/experiment branch and make different changes:
git checkout digitalcrafts/experiment

# Using double ">>" to append to hello.txt
echo "adding new stuff to the file" >> hello.txt
git commit -am "adds to hello.txt"
2
3
4
5
At this point, our two branches have diverged:

Return to master and try to merge digitalcrafts/experiment.
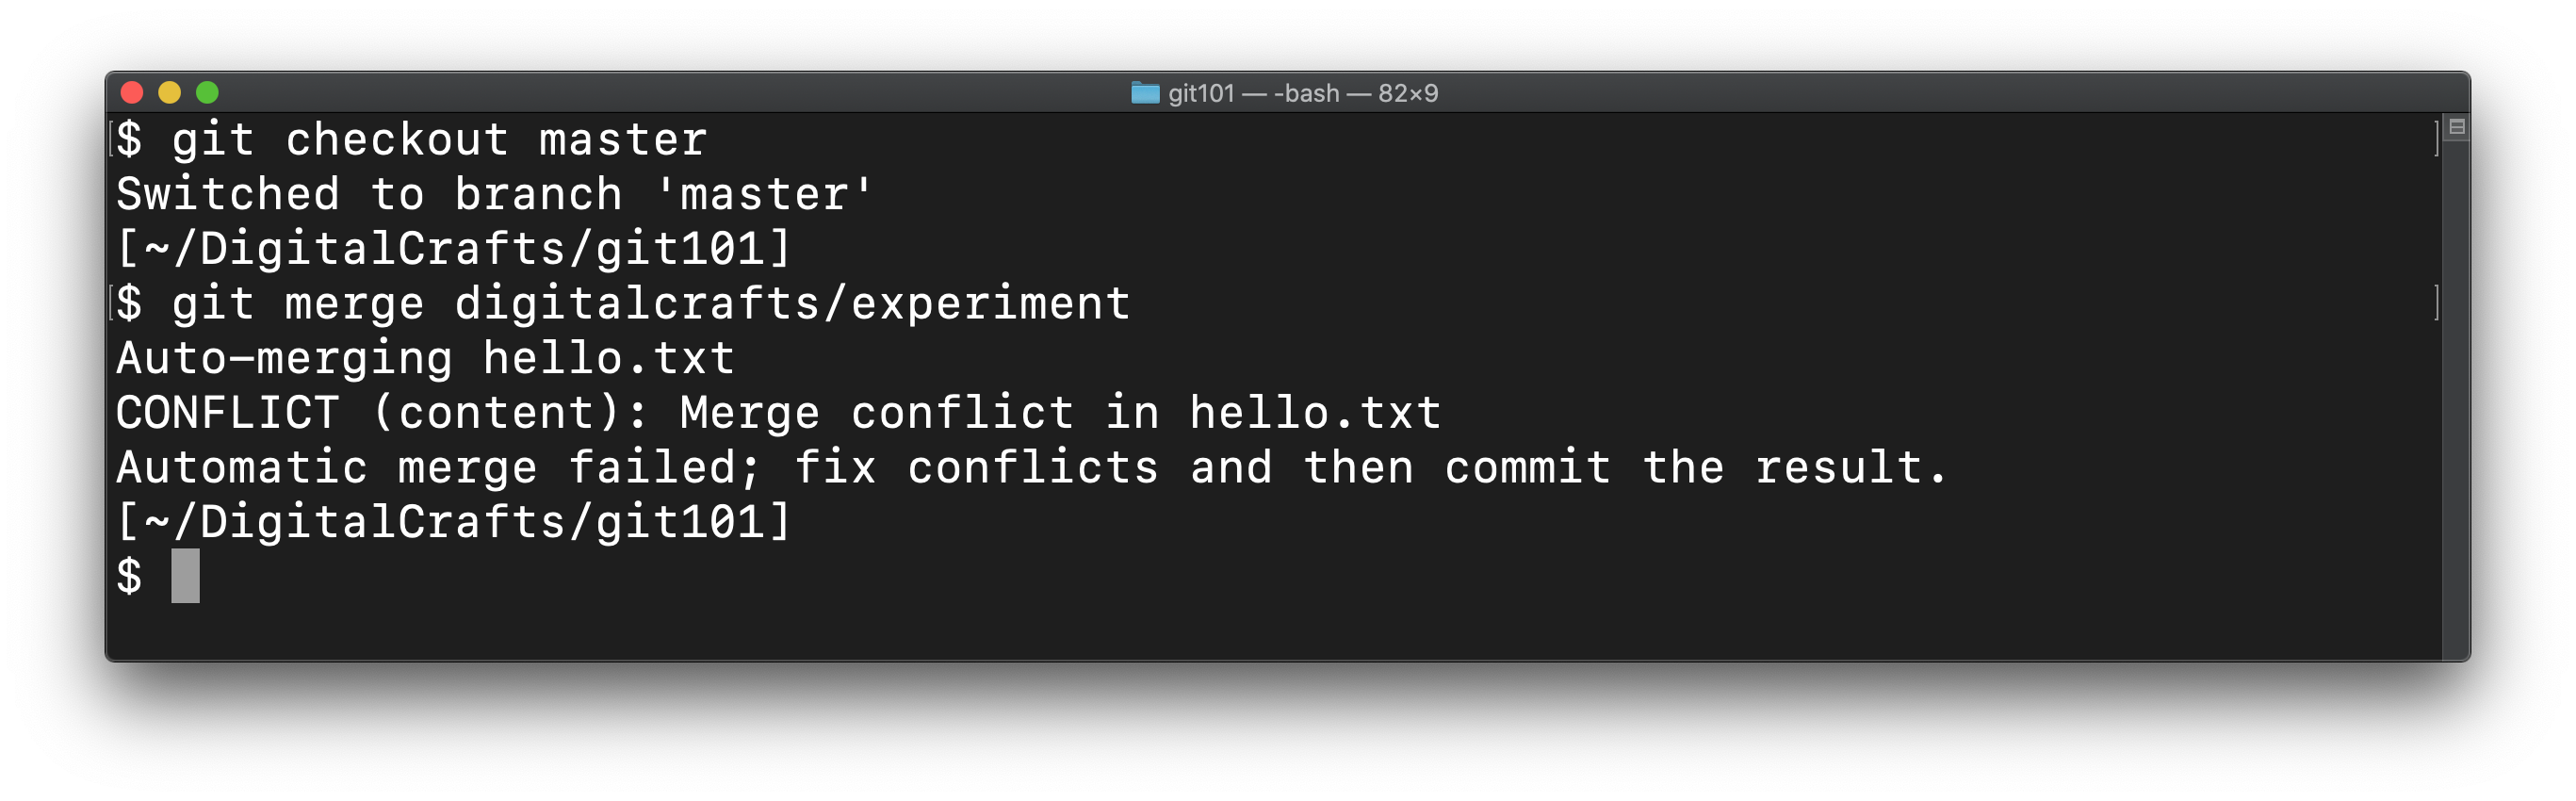
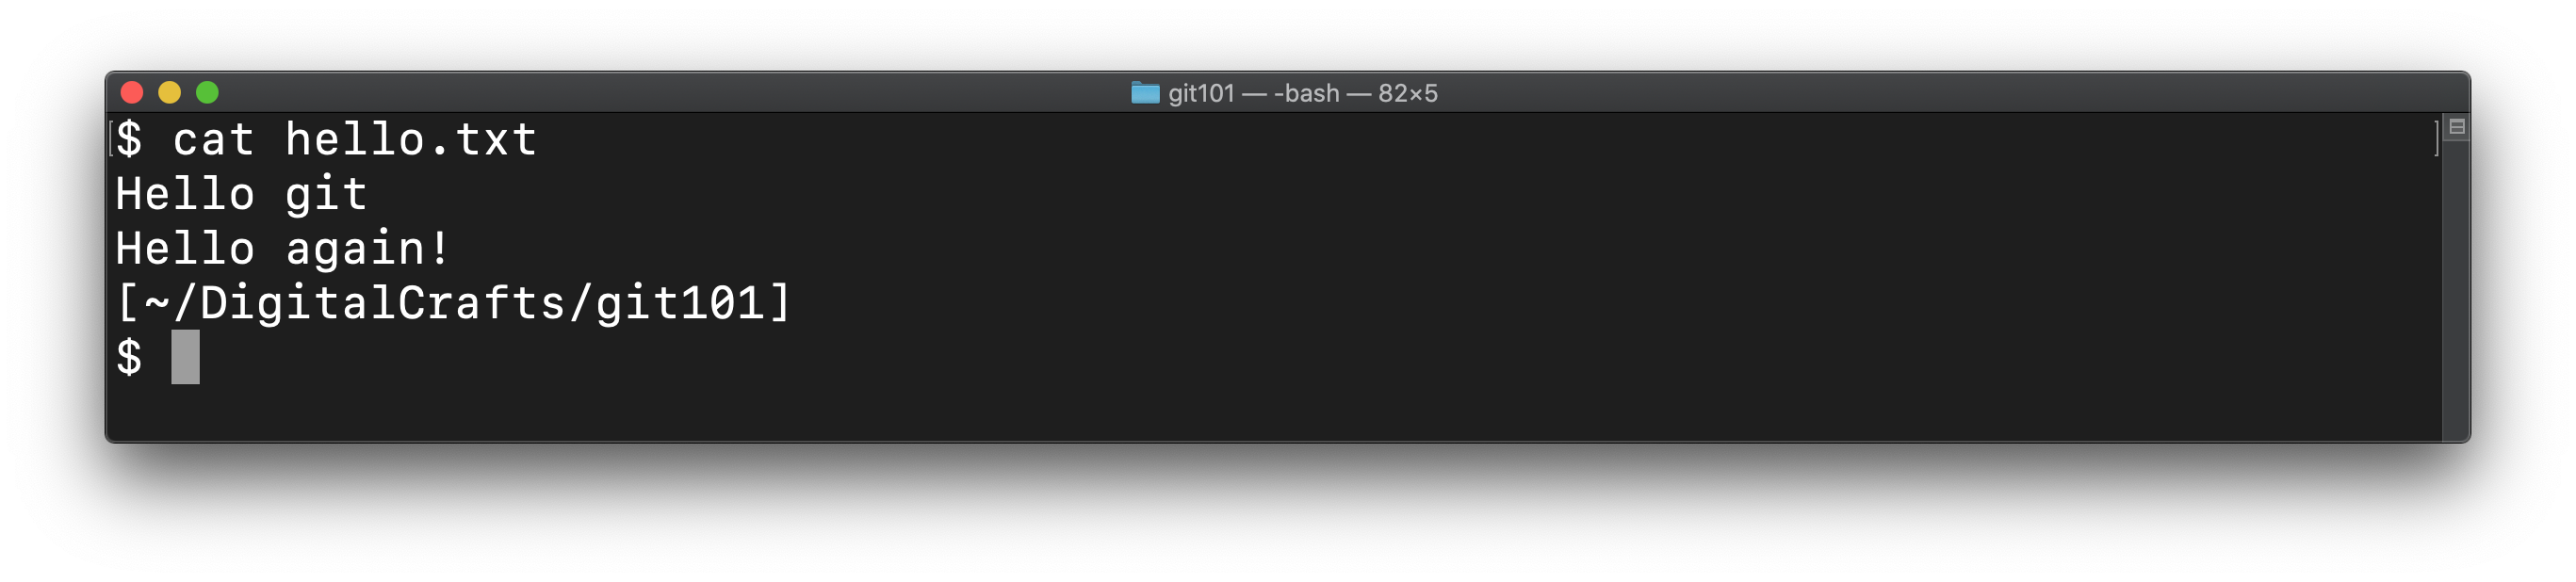
If you cat hello.txt, you'll see the following:
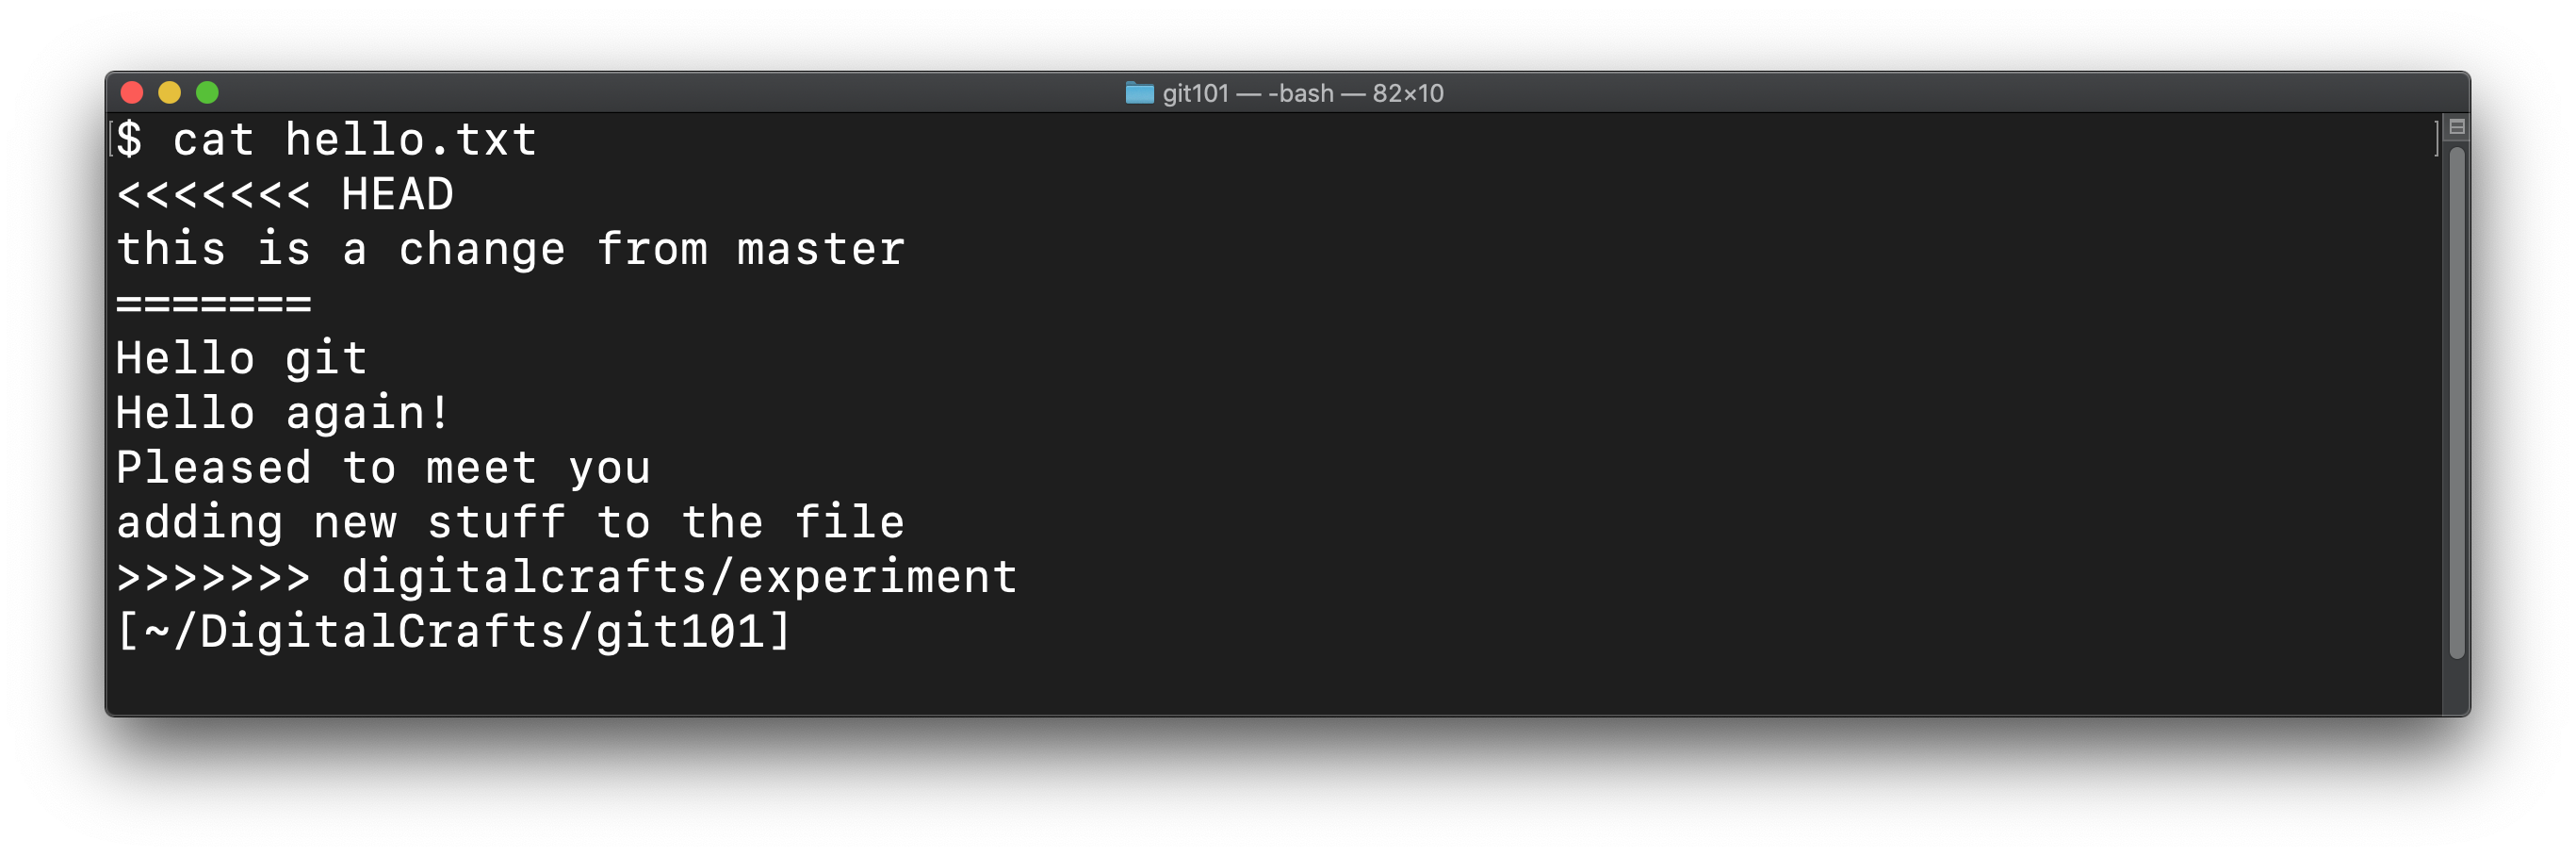
The text <<<<<<< HEAD, =======, and >>>>>>> digitalcrafts/experiment are git's way of indicating what text came from which branch. These are known as code fences.
The lines between <<<<<<< HEAD and ======= are from the master branch.
The lines between ======= and >>>>>>> digitalcrafts/experiment are from the digitalcrafts/experiment branch.
At this point, git wants you to manually edit the file. Remove the lines you do not want, as well as the code fences that git added. In this demontration, we'll keep the first two lines from the digitalcrafts/experiment branch:
The only thing left to do is to git add the changes to hello.txt and then commit those changes:
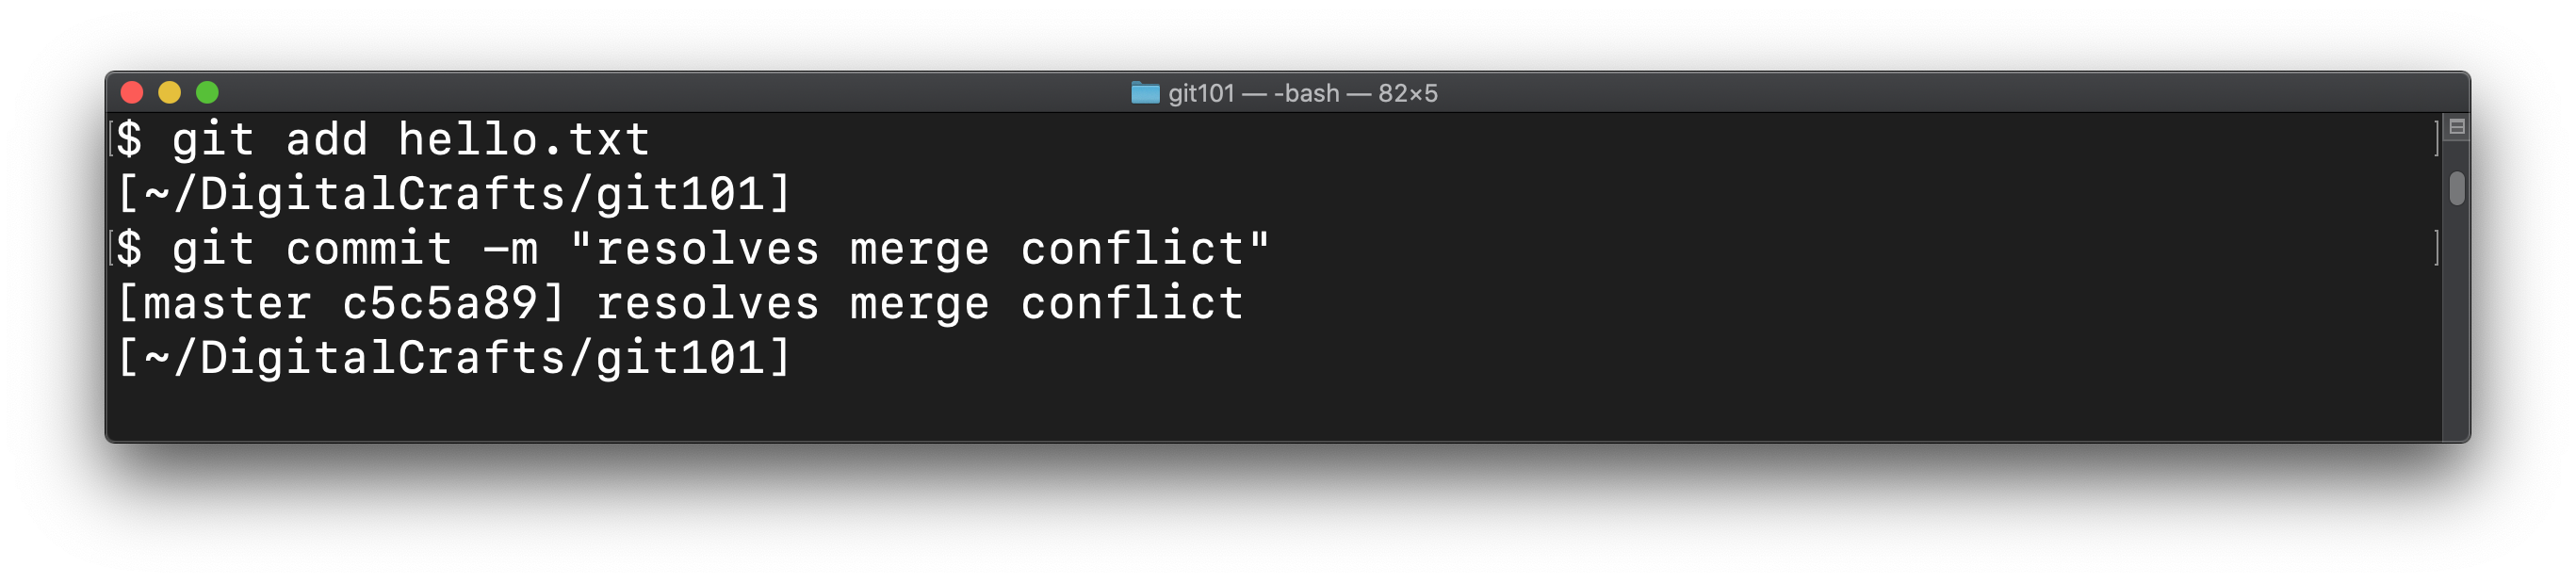
Finally, you can view the log to see that master contains the new commit from digitalcrafts/experiment as well as the commit you made to resolve the conflict:

# Summary
In this lesson, you learned how to create a local git repo using git init. You created new files and tracked changes to these files by using git add and git commit. You switched to older revisions using git revert and git reset, and you created parallel versions of your code using git branch and git checkout.
# Training Exercises
To solidify your knowledge, here are a set of exercises that will require you to use the techniques you've just learned in the lesson above.
They are organized into small, medium, and large sized problems. The small exercises will be very similar to the examples in the lesson. If you get stuck, refer to the relevant section above. The medium exercises will require you to combine concepts. The lesson may not have a single, specific example for you to reference. The large exercises are more open-ended and may require you to search the web for additional material.
# Small
# Visualizing Git
Visualizing Git is a tool for visualizing how commits and branches work. Use it to go through the commands used in this lesson and see how they work.
# Medium
There are no medium exercises for this lesson.
# Large
There are no large exercises for this lesson.
# Interview Questions
# Fundamentals
- What is source control?
- How do you create a git repository?
- What commands store snapshots of your code?
- What is the difference between
git revertandgit reset? - How do you use branches?
- How do you create a GitHub pull request?
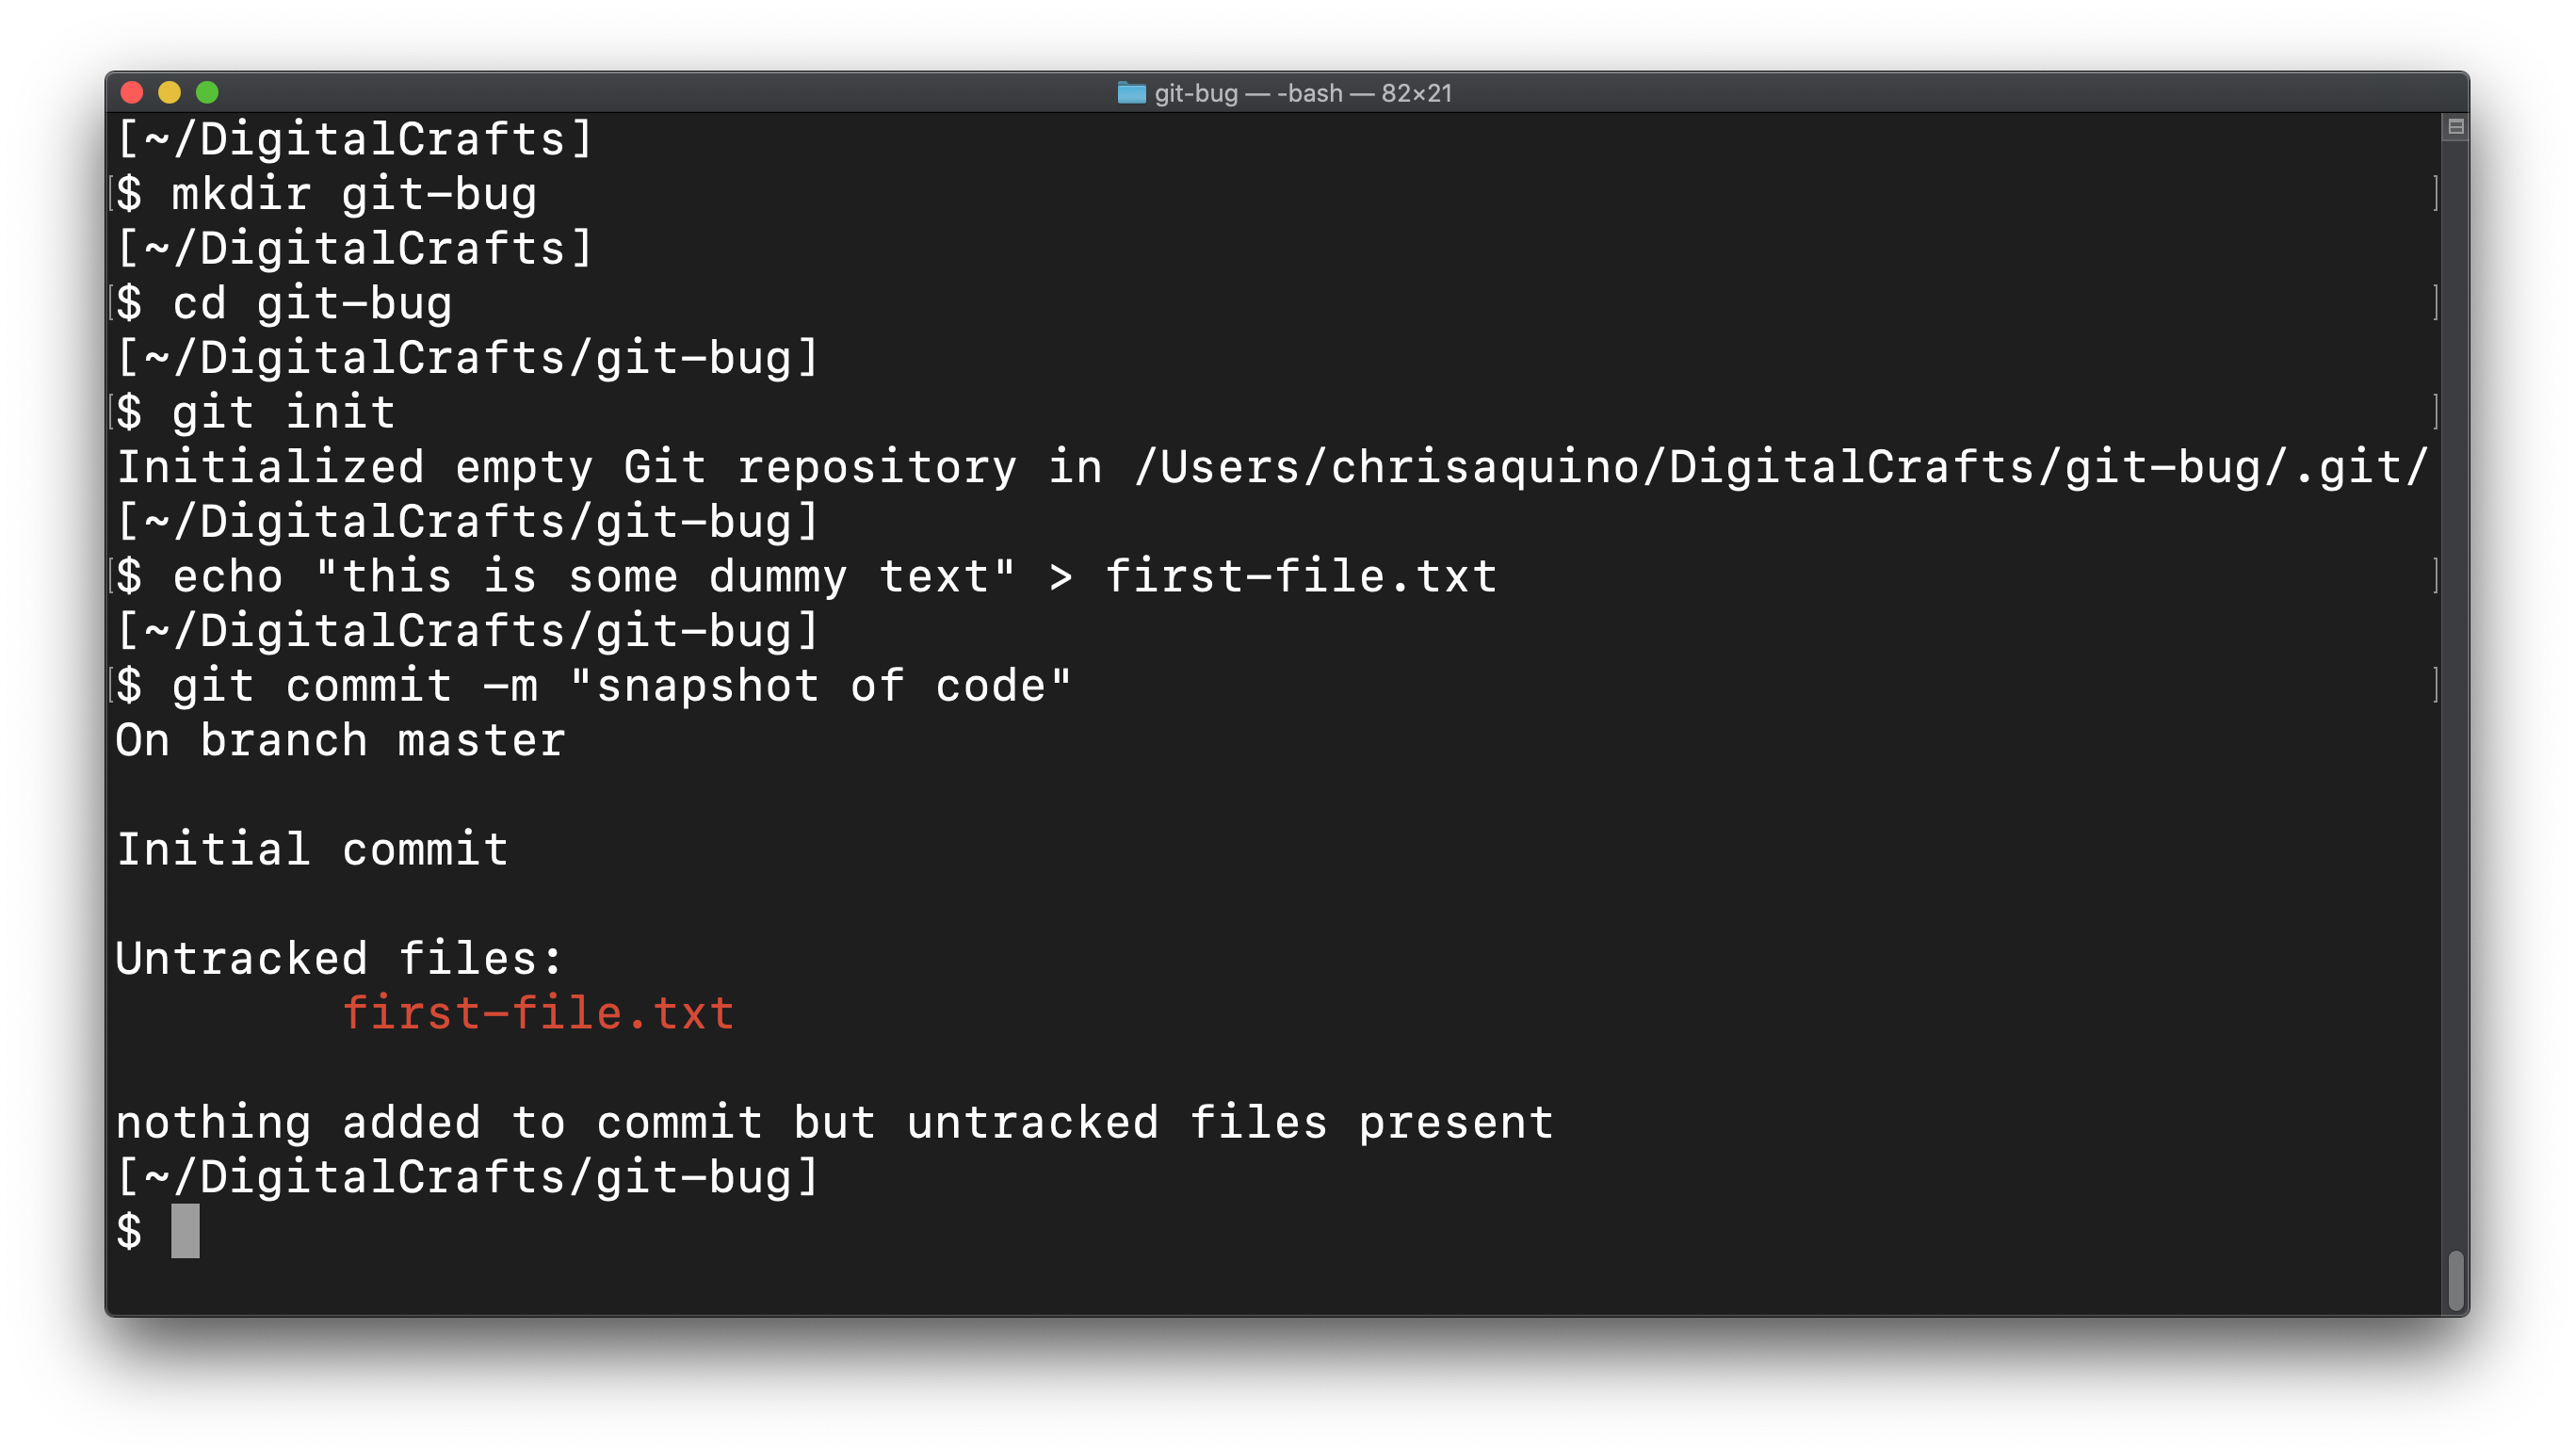
# Bugfix
This screenshot shows a sequence of commands that ends up in a failure to commit. What did the developer forget to do?
# Conceptual
- How is git different from GitHub?
# Architect
None for this lesson.
# Additional Resources
- Git Website - the official website of git.
- Learn Git Branching - a visual tutorial for common tasks, including advanced topics.
- Git from the Bottom Up - a free book about git, starting from first principles.
- Dangit, Git!?! - a cheatsheet for solving common mistakes with git