# jQuery
# Learning Objectives
After completing this lesson, you will be able to:
- Create and manipulate DOM elements
- Handle events
- Make AJAX requests
- Create visual effects
# Lesson
# Overview
jQuery is a JavaScript library with functions that help with DOM manipulation, event handling, AJAX requests, and visual effects.
It was created at a time when browsers provided inconsistent functions for DOM, event handling, and AJAX. Writing robust front-end code meant handling the non-standard behavior of different browsers (and even across different versions of the same browser). This led to complex and fragile code that would have to be updated for every new version of each browser. jQuery's purpose was to hide these differences and produce the same behaviors, no matter the browser version.
Why learn jQuery?
While today's browsers all implement the same standard functionality, it is a good idea to familiarize yourself with jQuery's syntax. You may find yourself working on a legacy codebase that uses jQuery. Or you may work on a site that has to support much older browsers (that don't understand newer JavaScript syntax).
To explore jQuery, we'll build a simple AJAX application that makes a request for a dad joke from icanhazdadjoke.com and displays it on the page. All DOM elements will be created and modified using jQuery. Here is what our application will look like:
# Adding jQuery
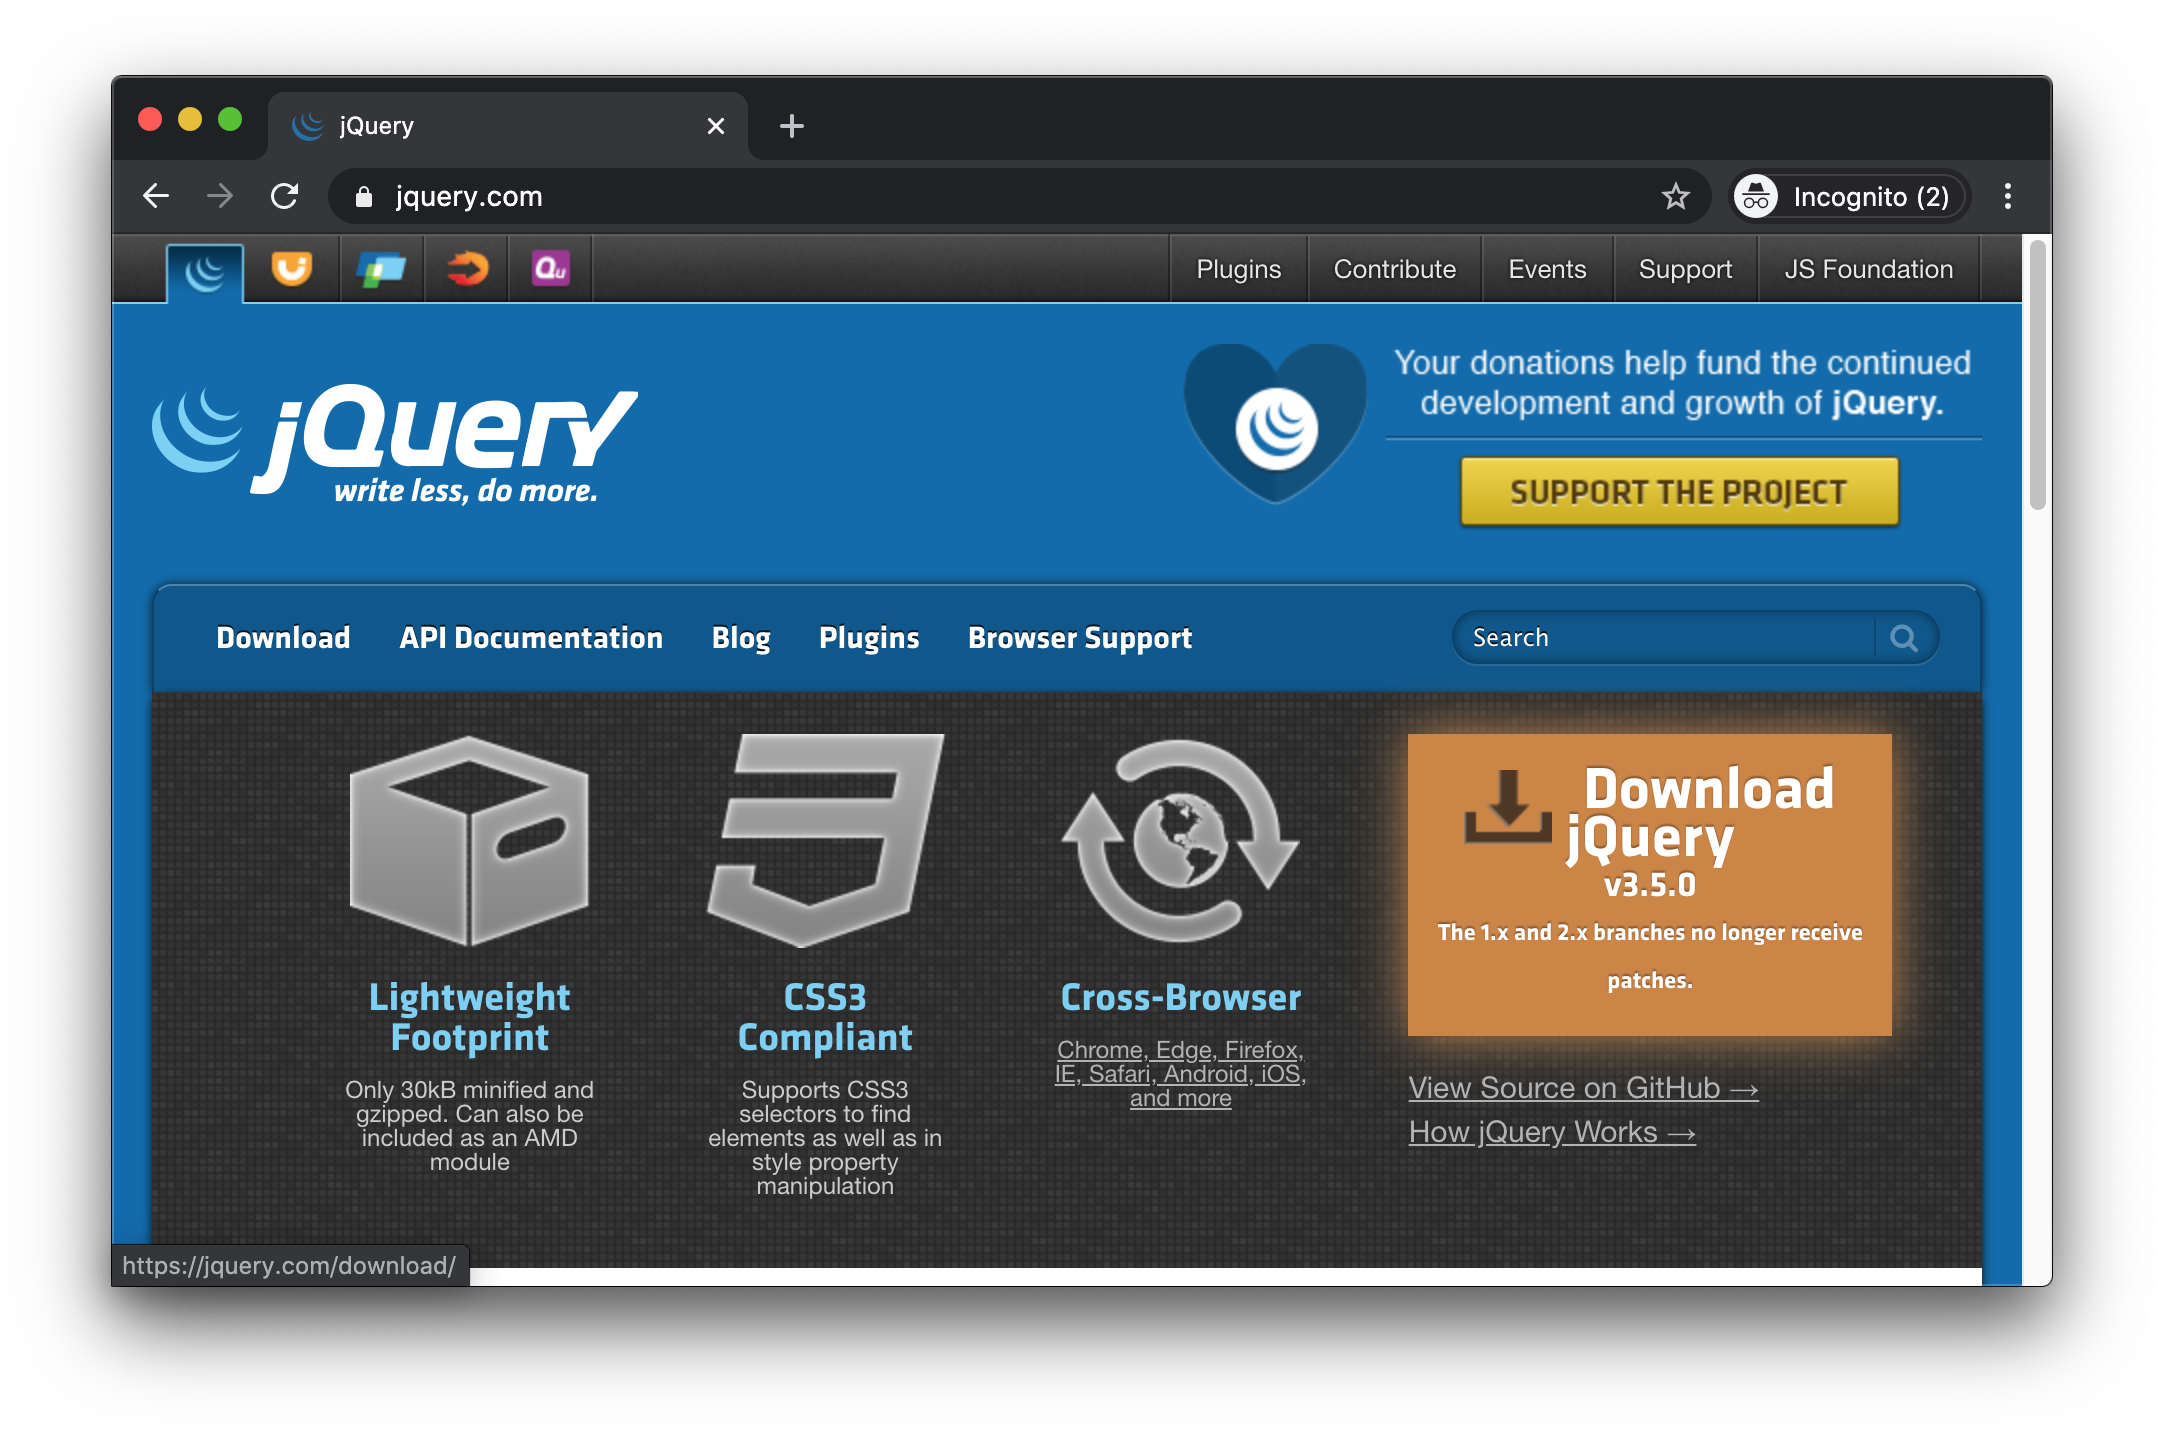
The simplest way to add jQuery is to get the URL for the jquery.min.js file from cdnjs
Copy the URL and add it as the src attribute for a <script> tag in a new HTML file, making sure to include an additional <script> tag for your own index.js:
<!DOCTYPE html>
<html lang="en">
<head>
    <meta charset="UTF-8">
    <meta name="viewport" content="width=device-width, initial-scale=1.0">
    <title>jQuery Intro</title>
</head>
<body>
    <script src="https://cdnjs.cloudflare.com/ajax/libs/jquery/3.5.0/jquery.min.js"></script>
    <script src="./index.js"></script>
</body>
</html>2
3
4
5
6
7
8
9
10
11
Create index.js and add the following code:
$(document).ready(() => {
    console.log('jQuery is ready to go!');
});
2
3
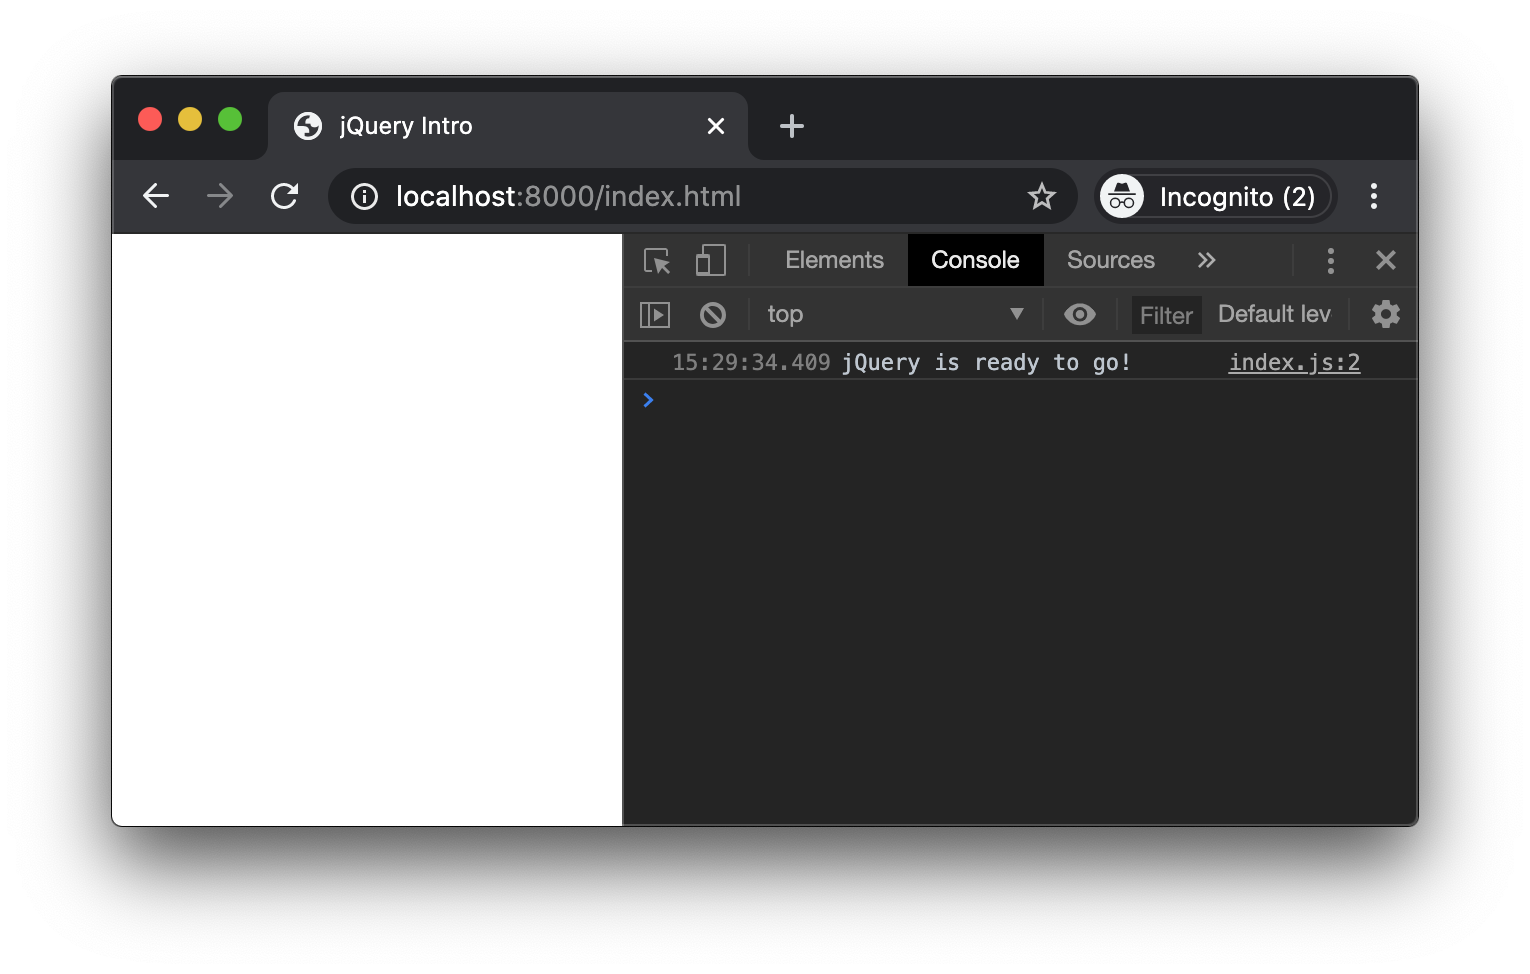
You should see your console.log() message when you load the page and open the DevTools.
(If you see an error, confirm that the CDN link is correct.)
We'll discuss what this code does in just a moment, but consider this the "Hello World!" of jQuery.
# Manipulating the DOM
# Selecting
jQuery first popularized using CSS selectors for accessing DOM elements.
| DOM | jQuery |
|---|---|
document | $(document) |
document.querySelector('#my-id') | $('#my-id') |
document.querySelectorAll('.a-class') | $('.a-class') |
The $() function works similarly to document.querySelectorAll(). It always returns a collection, even if there is only a single match (as with an ID selector).
Note that when we wrote the following:
$(document).ready(() => {
    console.log('jQuery is ready to go!');
});
2
3
We called the jQuery function ($()) and passed it the document object. If we already have the document variable, why bother calling $()?
The main reason to use jQuery is to access its helper methods. The .ready() helper method accepts a callback and runs the callback when the browser has finished loading the HTML document.
You'll see other helper methods in this lesson.
# Creating Element
The jQuery function not only lets you select DOM elements, but can also create DOM elements.
| DOM | jQuery |
|---|---|
document.createElement('div') | $('<div></div>') |
Pass jQuery an HTML string and it will create the corresponding DOM element.
const $container = $('<div></div>');
Or just pass it the opening tag:
const $container = $('<div>');
$proTip: Prefix your jQuery variables.
When you create or select elements using jQuery, prefix the variable name with $.
This is a common practice in jQuery codebases. It helps you and your teammates know which elements have access to jQuery's helper methods. (Only elements created by or selected with $() have access.)
# Creating with Properties
When creating an element, jQuery will accept a configuration object as the second argument:
const $title = $('<h1>', {
    text: 'Dad Jokes'
});
2
3
This example sets the textContent of our new h1 to 'Dad Jokes'.
Use this technique to set any valid HTML attributes, such as class, href, src.
# Appending elements
Now that you can create elements, you'll want to nest them inside one another and add them to the page.
| DOM | jQuery |
|---|---|
myDiv.appendChild(myTitle) | $container.append($title) |
document.body.appendChild(domElement) | $(document.body).append($container) |
| (no equivalent) | $container.appendTo(document.body) |
Let's put our $title inside of our $container, then append $container to the page:
const $container = $('<div>');
const $title = $('<h1>', {
    text: 'Dad Jokes'
});

$container.append($title);
$(document.body).append($container);
2
3
4
5
6
7
With these changes in place, our page now looks like this:

jQuery's .append() method will accept either a jQuery element or a DOM element, and is equivalent to the DOM method .appendChild().
jQuery also provides an .appendTo() method, which lets you specify what parent to add the jQuery element to. (There is no corresponding DOM method).
DOM elements !== jQuery elements
jQuery is able to "translate" to and from DOM elements, allowing you to do this:
const $container = $('<div>');
const title = document.createElement('h1');
title.textContent = 'Dad Jokes';

$container.append(title);
2
3
4
5
The built-in DOM methods can not do the same with jQuery elements. You cannot pass jQuery elements to DOM methods.
For example, this will not give you the expected results:
document.body.append($container)
![Page showing [Object object]](/assets/img/dom-append-jquery.74127a37.png)
Because of this, always prefix your jQuery variables with $ to avoid confusion!
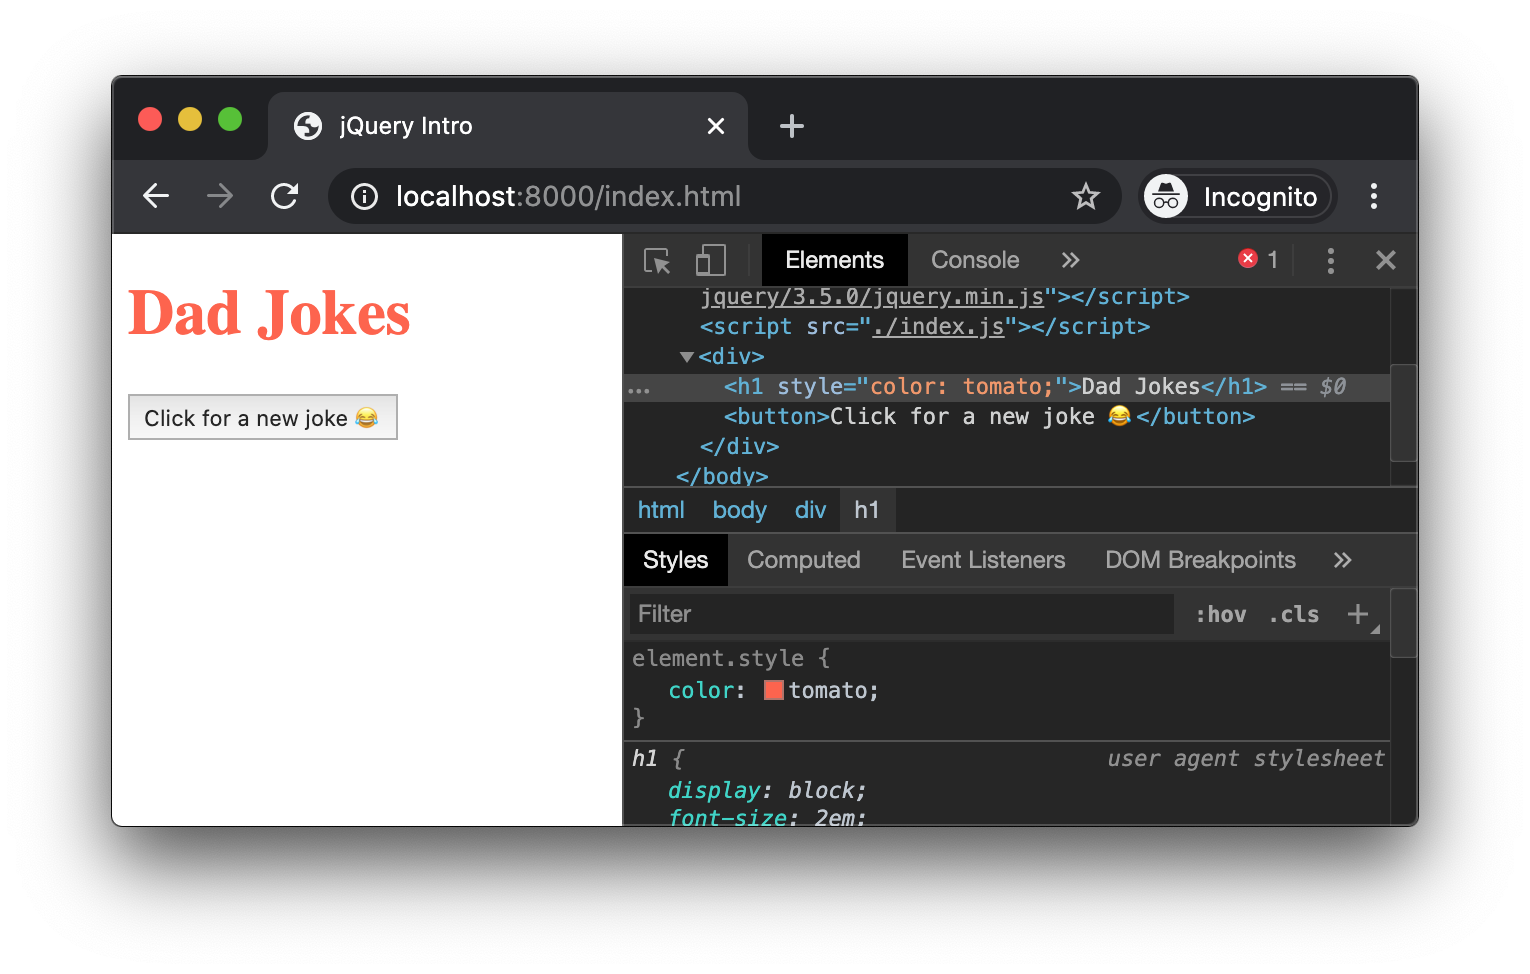
# Styling with jQuery
jQuery lets you modify CSS styles of DOM elements on the page.
const $container = $('<div>');
const $title = $('<h1>', {
    text: 'Dad Jokes'
});

$container.append($title);
$(document.body).append($container);
$title.css('color', 'tomato');
2
3
4
5
6
7
8
When you pass a css property name and value to the .css() method, jQuery sets the style attribute on the DOM element.

However, you may already have written CSS styles that you want to turn on or off.
jQuery includes equivalents to the classList API:
| DOM | jQuery |
|---|---|
myTitle.classList.add('a-class') | $title.addClass('a-class') |
myTitle.classList.remove('a-class') | $title.removeClass('a-class') |
myTitle.classList.toggle('a-class') | $title.toggleClass('a-class') |
In practice, it is best to write your styles in a .css file and not in your jQuery code.
# Event Handling
The next feature of our Dad Jokes app will be to add the "joke" button. When we click it, we want to trigger our own code.
First, create and append a button element:
const $jokeButton = $('<button></button>', {
    text: 'Click for a new joke 😂'
})
$jokeButton.appendTo($container);
2
3
4
When you refresh the page, your button should be added to the DOM:
jQuery's event handling method is nearly identical to the DOM method:
| DOM | jQuery |
|---|---|
button.addEventListener('click', () => {}) | $btn.on('click', () => {}) |
For now, we'll add an event handler function that performs a console.log():
const $jokeButton = $('<button></button>', {
    text: 'Click for a new joke 😂'
})
$jokeButton.appendTo($container);
$jokeButton.on('click', event => {
    console.log('You clicked!');
});
2
3
4
5
6
7
Save and reload. Then click the button a few times to make sure that the console.log() runs:

# AJAX with jQuery
jQuery's AJAX functionality made it extremely popular. You have already learned how to create, open, and send XMLHttpRequest objects. jQuery condensed all of those steps into a single method call and worked consistently across all the major browsers. (It wasn't until several years later that the fetch() function was introduced.)
# $.ajax()
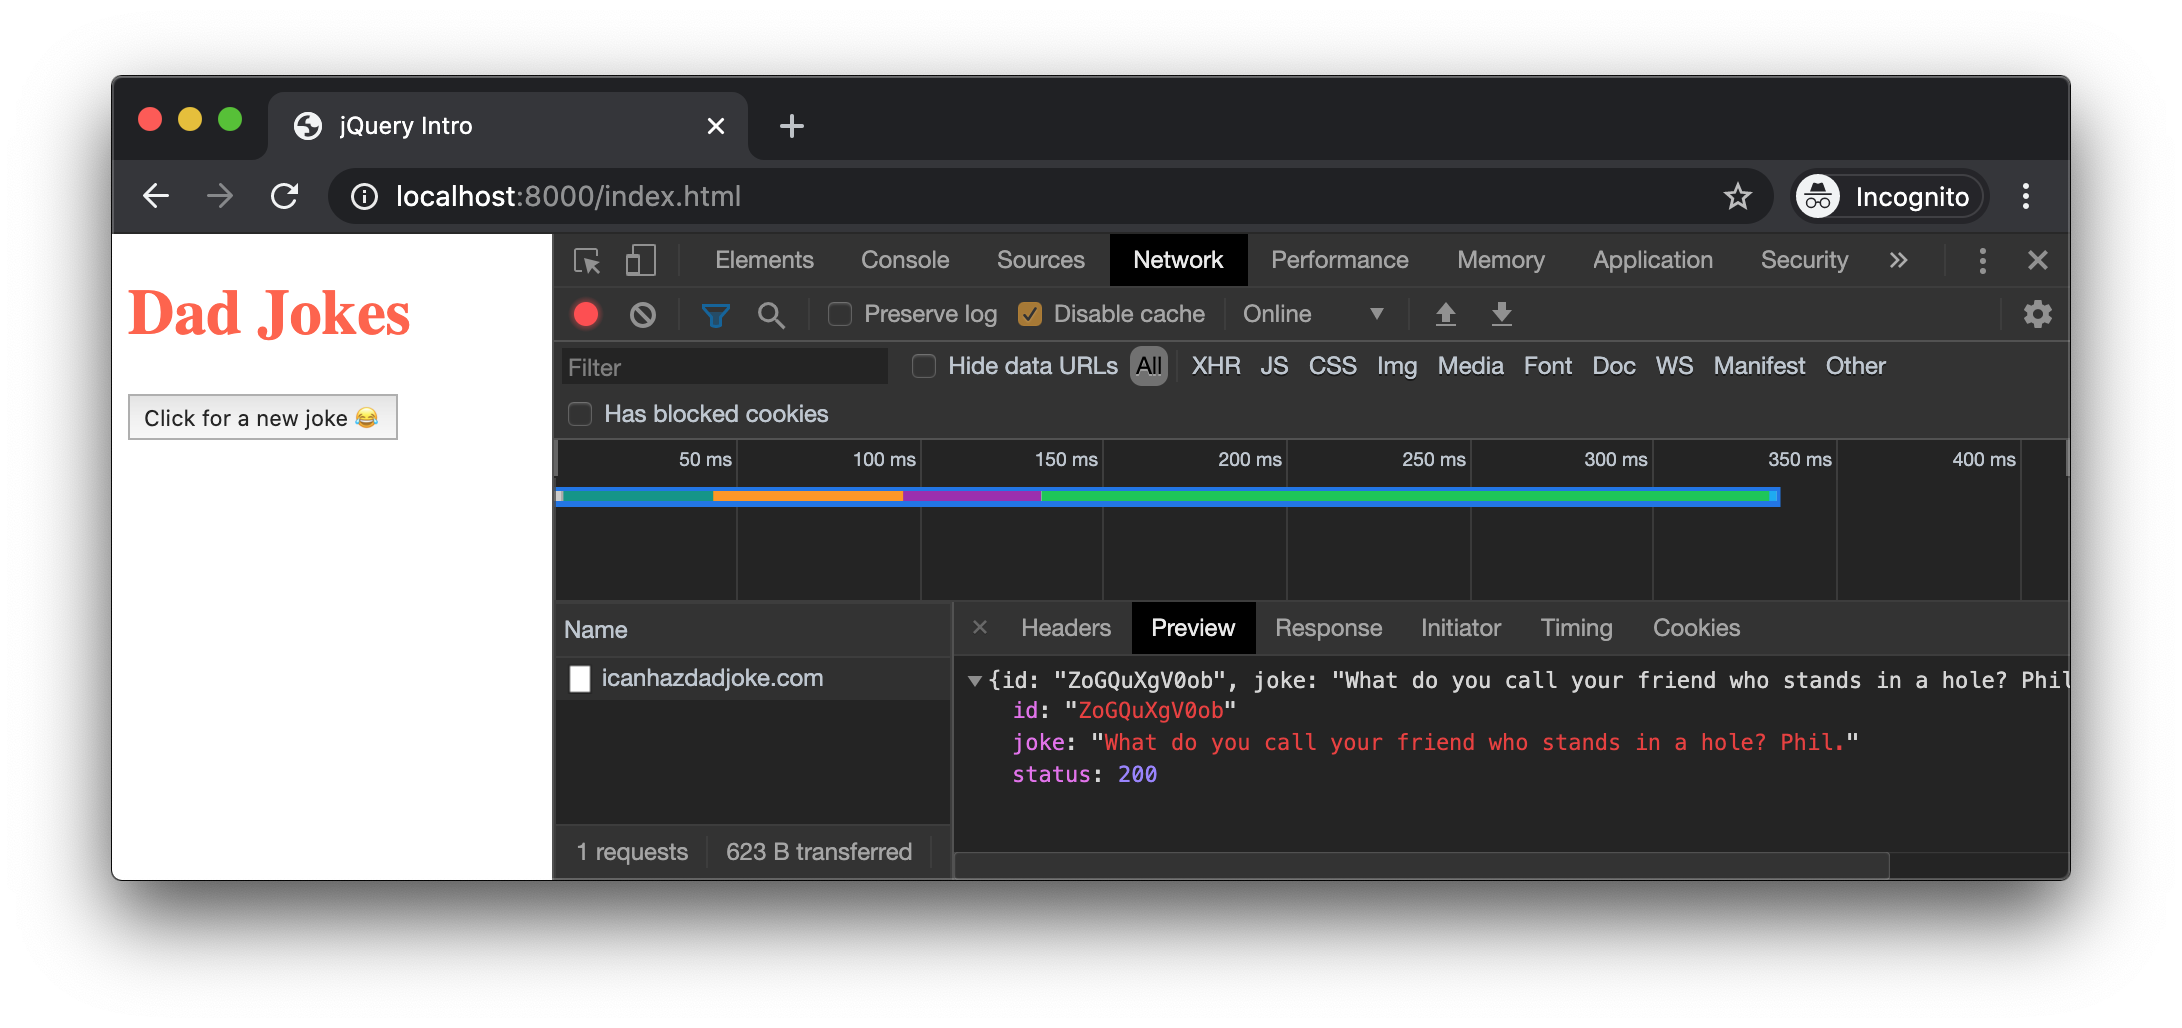
To create and send an AJAX request, call the $.ajax() method:
$.ajax({
    url: 'https://icanhazdadjoke.com/'
});
2
3
When you call the $.ajax() method, you pass it a configuration object. At minimum, the configuration object should have a url key that specifies the address of the API.
Note: our joke API requires us to pass some additional information so that it knows how to format the data. In this case, we want to receive JSON data, which jQuery automatically converts to JavaScript. Add this headers key to the configuration object:
$.ajax({
    url: 'https://icanhazdadjoke.com/',
    headers: {
        'Accept': 'application/json'
    }
});
2
3
4
5
6
headers needs to be an object, since an AJAX requests may have multiple headers. (For this API, we only need the 'Accept' header.)
After you make this change and reload the page, the Network panel in the Dev Tools should show our AJAX request and the response sent back by the server.
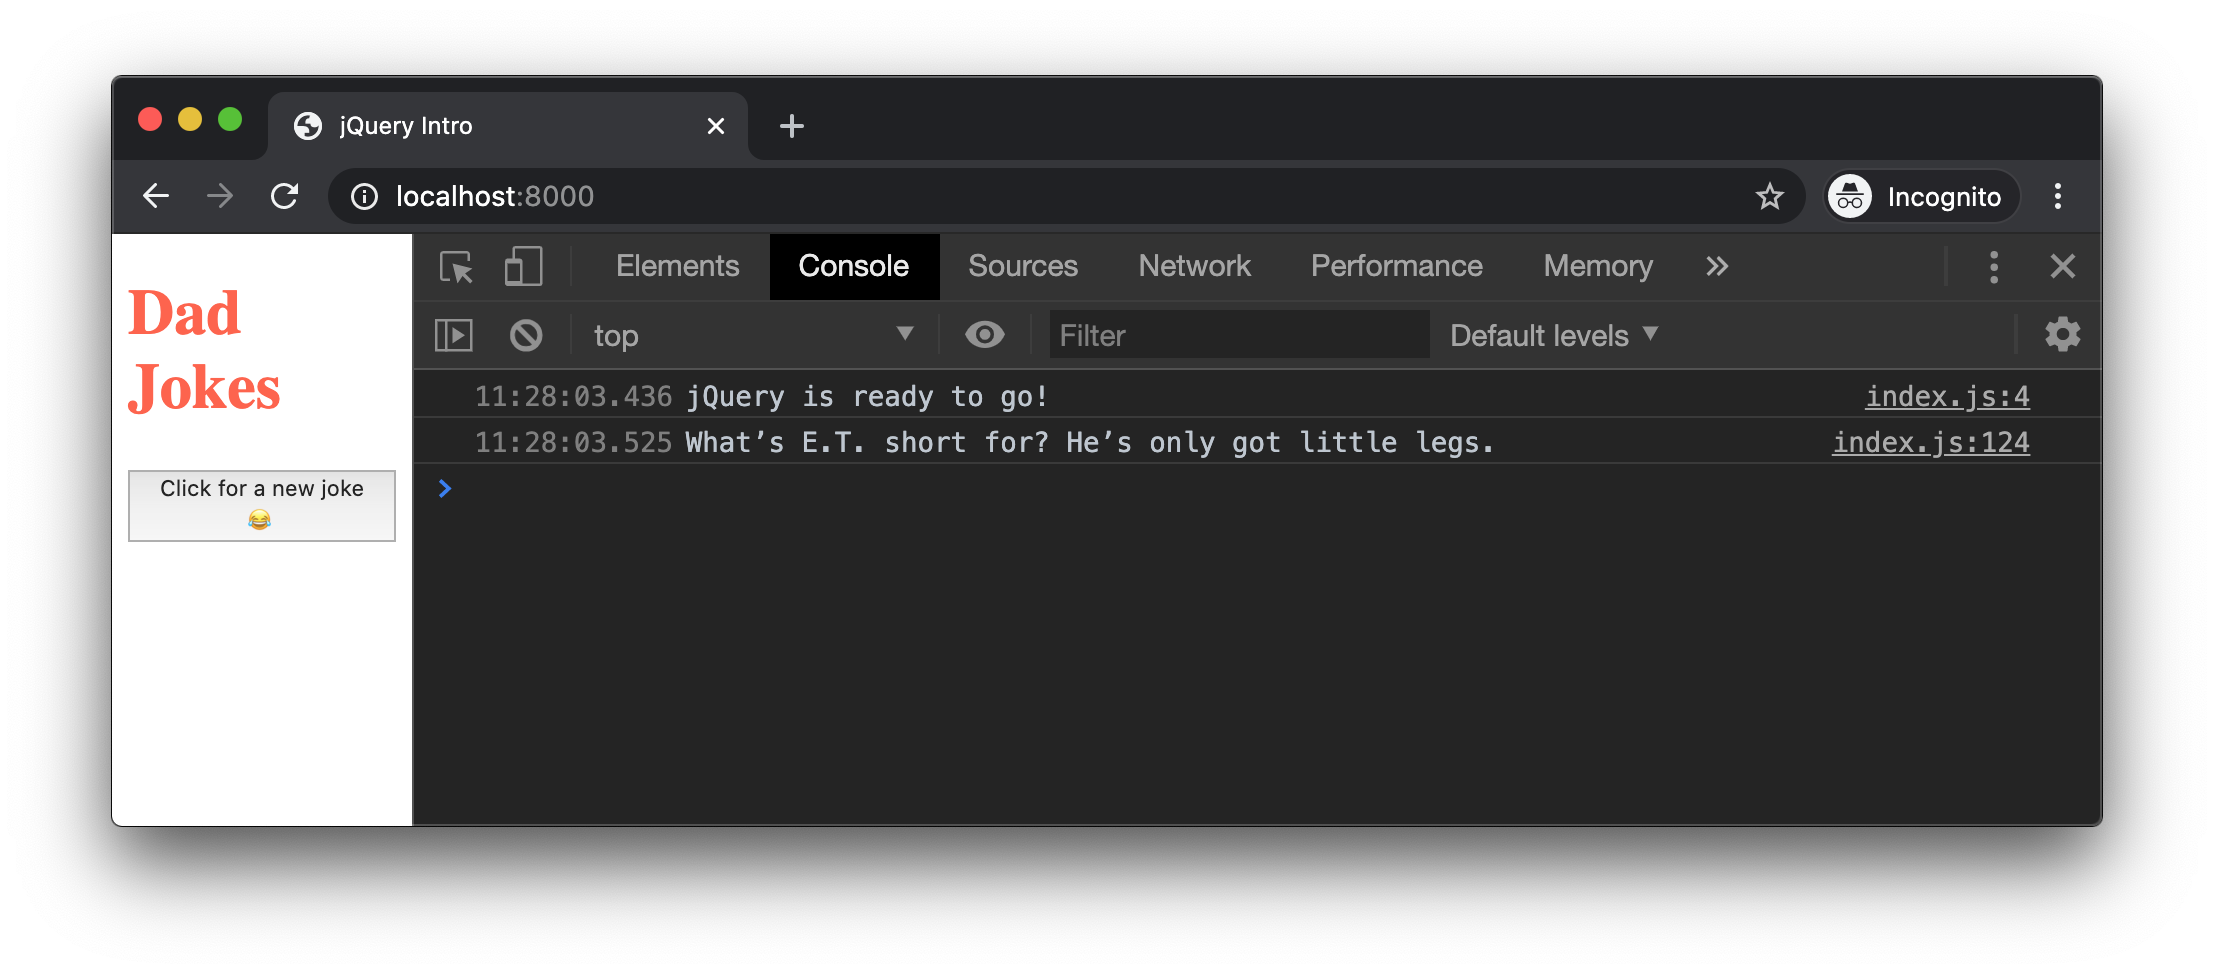
Like fetch(), $.ajax() uses Promises for attaching a callback.
$.ajax({
    url: 'https://icanhazdadjoke.com/',
    headers: {
        'Accept': 'application/json'
    }
}).then(res => {
    console.log(res.joke);
});
2
3
4
5
6
7
8
When the response is received by the browser, jQuery will convert the JSON to a JavaScript object and pass it to our anonymous function. We use console.log() to output the .joke property, which contains the text of the joke:

Add error handling code by attaching a .catch() callback:
$.ajax({
    url: 'https://icanhazdadjoke.com/',
    headers: {
        'Accept': 'application/json'
    }
}).then(res => {
    console.log(res.joke);
}).catch(err => {
    console.log(err);
})
2
3
4
5
6
7
8
9
10
This creates a promise chain that makes the request, logs the joke text from a good response, and logs an error, if one occurs.
But, it's a lot of code to write anytime we want to get a new joke from the API. This is a good opportunity to move this complexity into a reusable function.
function getJoke() {
    return $.ajax({
        url: 'https://icanhazdadjoke.com/',
        headers: {
            'Accept': 'application/json'
        }
    }).then(res => {
        return res.joke;
    }).catch(err => {
        console.log(err);
        return 'There was an error making the reqeuest';
    });
}
2
3
4
5
6
7
8
9
10
11
12
13
As you learned in the Promises lesson, you return the promise chain itself, and each "link" in the chain should return a value. The value returned by the .then() callback becomes the value of entire promise chain when the Response arrives. The value returned by the .catch() callback becomes the value of the entire promise chain if there is an error.
Test this out by adding the following code at the end of your index.js:
getJoke()
    .then(joke => {
        console.log(joke);
    });
2
3
4
Confirm that the joke text prints to the console:
If the joke text is printing, you can remove the code that tests getJoke().
# GET request with $.get()
By default, $.ajax() sends a GET request. Alternatively, use $.get(). Its syntax is very much like fetch():
$.get('/my-file.json')
    .then(data => {
        // create some DOM elements
        // append DOM elements to page
    })
    .catch(err => {
        // display error message
    })
2
3
4
5
6
7
8
# "POST request with $.post()
There is another shorthand function for sending POST Requests:
$.post('/login', {
        username,
        password
    })
    .then(res => {
        // do something after logging in
    })
    .catch(err => {
        // display error message
    })
2
3
4
5
6
7
8
9
10
# Putting it all together
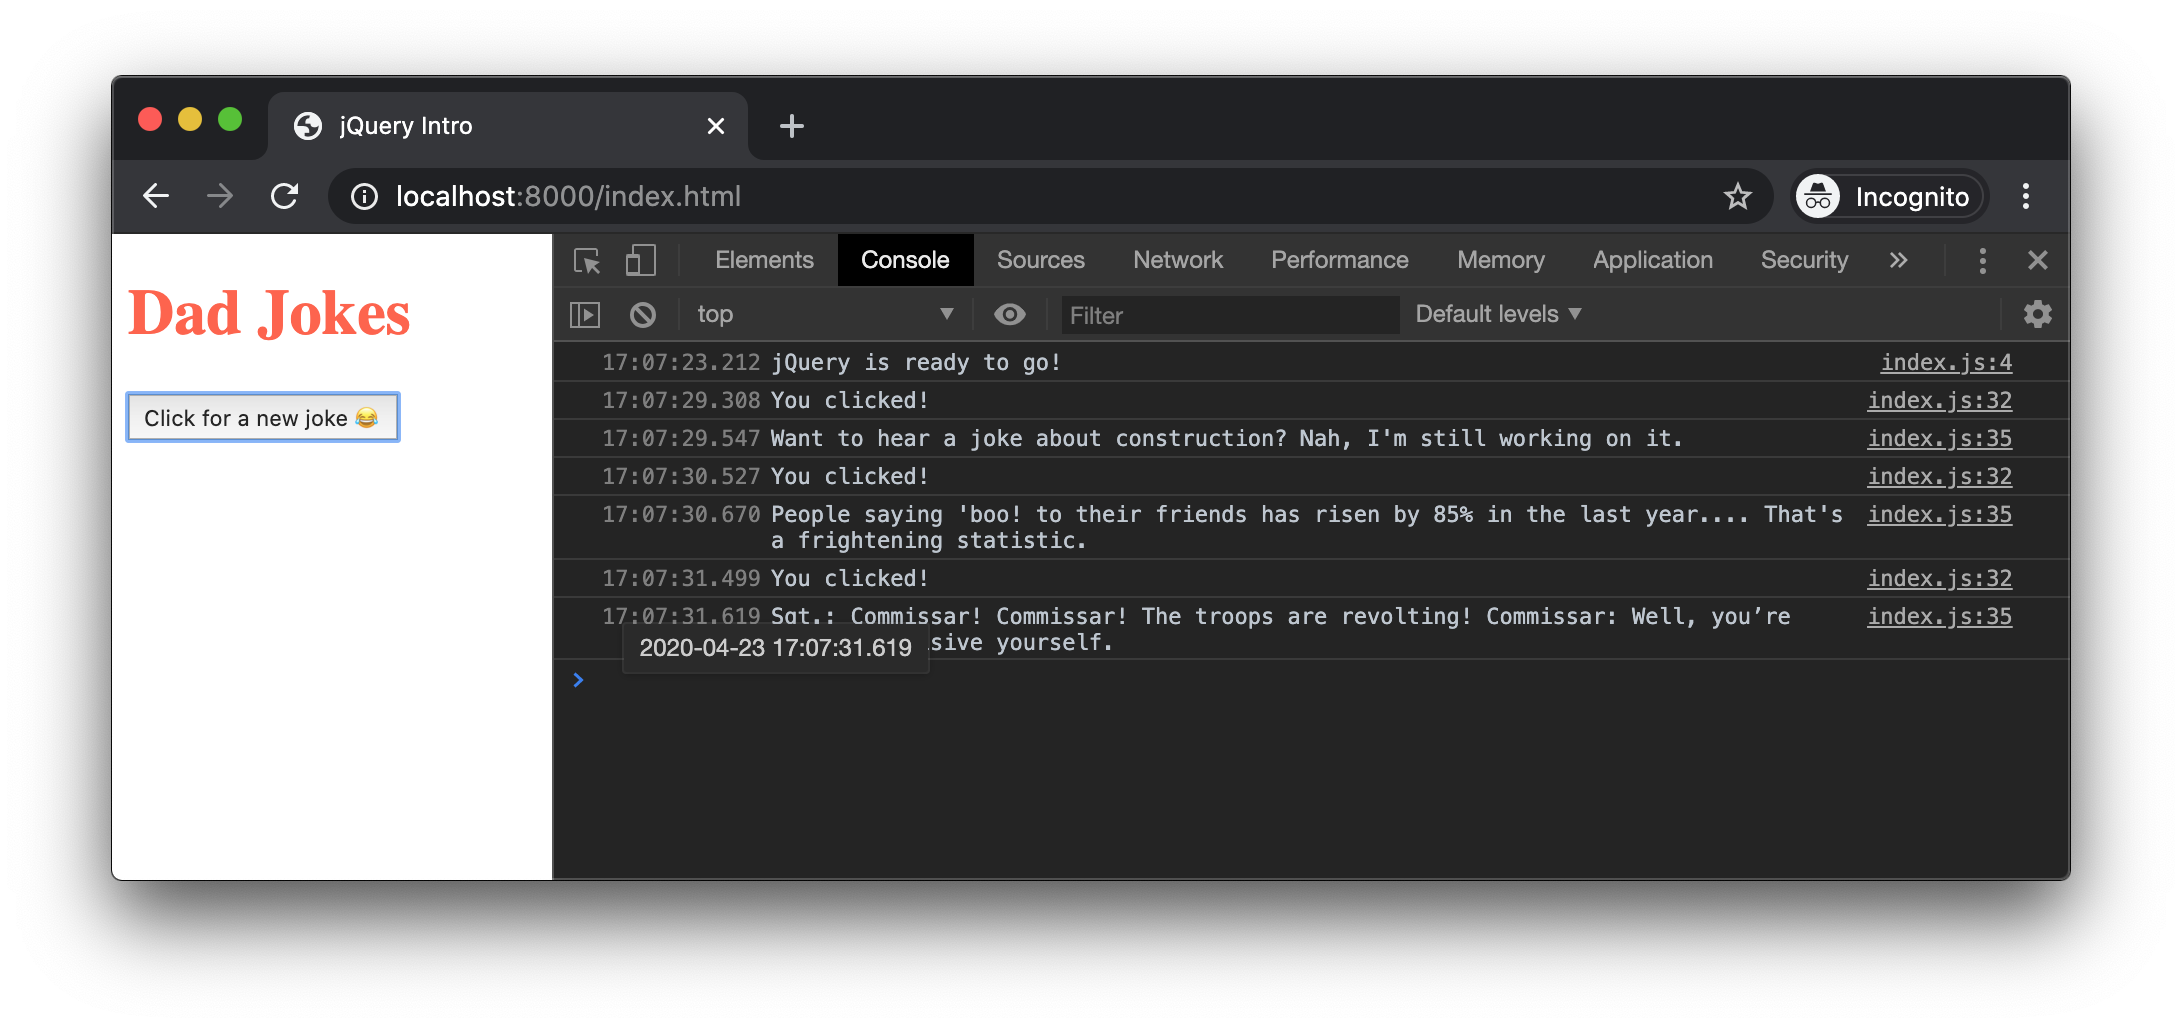
We have all the pieces in place for retrieving a joke from the API and drawing it to the page when the button is clicked.
We'll start by modifying our .on('click') listener so that it calls getJoke(). In the .then() callback, we will console.log() the joke text to make sure that it's coming back in the response.
$jokeButton.on('click', event => {
    console.log('You clicked!');
    getJoke()
        .then(joke => {
            console.log(joke);
        });
});
2
3
4
5
6
7
After reloading, when you click the button, check the console for a new joke each time you click the button:
Now that you have the joke text, create a new <p> tag using jQuery, setting the text attribute in the configuration object. Using your newly created jQuery object, .appendTo() the $container:
$jokeButton.on('click', event => {
    console.log('You clicked!');
    getJoke()
        .then(joke => {
            const $jokePara = $('<p></p>', {
                text: joke,
            });

            $jokePara.appendTo($container);
        });
});
2
3
4
5
6
7
8
9
10
11
Clicking the button several times should now add the jokes to the page:

# Showing a single joke
To show a single joke at a time, first remove any/all existing joke elements with $('.joke').remove(), then append the new joke to the container.
$jokeButton.on('click', event => {
    console.log('You clicked!');
    getJoke()
        .then(joke => {
            // remove any existing .joke elements
            $('.joke').remove();

            const $jokePara = $('<p></p>', {
                text: joke,
            });
            $jokePara.addClass('joke'); // adds class to new <p>
            $jokePara.appendTo($container);
        });
});
2
3
4
5
6
7
8
9
10
11
12
13
14
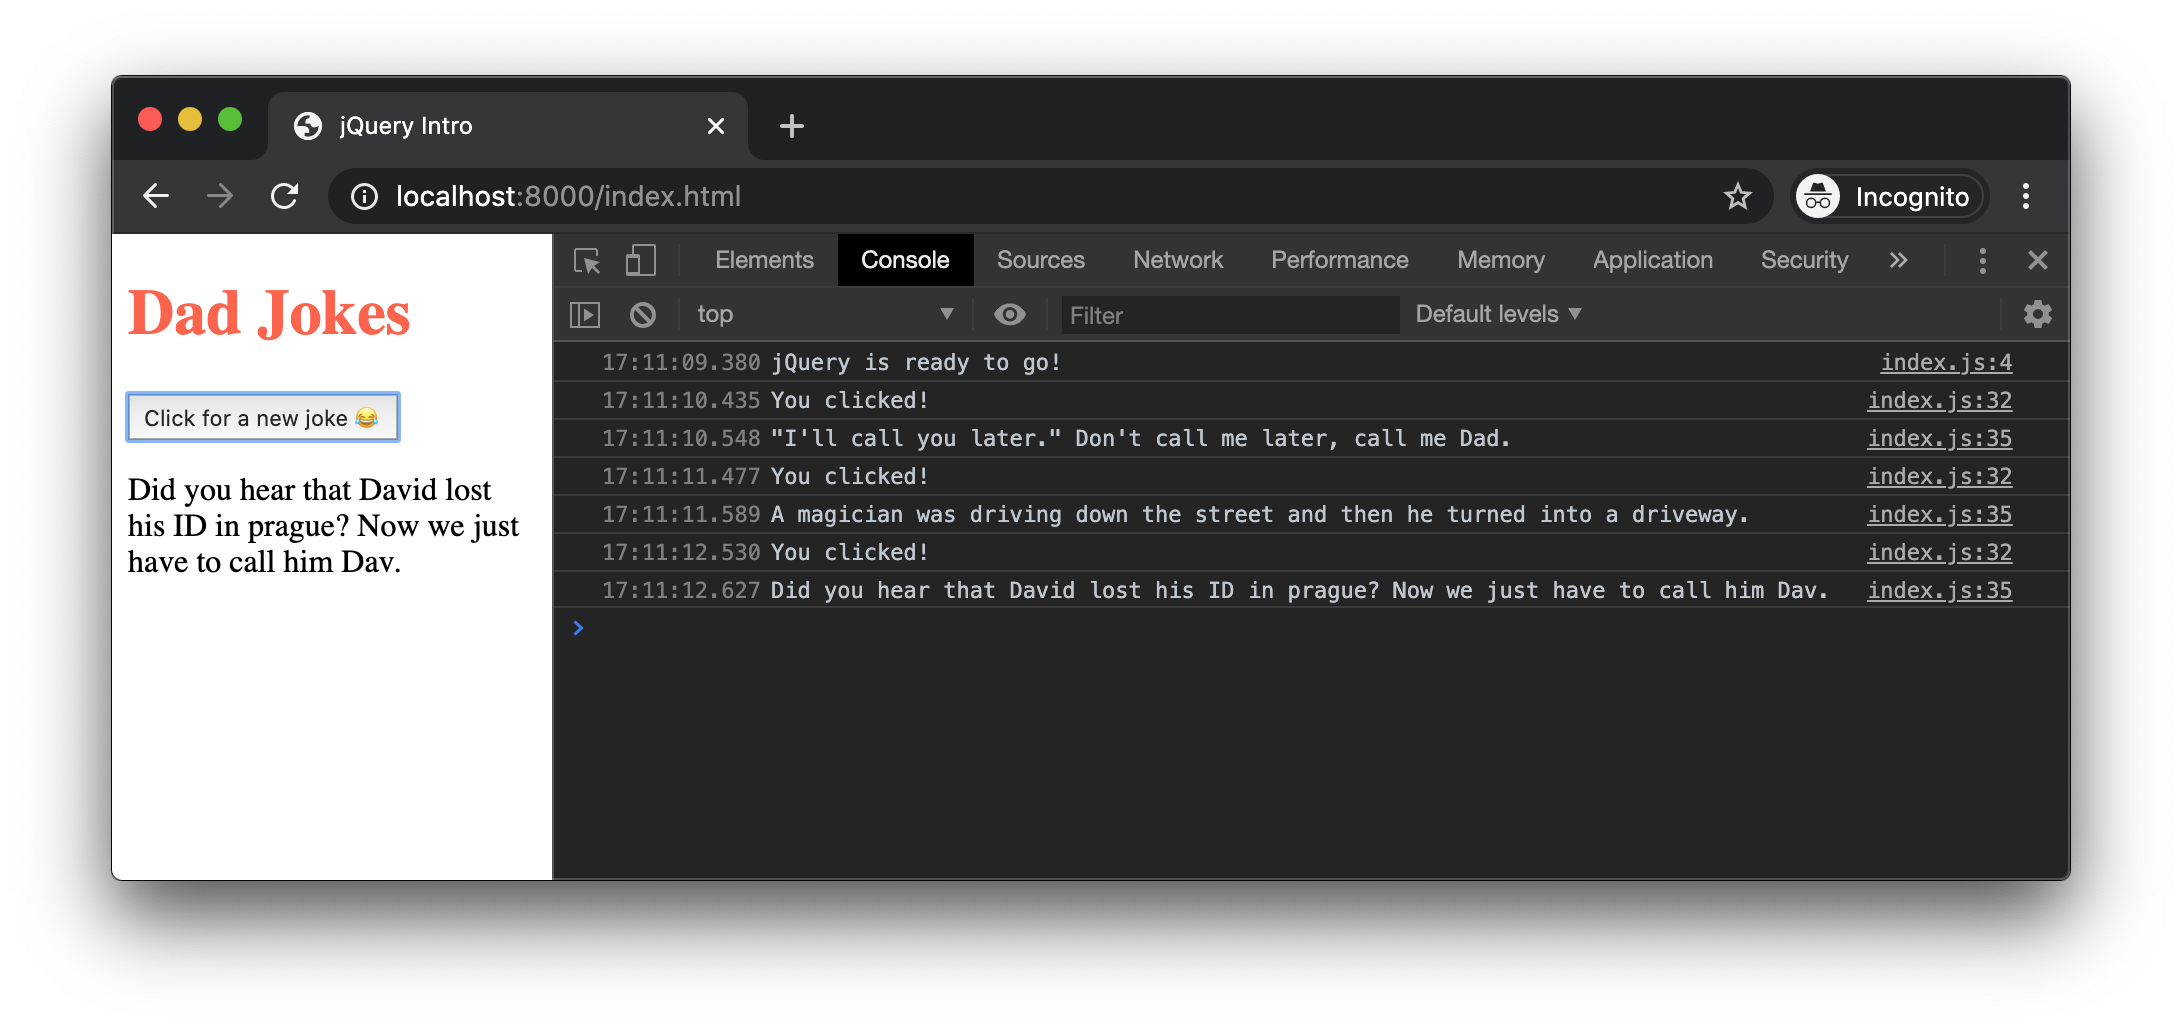
With this change, you'll only see a single joke on the page, no matter how many times you click the button:
# Chaining syntax
So far, we are mostly translating what we normally write using DOM methods. jQuery helps us write more succinct code by allowing us to chain method calls onto the same jQuery element. In fact, we no longer need the $jokePara variable:
$jokeButton.on('click', event => {
    console.log('You clicked!');
    getJoke()
        .then(joke => {
            // remove any existing .joke elements
            $('.joke').remove();

            // Create the element, set the text, add the class, and appendTo:
            $('<p></p>', {
                text: joke,
            }).addClass('joke')
              .appendTo($container);
        });
});
2
3
4
5
6
7
8
9
10
11
12
13
14
Watch those semi-colons!
If you use the chaining syntax, make that only the last method call has a semi-colon.
# Special Effects
jQuery comes with a number of visual effects methods. The following example chains a call to .hide() and .fadeIn() when we add the joke <p> to the page:
$jokeButton.on('click', event => {
    console.log('You clicked!');
    getJoke()
        .then(joke => {
            $('.joke').remove();

            $('<p></p>', {
                text: joke,
            }).addClass('joke')
              .hide()
              .appendTo($container)
              .fadeIn();  // semi-colon goes on the last method in the chain
        });
});
2
3
4
5
6
7
8
9
10
11
12
13
14
More effects
Read more about the effects methods jQuery has to offer in the jQuery Effects API Documentation
# Form Handling
The API lets you search for jokes with a particular search term. Here is a function that accepts a term and returns a promise chain for the AJAX Request:
function searchJoke(term) {
    return $.ajax({
        url: 'https://icanhazdadjoke.com/search?term=' + term,
        headers: {
            'Accept': 'application/json'
        }
    }).then(res => {
        return res.results.map(result => result.joke)
    }).catch(err => {
        console.log(err);
        return 'There was an error making the reqeuest';
    });
}
2
3
4
5
6
7
8
9
10
11
12
13
In the .then() callback, we return an array jokes using the .map() array method.
Next, we'll create a form with an input and a submit button.
const $jokeForm = $('<form>');
const $jokeInput = $('<input>', {
    placeholder: 'Enter search term'
});
const $submitBtn = $('<input>', {
    type: 'submit',
    value: '😂 Search!'
});
$jokeForm
    .append($jokeInput)
    .append($submitBtn)
    .appendTo(document.body)
2
3
4
5
6
7
8
9
10
11
12
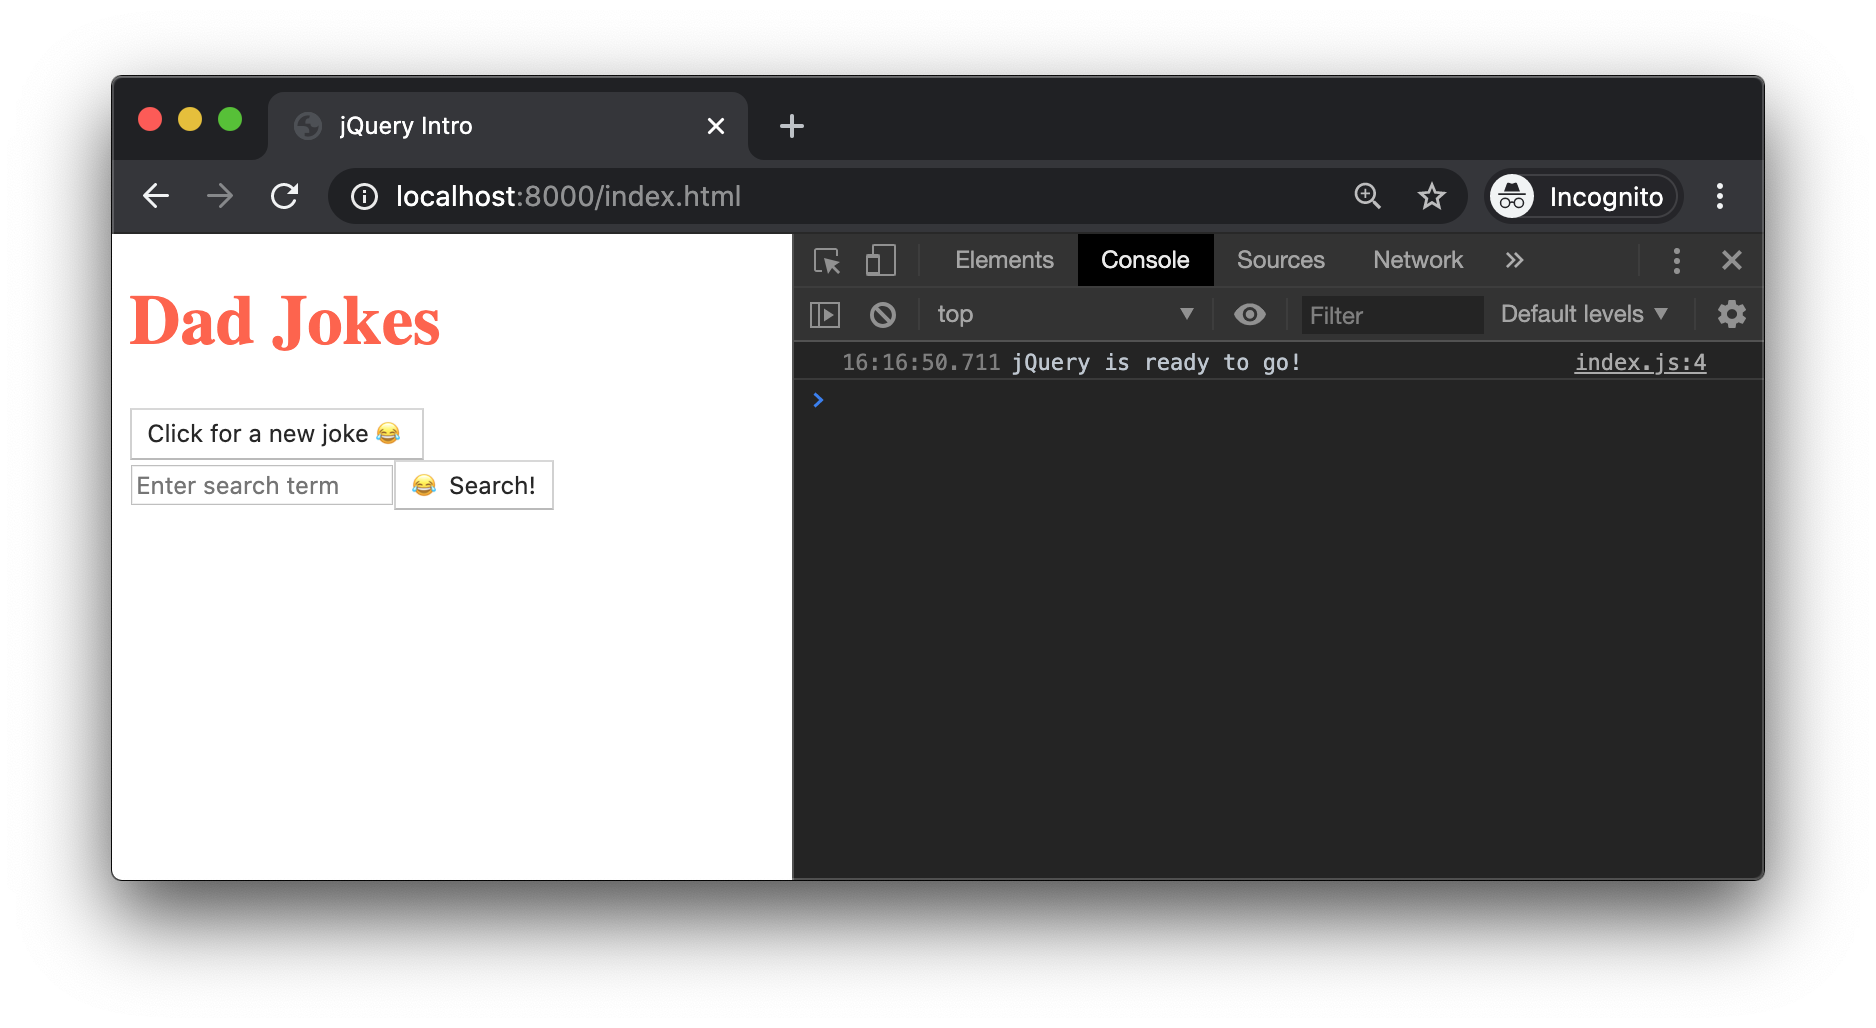
When we .appendTo(document.body) we should see the following on the page:
# Handling the submit event
The code for handling a 'submit' event is similar to what we write without jQuery:
$jokeForm
    .append($jokeInput)
    .append($submitBtn)
    .appendTo(document.body)
    .on('submit', event => {
        event.preventDefault();
    });
2
3
4
5
6
7
We need to event.preventDefault() so that the browser does not attempt to load a new page.
# Getting the input value
The $jokeInput jQuery element has a .val() method that returns whatever the user typed into it.
$jokeForm
    .append($jokeInput)
    .append($submitBtn)
    .appendTo(document.body)
    .on('submit', event => {
        event.preventDefault();
        const searchTerm = $jokeInput.val();
    });
2
3
4
5
6
7
8
# Sending the AJAX Request
After we get the .val() from the input, pass it to searchJoke().
$jokeForm
    .append($jokeInput)
    .append($submitBtn)
    .appendTo(document.body)
    .on('submit', event => {
        event.preventDefault();
        const searchTerm = $jokeInput.val();
        searchJoke(searchTerm)
            .then(jokesArray => {
                console.log(jokesArray);
            })
    });
2
3
4
5
6
7
8
9
10
11
12
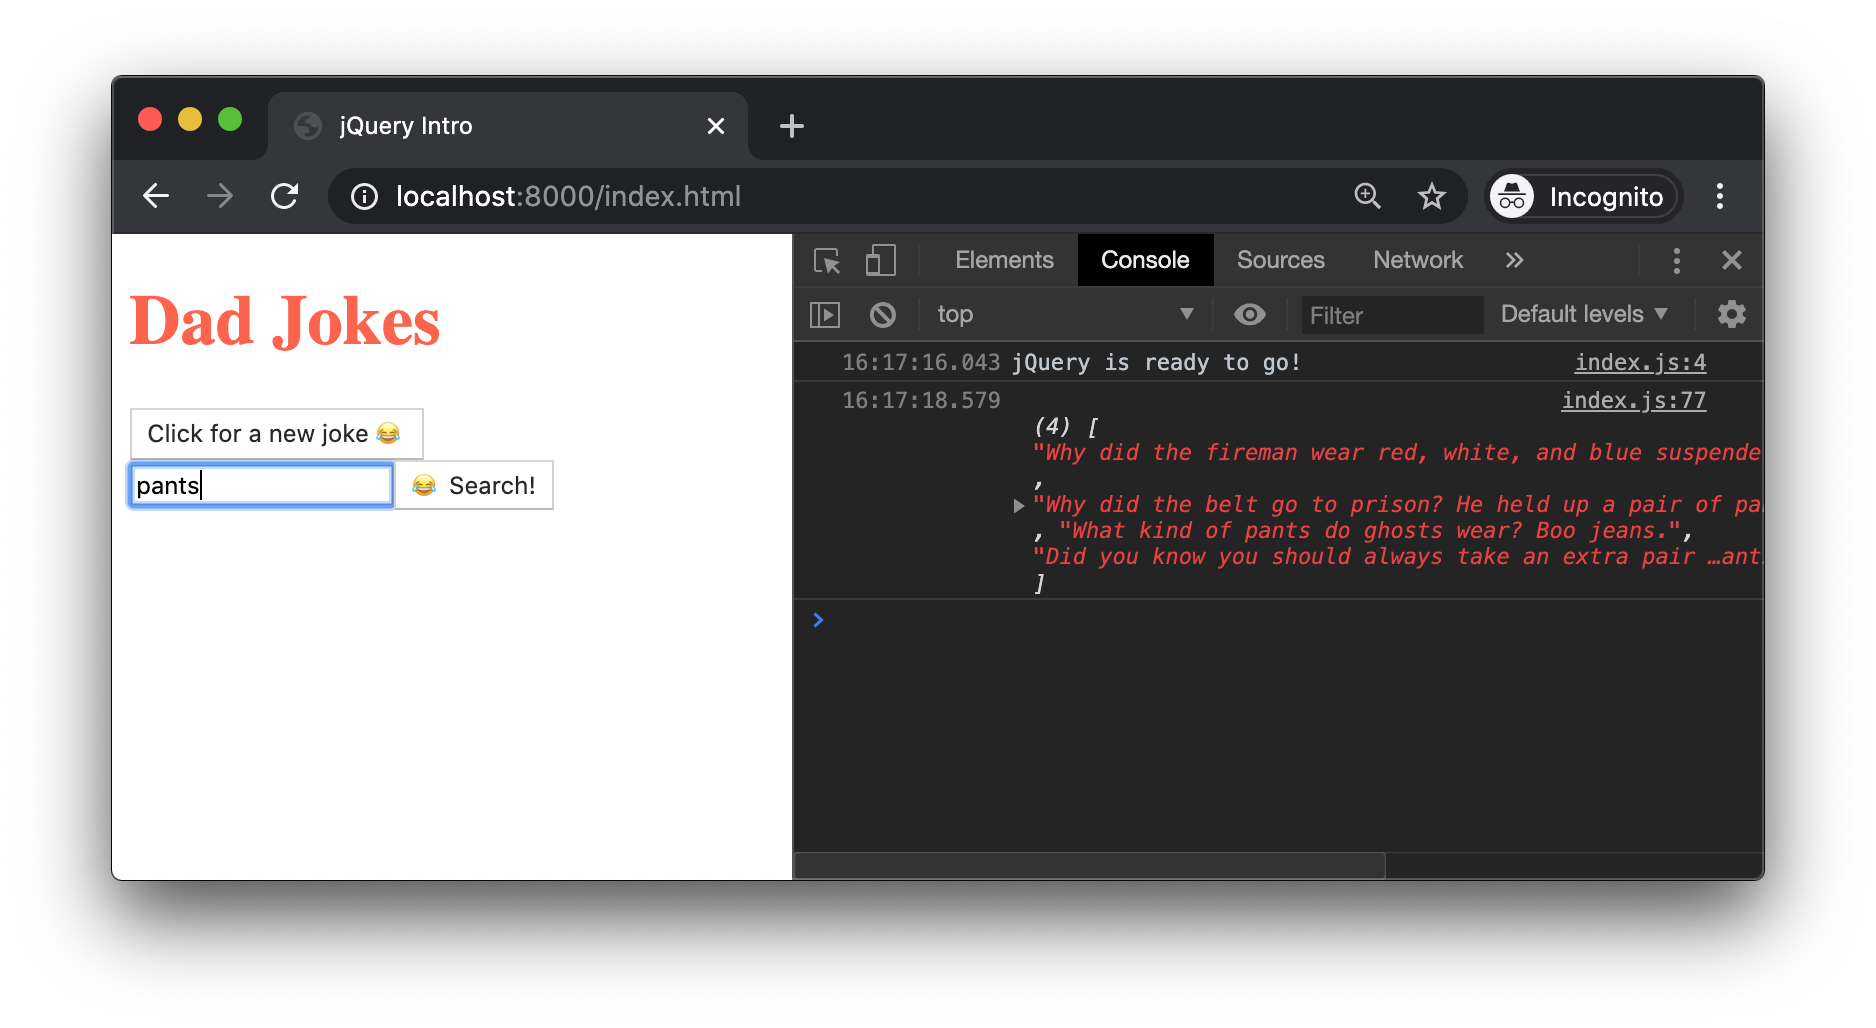
When we submit the form, an array of jokes should print to the console:
# Appending the results
To see each joke on the page, create a <p> element for each one and then append it to the page. We could use one of the built-in array methods, but the following code sample shows the jQuery equivalent:
$jokeForm
    .append($jokeInput)
    .append($submitBtn)
    .appendTo(document.body)
    .on('submit', event => {
        event.preventDefault();
        const searchTerm = $jokeInput.val();
        searchJoke(searchTerm)
            .then(jokesArray => {
                $(jokesArray).each((index, joke) => {
                    console.log(jokesArray);
                    $('<p>', {
                        text: joke
                    }).appendTo(document.body)
                })
            })
    });
2
3
4
5
6
7
8
9
10
11
12
13
14
15
16
17
The callback arguments are flipped!
When you pass .each() a callback, make sure that your callback expects the index as the first argument and the element as the second argument.
jQuery implements this for compatibility reasons that could not be changed later on.
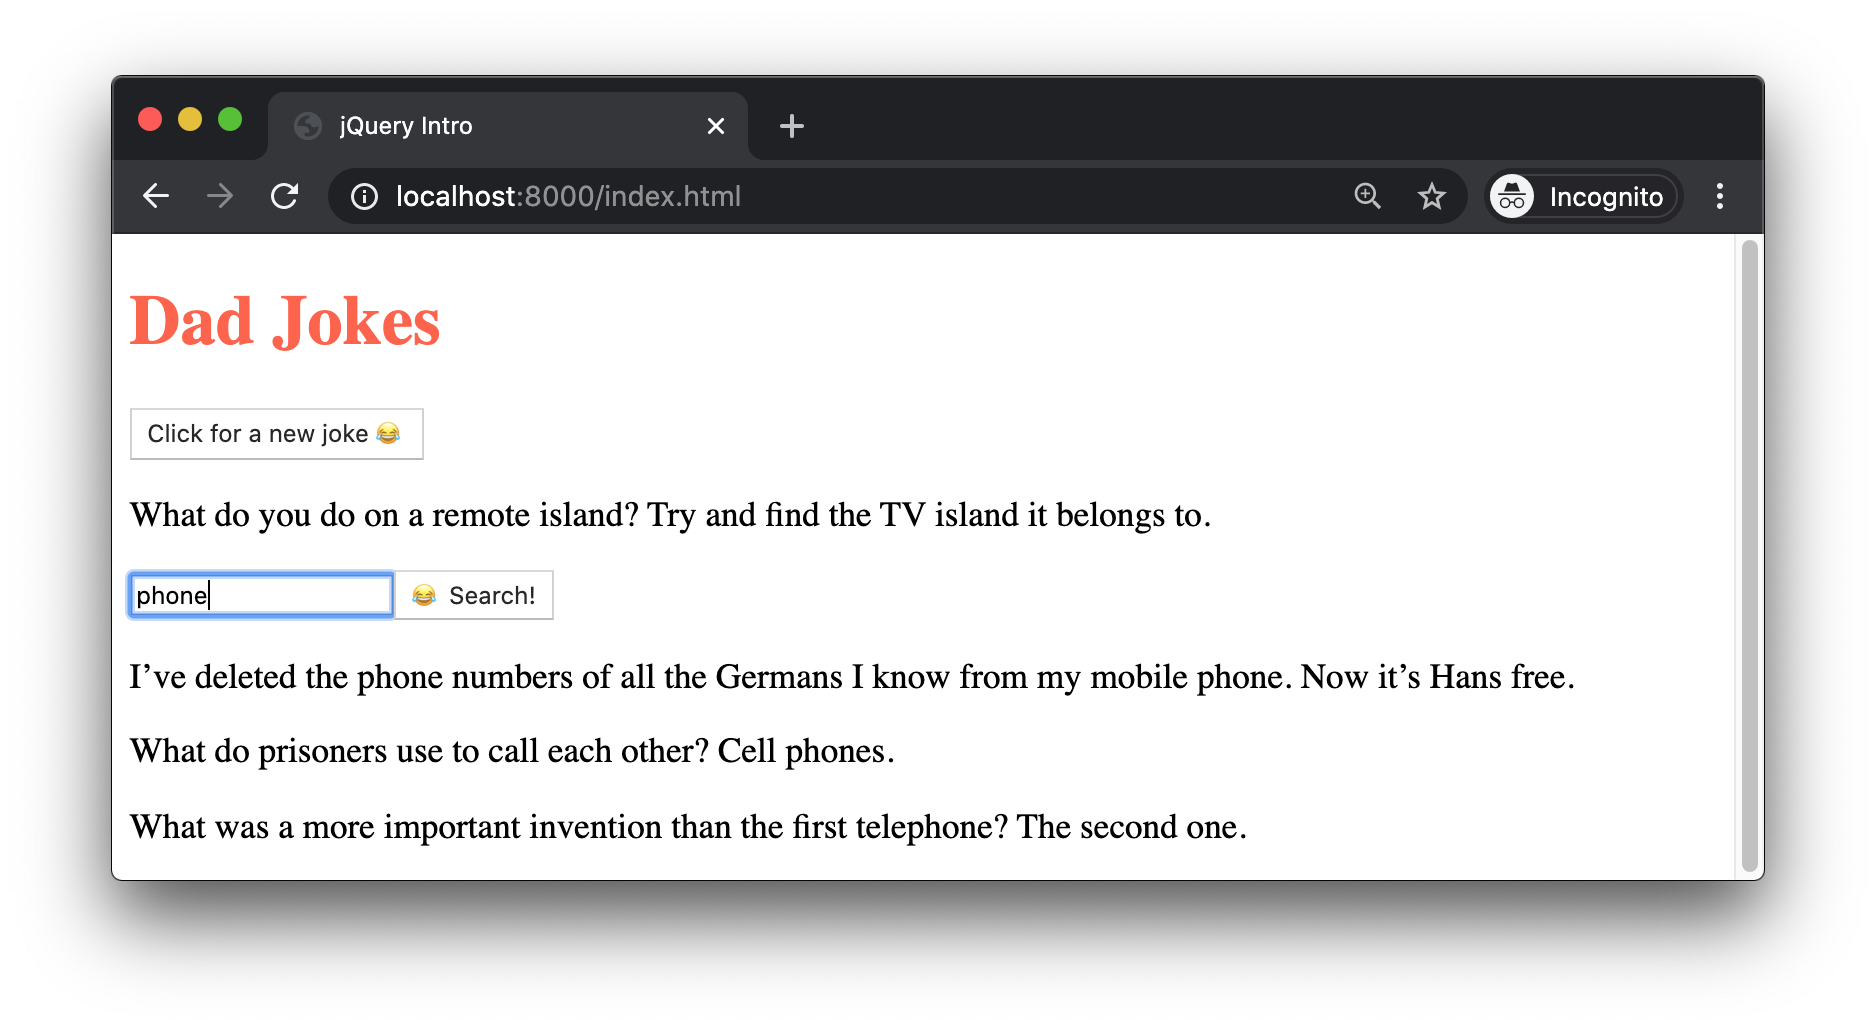
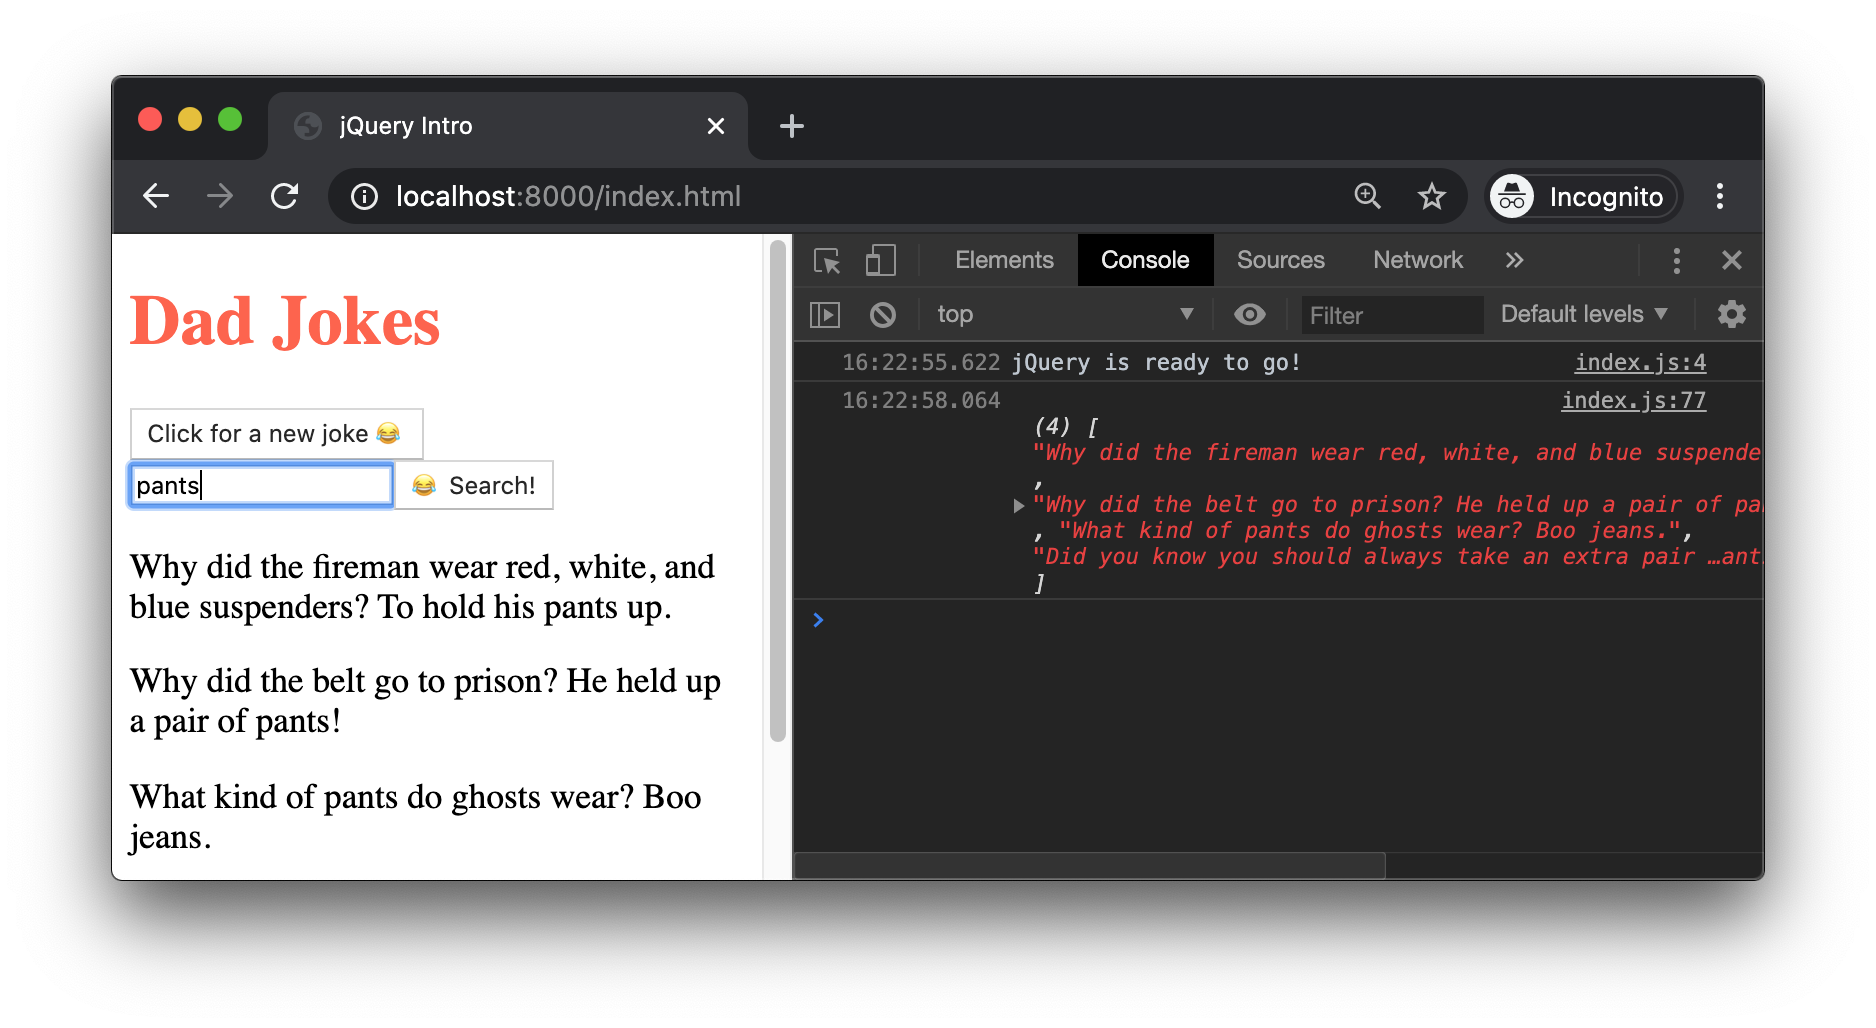
Enter a search term and submit the form. You should see something like this:
# Removing a result on click
Finally, we may want to remove a joke result from the page. Let's add a 'click' handler to each joke that removes it from the page.
We are able to chain our event handler to the end of .appendTo() because jQuery gives us access to the $(<p>) element.
$jokeForm
    .append($jokeInput)
    .append($submitBtn)
    .appendTo(document.body)
    .on('submit', event => {
        event.preventDefault();
        const searchTerm = $jokeInput.val();
        searchJoke(searchTerm)
            .then(jokesArray => {
                $(jokesArray).each((index, joke) => {
                    $('<p>', {
                        text: joke
                    }).appendTo(document.body)
                        .on('click', event => {
                            console.log('Removing ' + joke);
                            $(event.target).remove();
                        })
                })
            })
    });
2
3
4
5
6
7
8
9
10
11
12
13
14
15
16
17
18
19
20
# Event Delegation
One advantage of jQuery's event handling syntax is that you can add a filtering selector as an optional argument. Here is another way to write our event handler:
$jokeForm
    .append($jokeInput)
    .append($submitBtn)
    .appendTo(document.body)
    .on('submit', event => {
        event.preventDefault();
        const searchTerm = $jokeInput.val();
        searchJoke(searchTerm)
            .then(jokesArray => {
                $(jokesArray).each((index, joke) => {
                    $('<p>', {
                        text: joke,
                        class: 'joke-result'
                    }).appendTo(document.body)
                })
            })
    });
// Outside of our .on('submit') handler
$(document.body).on('click', '.joke-result', event => {
    $(event.target).remove();
});
2
3
4
5
6
7
8
9
10
11
12
13
14
15
16
17
18
19
20
21
In this example, we add the class joke-result to each joke.
Then we listen on the entire document for a 'click'. However, the callback function will only be called if the target element matches the .joke-result class selector.
Instead of adding an event listener to each new element (and thus registering an additional copy of the callback function for each new element), you register a single callback on a single element. The filtering selector acts as an if statement, ensuring the callback function is only triggered when the selector matches.
This performance optimization technique is known as Event Delegation.
# Summary
In this lesson, you learned how to use jQuery to create and change DOM elements, handle events, make AJAX requests, and even add some special effects. The final version of the Dad Jokes app is a good example of how powerful jQuery is, while allowing you to write clear and consice code. Best practices - such as event delegation, method chaining, and the use of promises for asynchronous code - are a core part of the library.
Though it is not as popular as it once was, jQuery is still widely used and is the best choice for writing front-end JavaScript for older browsers. Also, most front-end developers are familiar with jQuery, making it easy to bring developers onto a team that uses jQuery.
# Training Exercises
To solidify your knowledge, here are a set of exercises that will require you to use the techniques you've just learned in the lesson above.
They are organized into small, medium, and large sized problems. The small exercises will be very similar to the examples in the lesson. If you get stuck, refer to the relevant section above. The medium exercises will require you to combine concepts. The lesson may not have a single, specific example for you to reference. The large exercises are more open-ended and may require you to search the web for additional material.
# Small
Reimplement all of the "Handling Browser Events" lesson's small exercises lesson using jQuery.
# Medium
Reimplement all of the "Handling Browser Events" lesson's medium exercises lesson using jQuery.
# Large
# 1. Concentration Game
Using jQuery, implement a simple Concentration Game app. The game starts with a grid of shuffled cards, facing "away" from you, so you don't know its value. When you click a card, show the "front" of the card. Click another card to show its front.
If the cards match, you gain a point and the cards are removed from the grid. If the cards do not match, they turn away from you again. The goal is to find all matches in the fewest number of moves.
As a bonus, add some visual effects to create a kind of "card flip" effect.
# Interview Questions
# Fundamentals
- What is jQuery, and how is it related to JavaScript?
- What can you use jQuery to do?
- What is the
$variable? - How do you use jQuery to ensure your code runs after the document has loaded?
# Bugfix
In the following code, the form isn't submitting and is instead reloading the page. How would you fix it?
const $searchForm = $('<form>');
const $submitBtn = $('<input>', {
    type: 'submit'
});
const $searchInput = $('<input>');

$searchForm
    .append($searchInput)
    .append($submitBtn)
    .appendTo(document.body);
    .on('submit', event => {
        const searchTerm = $searchInput.val();
        // Assume searchTerm is used as part of a $.ajax() request
    });
2
3
4
5
6
7
8
9
10
11
12
13
14
Solution
The form was being added to the page, but the .on('submit') handler was not being applied, due to the semi-colon at the end of .appendTo(document.body).
After removing the semi-colon, it is also necessary to add event.preventDefault() inside the handler function to stop the page from reloading.
const $searchForm = $('<form>');
const $submitBtn = $('<input>', {
    type: 'submit'
});
const $searchInput = $('<input>');

$searchForm
    .append($searchInput)
    .append($submitBtn)
    .appendTo(document.body)
    .on('submit', event => {
        event.preventDefault();
        const searchTerm = $searchInput.val();
        // Assume searchTerm is used as part of a $.ajax() request
    });
2
3
4
5
6
7
8
9
10
11
12
13
14
15
# Conceptual
- When might you choose to use jQuery on a project?
# Architect
If you were to reimplement the $() function, how would you start? What DOM methods would you use in your implementation?